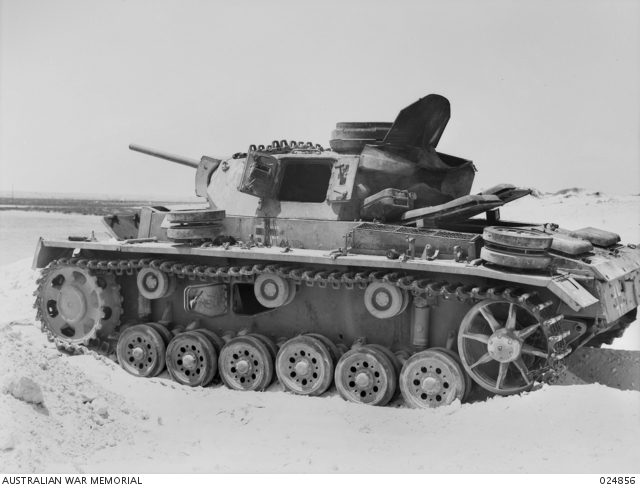
Panzer III L knocked out by Australian anti-tank gunners El Alamein
Playing Flames of War games with models appropriate to battle of El Alamein
El Alamein in North Africa is where Rommel's Panzerarmee and the famous Deutsches Afrika Korps were first stopped and then defeated by the British 8th Army. The first battle of El Alamein was July 1942 and halted the Axis advance towards Egypt and the middle east oil fields. While the Panzerarmee was faced with over extended supply lines the 8th Army was able to build up their forces. The second battle of El Alamein saw the British attacking, and occurred over November/December 1942.
Winston Churchill was convinced that the battle of El Alamein marked the turning point in the war and ordered the ringing of church bells all over Britain. He later wrote: "Before Alamein we never had a victory, after Alamein we never had a defeat."
The second battle of El Alamein was the last major battle that the Australian forces took part in during the North Africa campaign. As such this battle is of special interest to Australian players.
The tanks available to the Germans at the 1st Battle of El Alamein (Carver p47) are shown below, and a suggested representation of this in a Flames of War army.
| Tank | Details | Total | FoW Models | Number | Points |
| PzKw IIs | Panzer II (20mm) | 29 | Panzer II F | 3 | 6 |
| PzKw IIIs | Panzer III (50mm L/42) | 93 | Panzer III G, H or J (early) | 5 | 25 |
| PzKw III Specials | Panzer III (50mm L/60) | 71 | Panzer III J (late) | 3 or 4 | 21 or 28 |
| PzKw IVs | Panzer IV (75mm L/24) | 10 | Panzer IV E or F1 | 1 or 0 | 6 or 0 |
| PzKw IV Specials | Panzer IV (75mm L/43) | 26 | Panzer IV F2 or G | 1 or 2 | 10 or 20 |
The tanks available to the Germans at the 2nd Battle of El Alamein (Mitcham p153) are shown below, and a suggested representation of this in a Flames of War army.
| Tank | Details | Total | FoW Models | Number | Points |
| PzKw IIs | Panzer II (20mm) | 30 | Panzer II F | 3 | 6 |
| PzKw IIIs | Panzer III (50mm L/42) | 85 | Panzer III G, H or J (early) | 4 | 20 |
| PzKw III Specials | Panzer III (50mm L/60) | 88 | Panzer III J (late)
or Panzer III L |
4 | 28 to 32 |
| PzKw IVs | Panzer IV (75mm L/24) | 8 | Panzer IV E or F1 | 1 or 0 | 6 or 0 |
| PzKw IV Specials | Panzer IV (75mm L/43) | 30 | Panzer IV F2 or G | 1 or 2 | 10 or 20 |
The Number column is a suggested number of models to use in a Flames of War company, assuming that we use one tank model for every 20 tanks that were available of that type at the battle. Note that strictly speaking this would mean that you only have 1.5 Panzer II tanks, but the minimum Panzer II platoon size in Flames of War is 3 tanks.
The above gives a total of 13 tanks costing 70 to 78 points.
The details of these tanks are shown below.
| Tank | Armour |
Main Gun |
||||
| Range | RoF | AT | FP | Notes | ||
| Panzer II F | 3 / 1 / 1 | 20" | 2 | 5 | 5+ | |
| Panzer III G (short 5cm) | 5 / 3 / 1 | 24" | 2 | 8 | 4+ | |
| Panzer III J (late) (long 5cm) | 5 / 3 / 1 | 28" | 2 | 9 | 4+ | |
| Panzer III L (long, uparmoured) | 6 / 3 / 1 | 28" | 2 | 9 | 4+ | |
| Panzer IV F1 (short 7.5cm) | 5 / 3 / 1 | 24" | 2 | 7 | 3+ | Smoke; Artillery |
| Panzer IV F2 (long 7.5cm) | 5 / 3 / 1 | 32" | 2 | 10 | 3+ | |
A sample Panzer III tank company based on the 2nd Battle of El Alamein and using the v4 Afrika Korps book is listed below. The relative numbers don't exactly match what was described above, but have been adjusted to fit the intelligence briefing. This formation is 83 points
| Panzer III Tank Company (83 points) | ||||
| Unit | Details | FoW Models | Number | Points |
| Panzer III Tank Company HQ | 2 x Panzer III (uparmoured) | Panzer III L | 2 | 16 |
| Panzer III Tank Platoon | 4 x Panzer III (short 5cm) | Panzer III G, H or J (early) | 4 | 20 |
| Panzer III Tank Platoon | 3 x Panzer III (long 5cm) | Panzer III J (late) | 3 | 21 |
| Panzer IV Tank Platoon | 2 x Panzer IV (long 7.5cm) | Panzer IV F2 | 2 | 20 |
| Panzer II Light Tank Platoon | 3 x Panzer II (2cm) | Panzer II | 2 | 6 |
Panzer III L knocked out by Australian anti-tank gunners El Alamein
The tanks available to the British at the 1st Battle of El Alamein (Carver p74) are shown below.
| Tank | Total | FoW Models | Number | Pts |
| "Honey" Stuart | 169 | Honey | 8 | 15 (for 9) |
| Crusader | 197 | Crusader II | 10 | 17 |
| Grant | 164 | Grant | 8 | 48 |
| Valentine | 163 | Valentine II | 8 | NA |
The tanks available to the British at the 2nd Battle of El Alamein (Ford, p61) are shown below. The Shermans were dispersed with usually one squadron per armoured regiment.
| Tank | Total | FoW Models | Number | Pts |
| "Honey" Stuart | 119 | Honey | 6 | 10 |
| Crusader | 294 | Crusader II Crusader III |
15 | 29 |
| Grant | 170 | Grant | 8 | 48 |
| Sherman | 250 | Sherman | 12 | NA |
| Valentine | 194 | Valentine II | 10 | NA |
| Matilda | 6 | Matilda | 0 | NA |
| Churchill | 3 | Churchill | 0 | NA |
The details of those tanks available in the v4 Desert Rats book are shown below.
| Tank | Armour |
Main Gun |
||||
| Range | RoF | AT | FP | Notes | ||
| "Honey" Stuart | 3 / 2 / 1 | 24" | 2 | 7 | 4+ | No HE; |
| Crusader II | 3 / 2 / 1 | 24" | 2 | 7 | 4+ | No HE; |
| Crusader III | 4 / 2 / 1 | 28" | 2 | 9 | 4+ | No HE; Overworked |
| Grant | 5 / 4 / 1 | 24 | 2 | 9 | 3+ | Smoke; 37 mm; |
The Desert Rats book doesn't include the Valentine (understandable because the division didn't field them) or the Sherman (inexplicable, especially in light of the Tiger in the Afrika Korps book).
Limiting ourselves to the available units, and using the same ratio 1 model to every 20 tanks available would give 6 Stuarts, 15 Crusaders and 8 Grants. This force could be approximated by fielding a Crusader Armoured Squadron and a Grant Armoured Squadron with a troop of Stuarts. The relative numbers don't exactly match what was described above, but have been adjusted to fit the intelligence briefing. This force is 78 points
| Crusader Armoured Squadron (25 points) | |||
| Unit | Details / FoW Models | Number | Points |
| Crusader Squadron HQ | 2 x Crusader II, 2 x Crusader CS | 4 | 7 |
| Crusader Armoured Troop | 2 x Crusader II, 1 Crusader III | 3 | 6 |
| Crusader Armoured Troop | 2 x Crusader II, 1 Crusader III | 3 | 6 |
| Crusader Armoured Troop | 2 x Crusader II, 1 Crusader III | 3 | 6 |
| Grant Armoured Squadron (53 points) | |||
| Unit | Details / FoW Models | Number | Points |
| Grant Squadron HQ | 2 x Grant | 2 | 12 |
| Grant Armoured Troop | 3 x Grant | 3 | 18 |
| Grant Armoured Troop | 3 x Grant | 3 | 18 |
| Honey Armoured Troop | 3 x Honey | 3 | 5 |
For the v3 version of this article based on the superseded North Africa book, refer here.
Carver, Michael "El Alamein" Fontana 1973.
Ford "El Alamein 1942: The Turning of the Tide". Osprey ISBN 184176 867 7
Kiehl "Armoured strength at El Alamein vs post-Kasserine" 2007
<http://www.feldgrau.net/forum/viewtopic.php?f=24&t=26369>
referencing
Jentz "Panzertruppen"
Marder III (GE104)
<http://www.flamesofwar.com/Default.aspx?tabid=144&art_id=1521&kb_cat_id=66>
Mitcham, Samuel "Rommel's Desert War: The Life and Death of the Afrika Korps" Stackpole Military History, 2007. ISBN-10: 0-8117-3413-7
Panzer III L, https://www.awm.gov.au/collection/024856/