
This would be my first game with the Romans.
Having reviewed my previous games I realised I needed to think about the terrain before the battle. I knew I was facing Thracians, and Jason had pointed out that the FAQ permitted 8 elite MI 2HW so it was a fair guess that I would be facing them. I decided that I would avoid rough terrain and go for either open or difficult terrain.
I had considered "Julian Guide to ADLG" and the suggested Republican Roman army list with 3 vanilla legions. However on the morning of the game I decided to go for one normal legion, one veteran legion and a cavalry command that I could use to flank march.
My Republican Roman list 53. Republican Roman
Note that I forgot to deploy the MI highlighted red. It wouldn't have made any difference to the result of the game.
Jason's Thracian list 63. Thracian, essentiallyI won initiative and decided to attack in the mountains. I was wanting to minimise the amount of rough terrain as that is where my HI would be at greatest disadvantage against MI. I preferred mountains to forest because mountain hills are steep (ie difficult) where forest hills could be made rough.
Jason took three terrain pieces plus the compulsory steep hill. I took an impassable lake and a forest. Rolling for the terrain location, it all ended up in my half of the table, with four pieces in the centre of my half. However, only three pieces could fit so the fourth was discarded. I was then able to remove two pieces and Jason adjusted one wooded hill to move it into his half of the table.
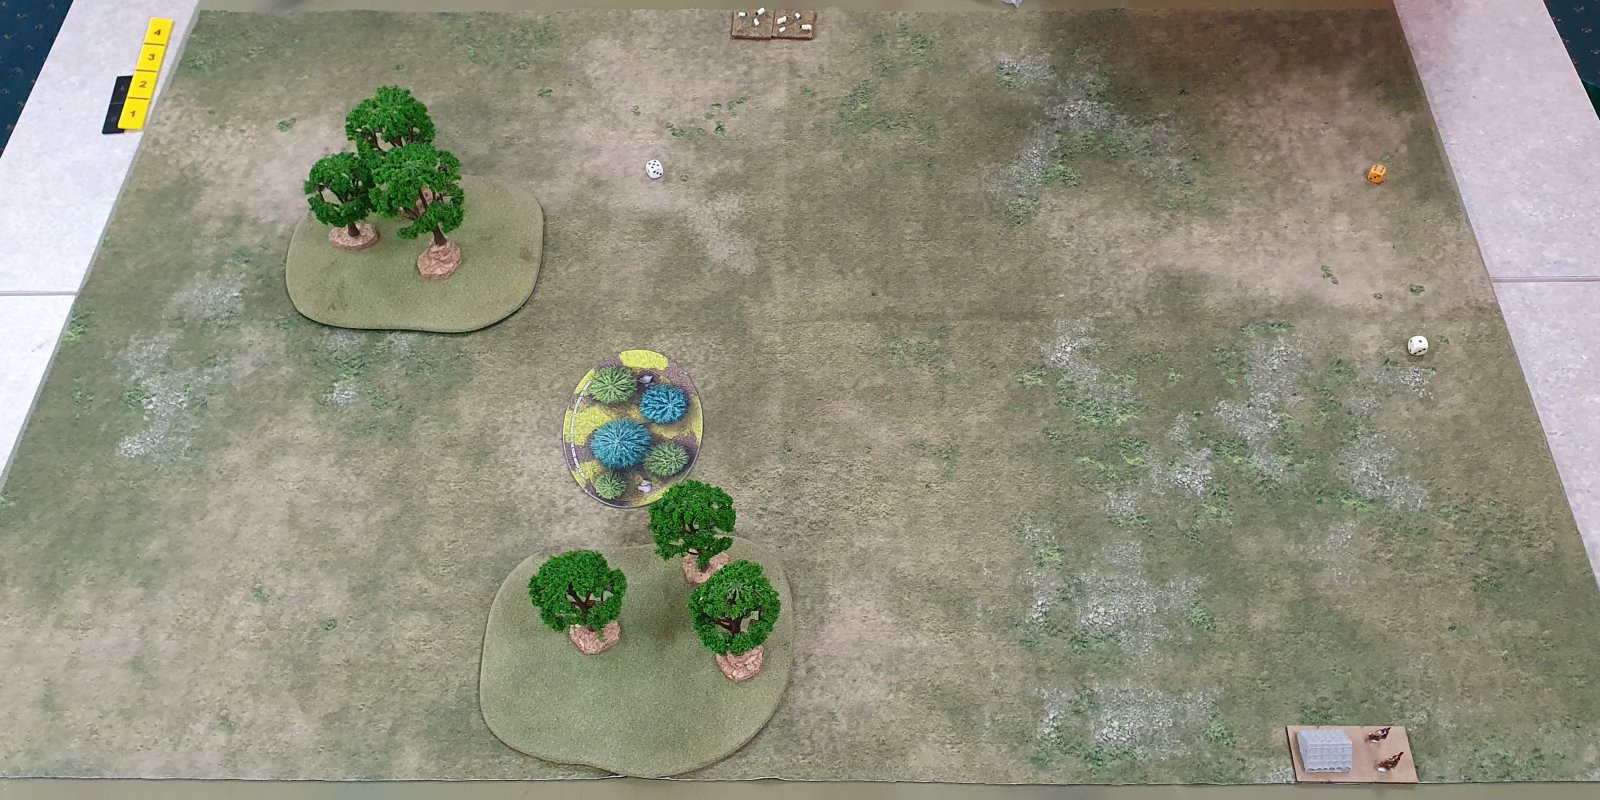
Final terrain placement
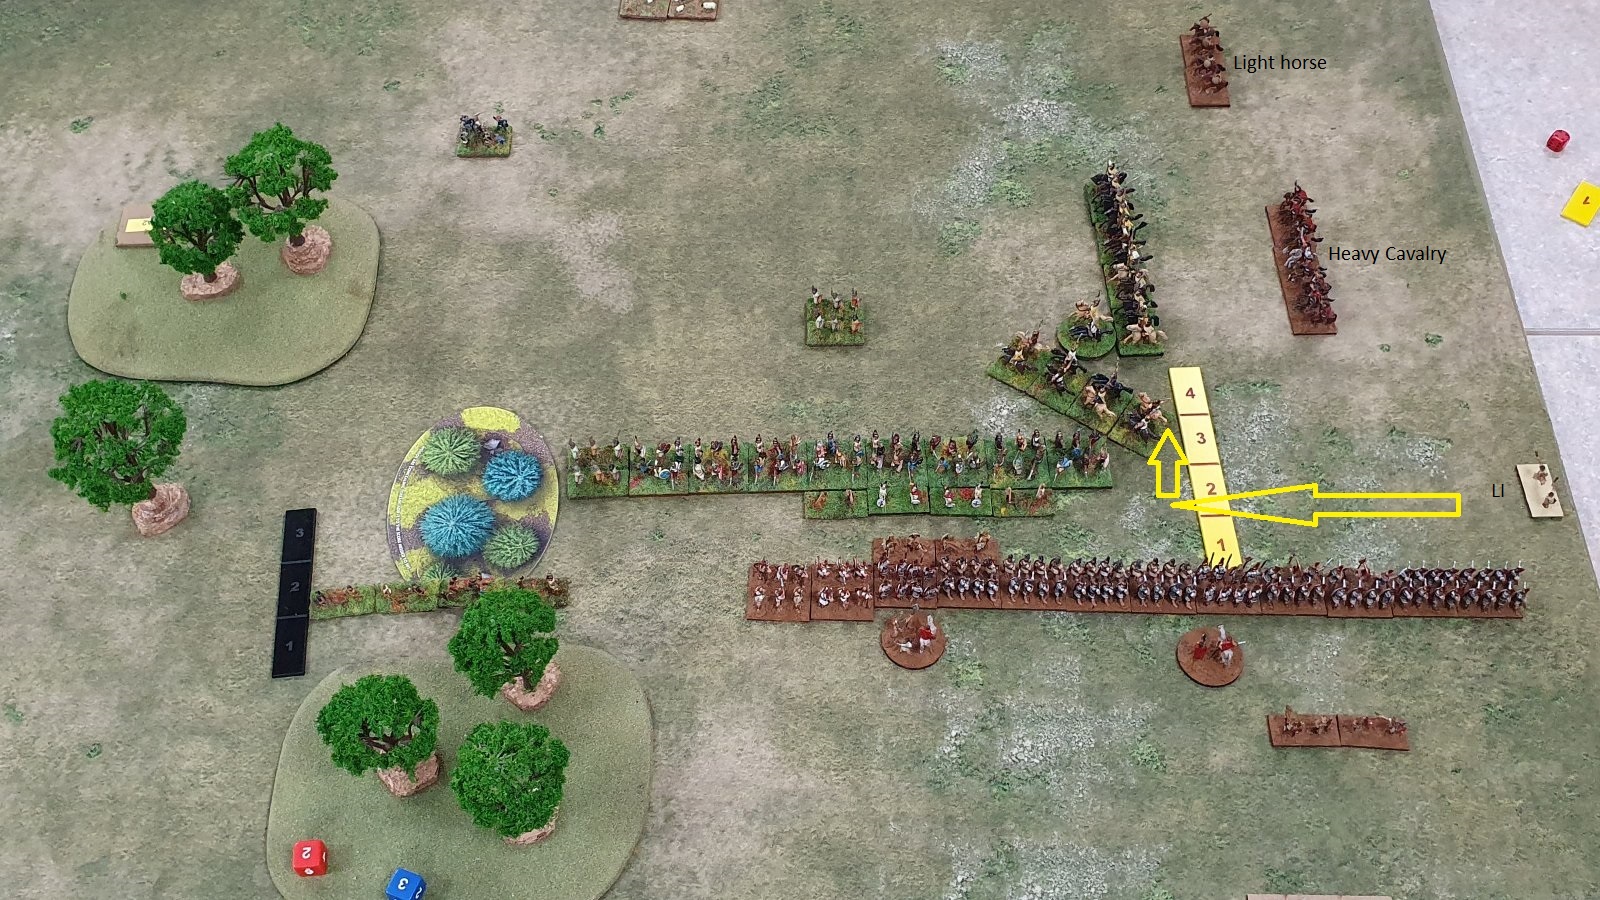
The Thracians deployed in front of their camp. I deployed my Corps I against the wooded hill, taking care to leave 4UD of deployment space for my next corps. The second Thracians unit deployed against the first. I deployed my Corps II with the intention to expand on the following turn. The final Thracian corps was a strong cavalry force on the flank. Recall that I was using a flank march, so no third deployment for me.
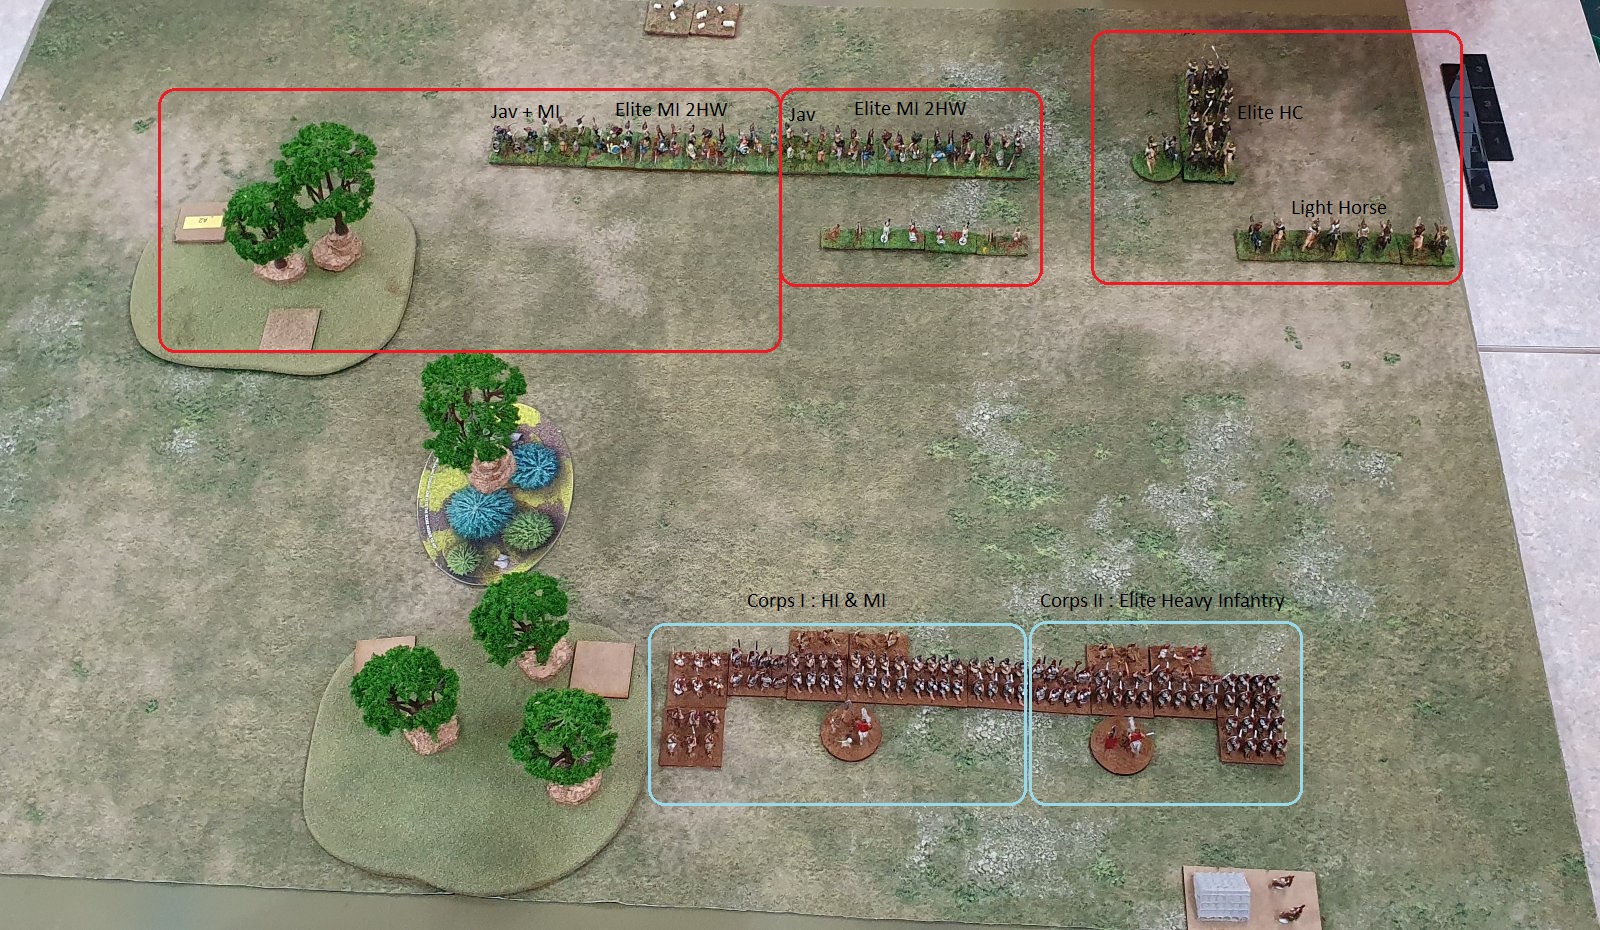
Initial deployment
At the end of deployment it looked like it would be a battle in the open, which should suit me, but I needed to be able to hold on until my flank march came on.
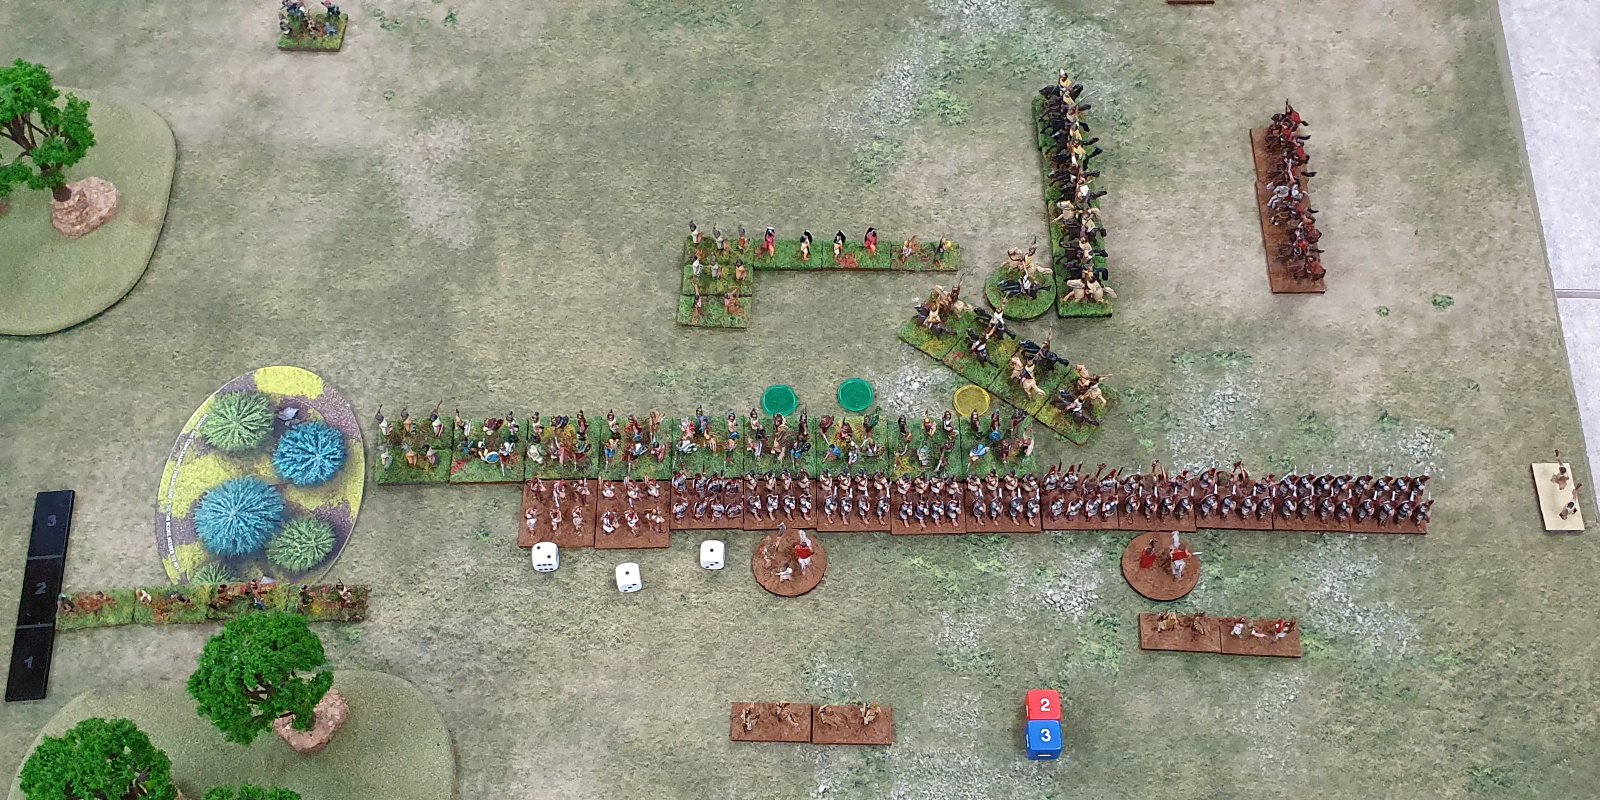
End of Turn One
In my first turn I moved twice, first 1 UD forward and a slide to the flank and then an expansion. This mean that I had a single battle line and that much of the gap on my flank had been closed. The Thracians also pushed forward, moving the 4 LI out of ambush but kept a unit back to protect their camp.
Turn two I rolled that my flank march was coming on. I moved up 1UD and slid to the right again.
In the Thracian turn two, the Thracian HC ran away from the edge of the board and the threat of the flank march whilst most of the rest of the Thracians moved up. Jason left the Javelin LMI in the centre of his battle line behind, which meant he had a solid battle line of 8 MI 2HW with Javelinmen on the right flank.
The Thracian Light Horse charged the Romans Velites, which fled through the Roman battle line.
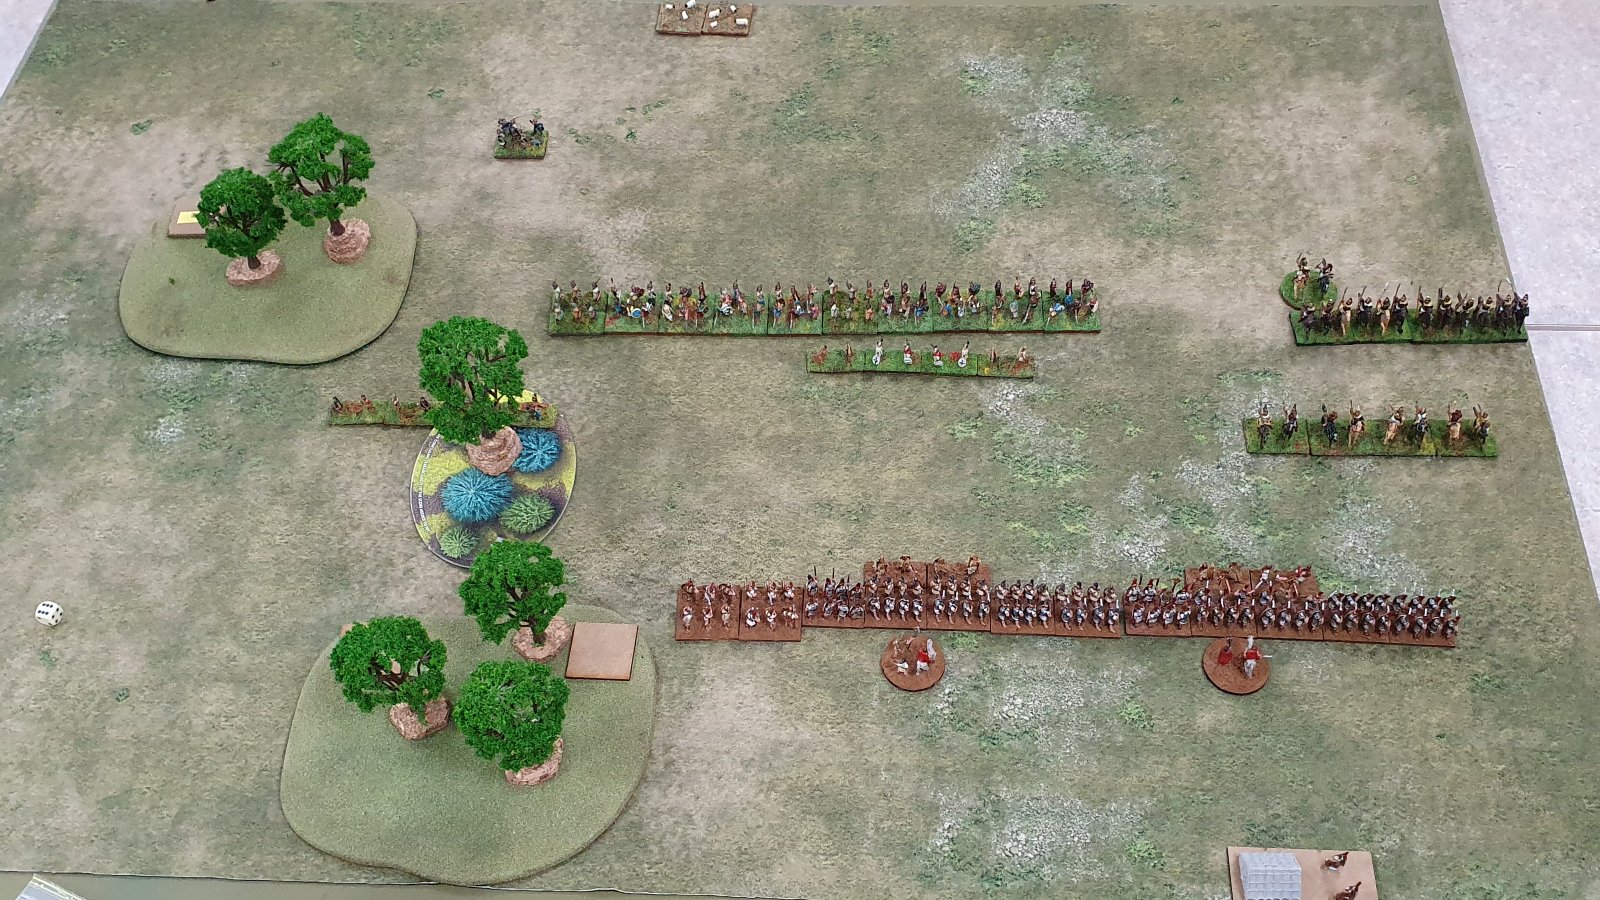
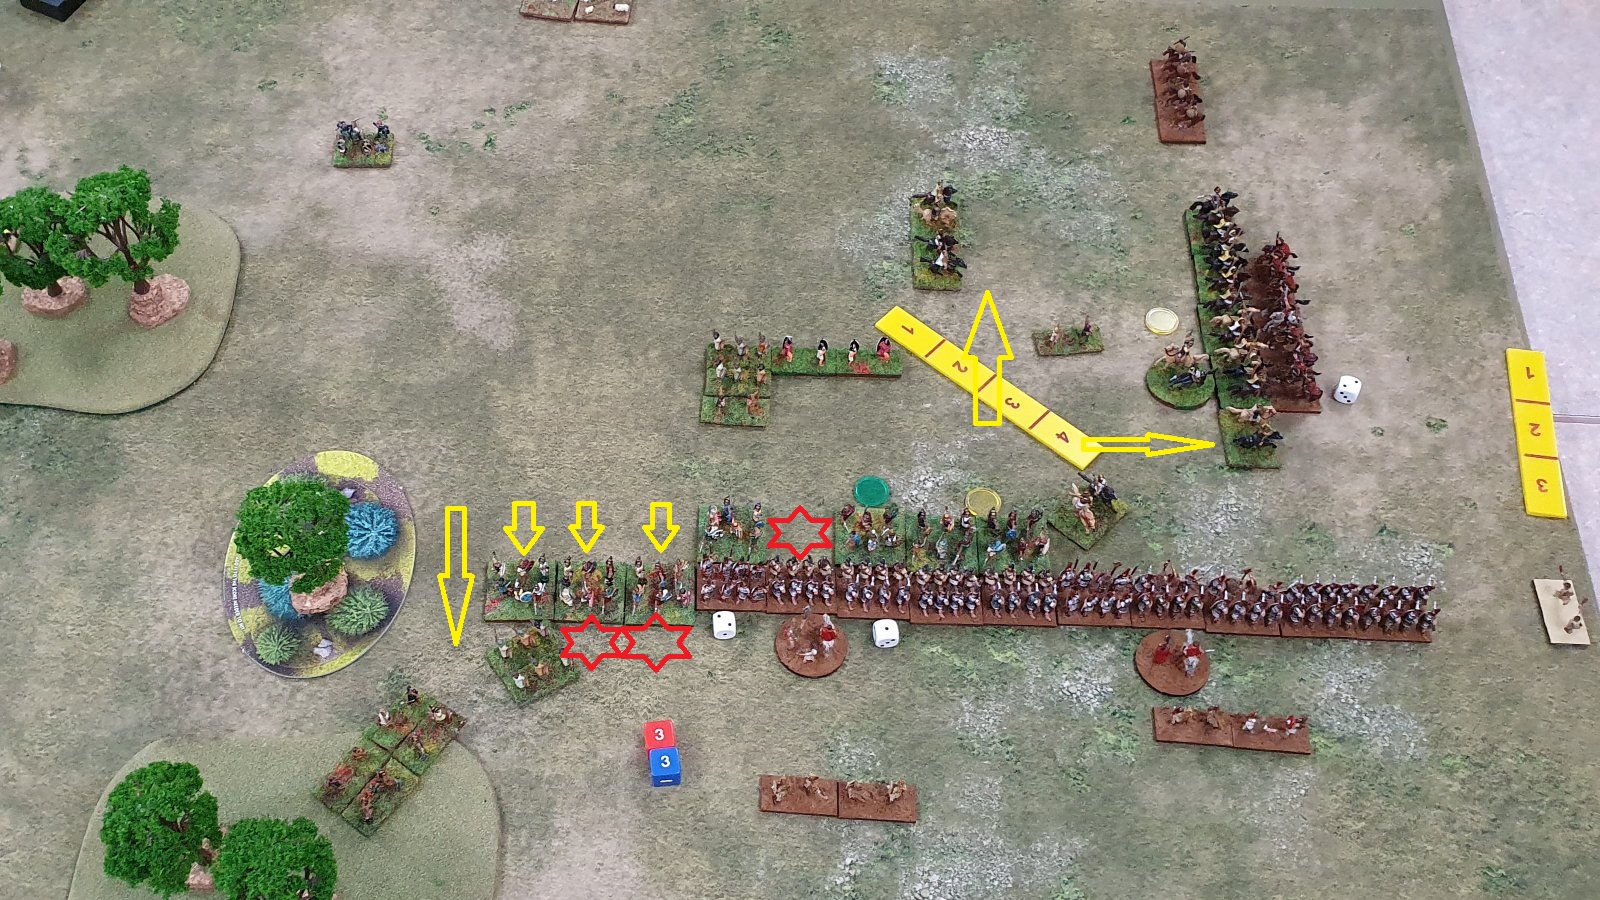
The flank march came on at the start of turn three (p26 of rules "hidden corps ... must be activated before the others"). This caused the Thracian light horse panic and flee. They were the only unit with 4UD of an entry point.
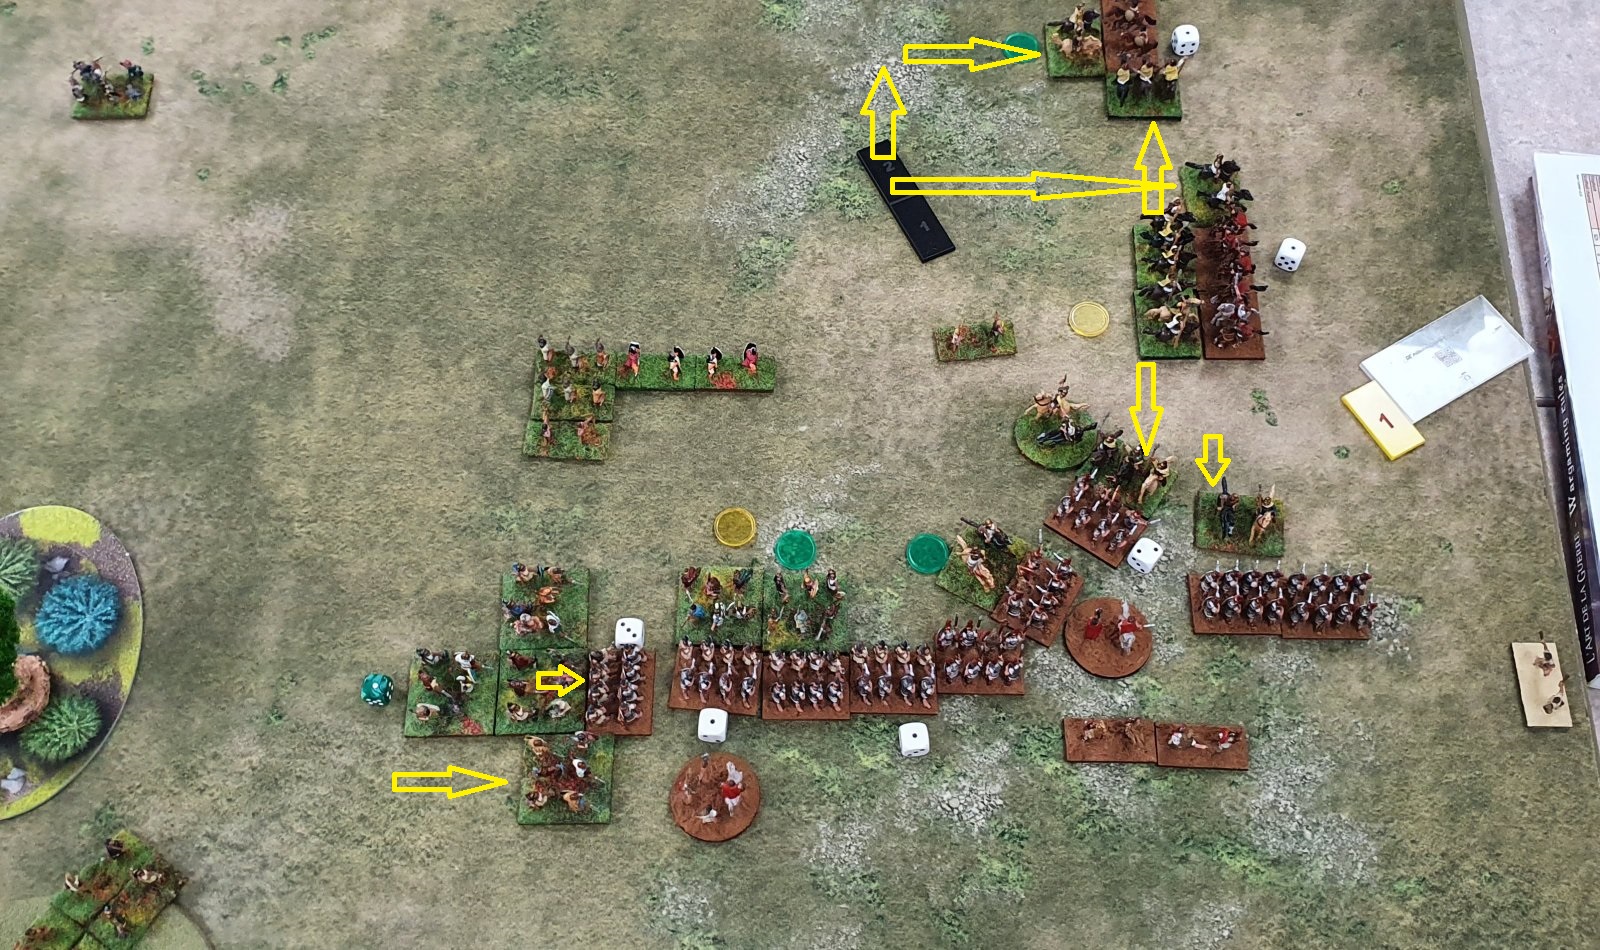
Flank March comes on
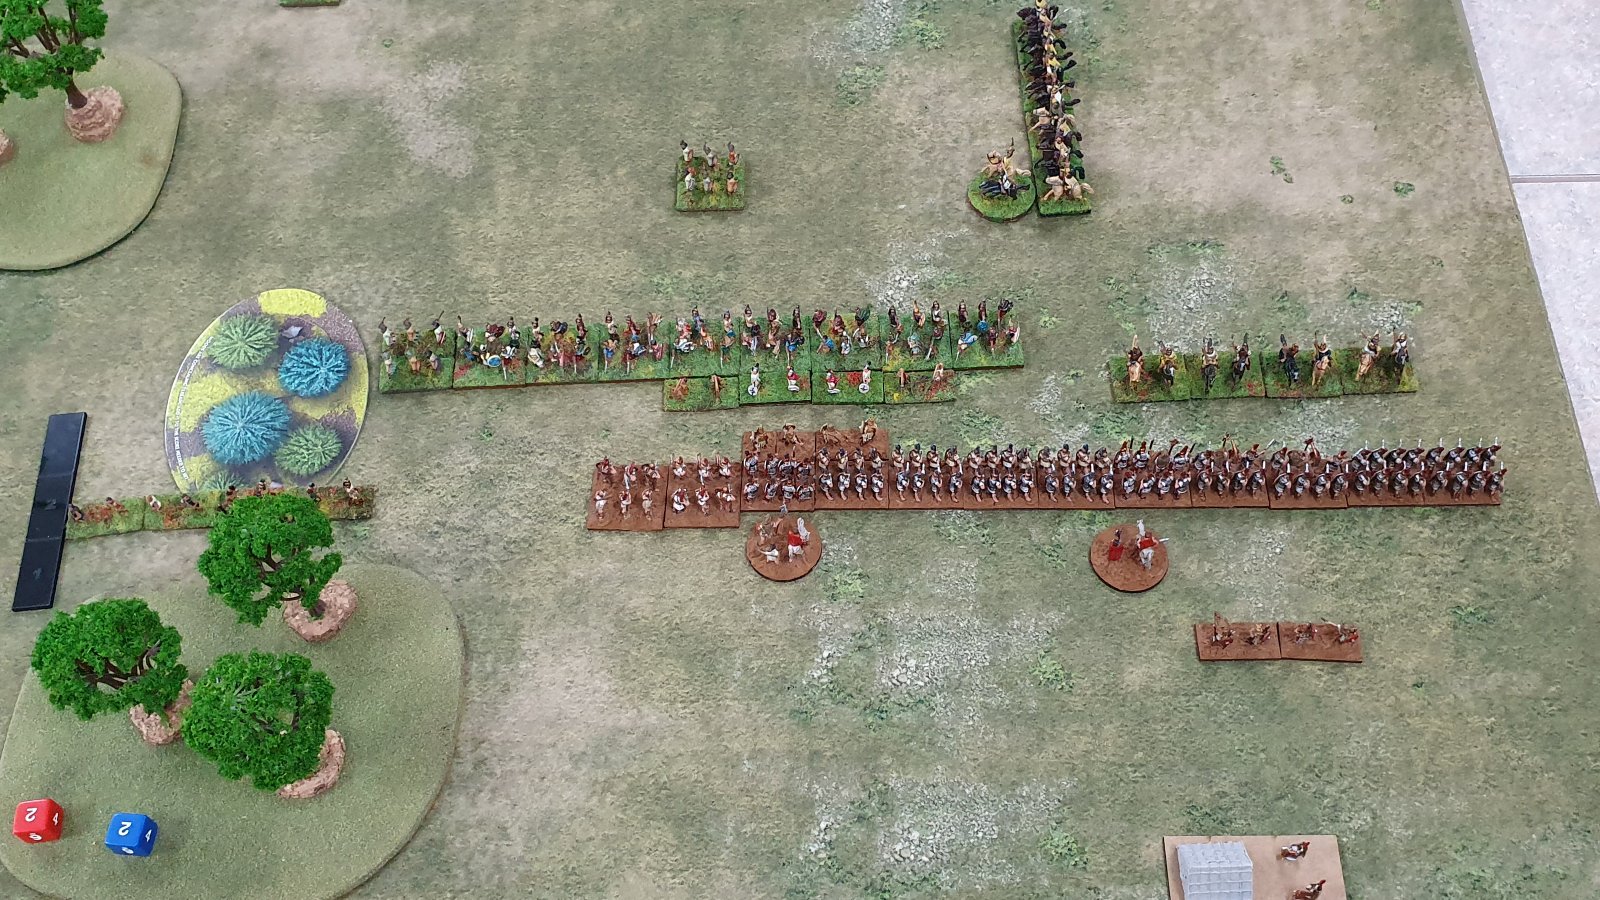
For the rest of my turn 3 I charged the Roman infantry into the Thracians, sliding 1UD to the left to maximise the match ups. This left the Thracian MI 2HW with embedded general unengaged (but giving support) and the Javelinmen out of the battle.
I realised that my left flank was going to be overmatched but hoped the right flank would win before that happened. The result of the combat was that each side took two "single" hits and one "double" hit.
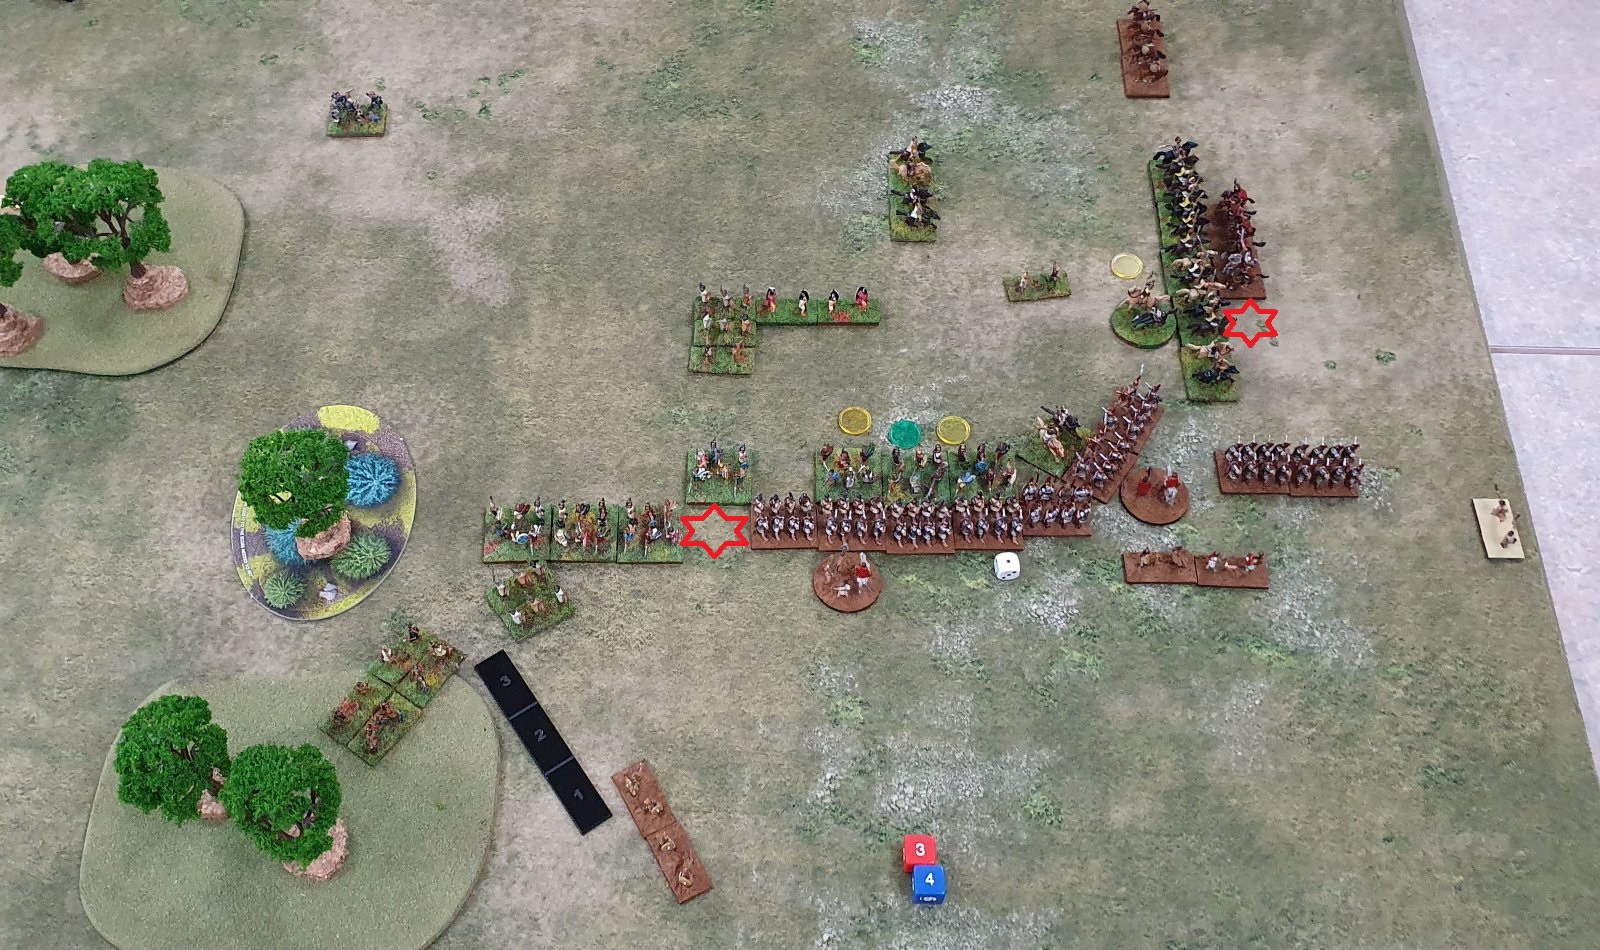
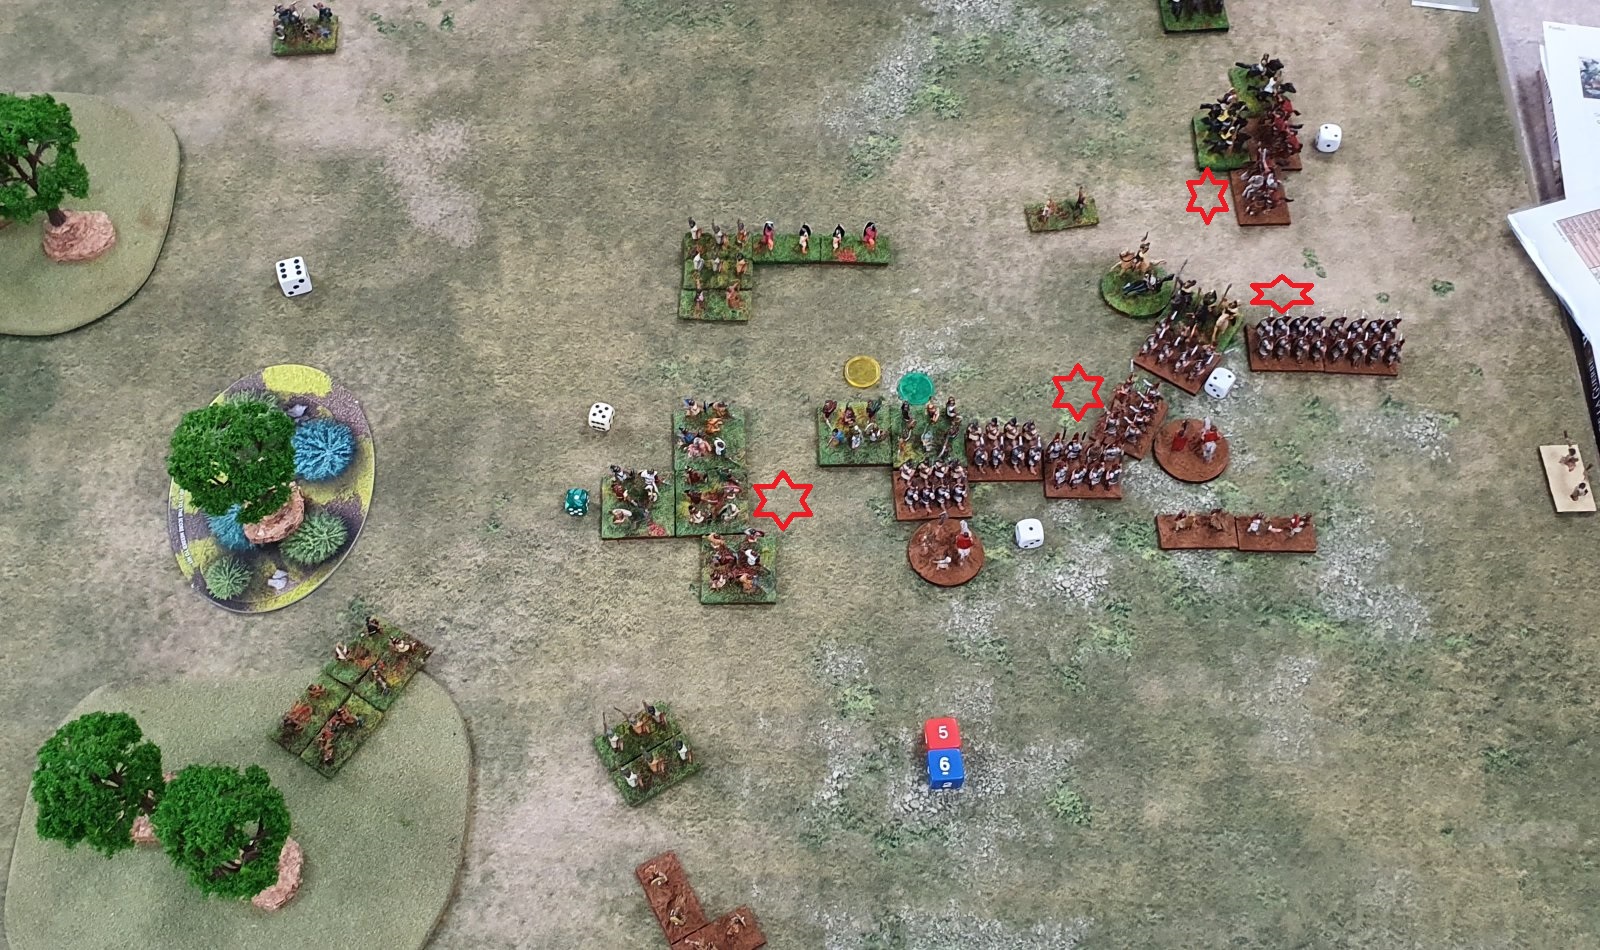
End of Roman Turn Three
In the second half of turn three, the Thracian elite heavy cavalry charged my
heavy cavalry. The Thracian light horse split up, with one unit supporting
the heavies, one ZOC by my infantry and two moved away. The Thracian right
flank was wrapping around my left flank, and both my Italian allies MI were
destroyed. However one Thracian elite MI 2HW unit was destroyed.
In my turn four the veteran legion charged the light horse, but the battle was a draw. Elsewhere a couple of Roman units died. The Roman light horse could not move due to lack of command pips.
The Thracian turn four saw the left Thracian cavalry peel off and attack the Roman light horse in the flank, and a Thracian light horse attack the same unit from the flank. The Romans took an automatic hit from the flank attack, but won the combat. A second Thracian light horse moved up to replace the HC on the left flank of the cavalry battle. The Thracian right flank units in the cavalry battle disengaged to attack the flank of the legionaries.
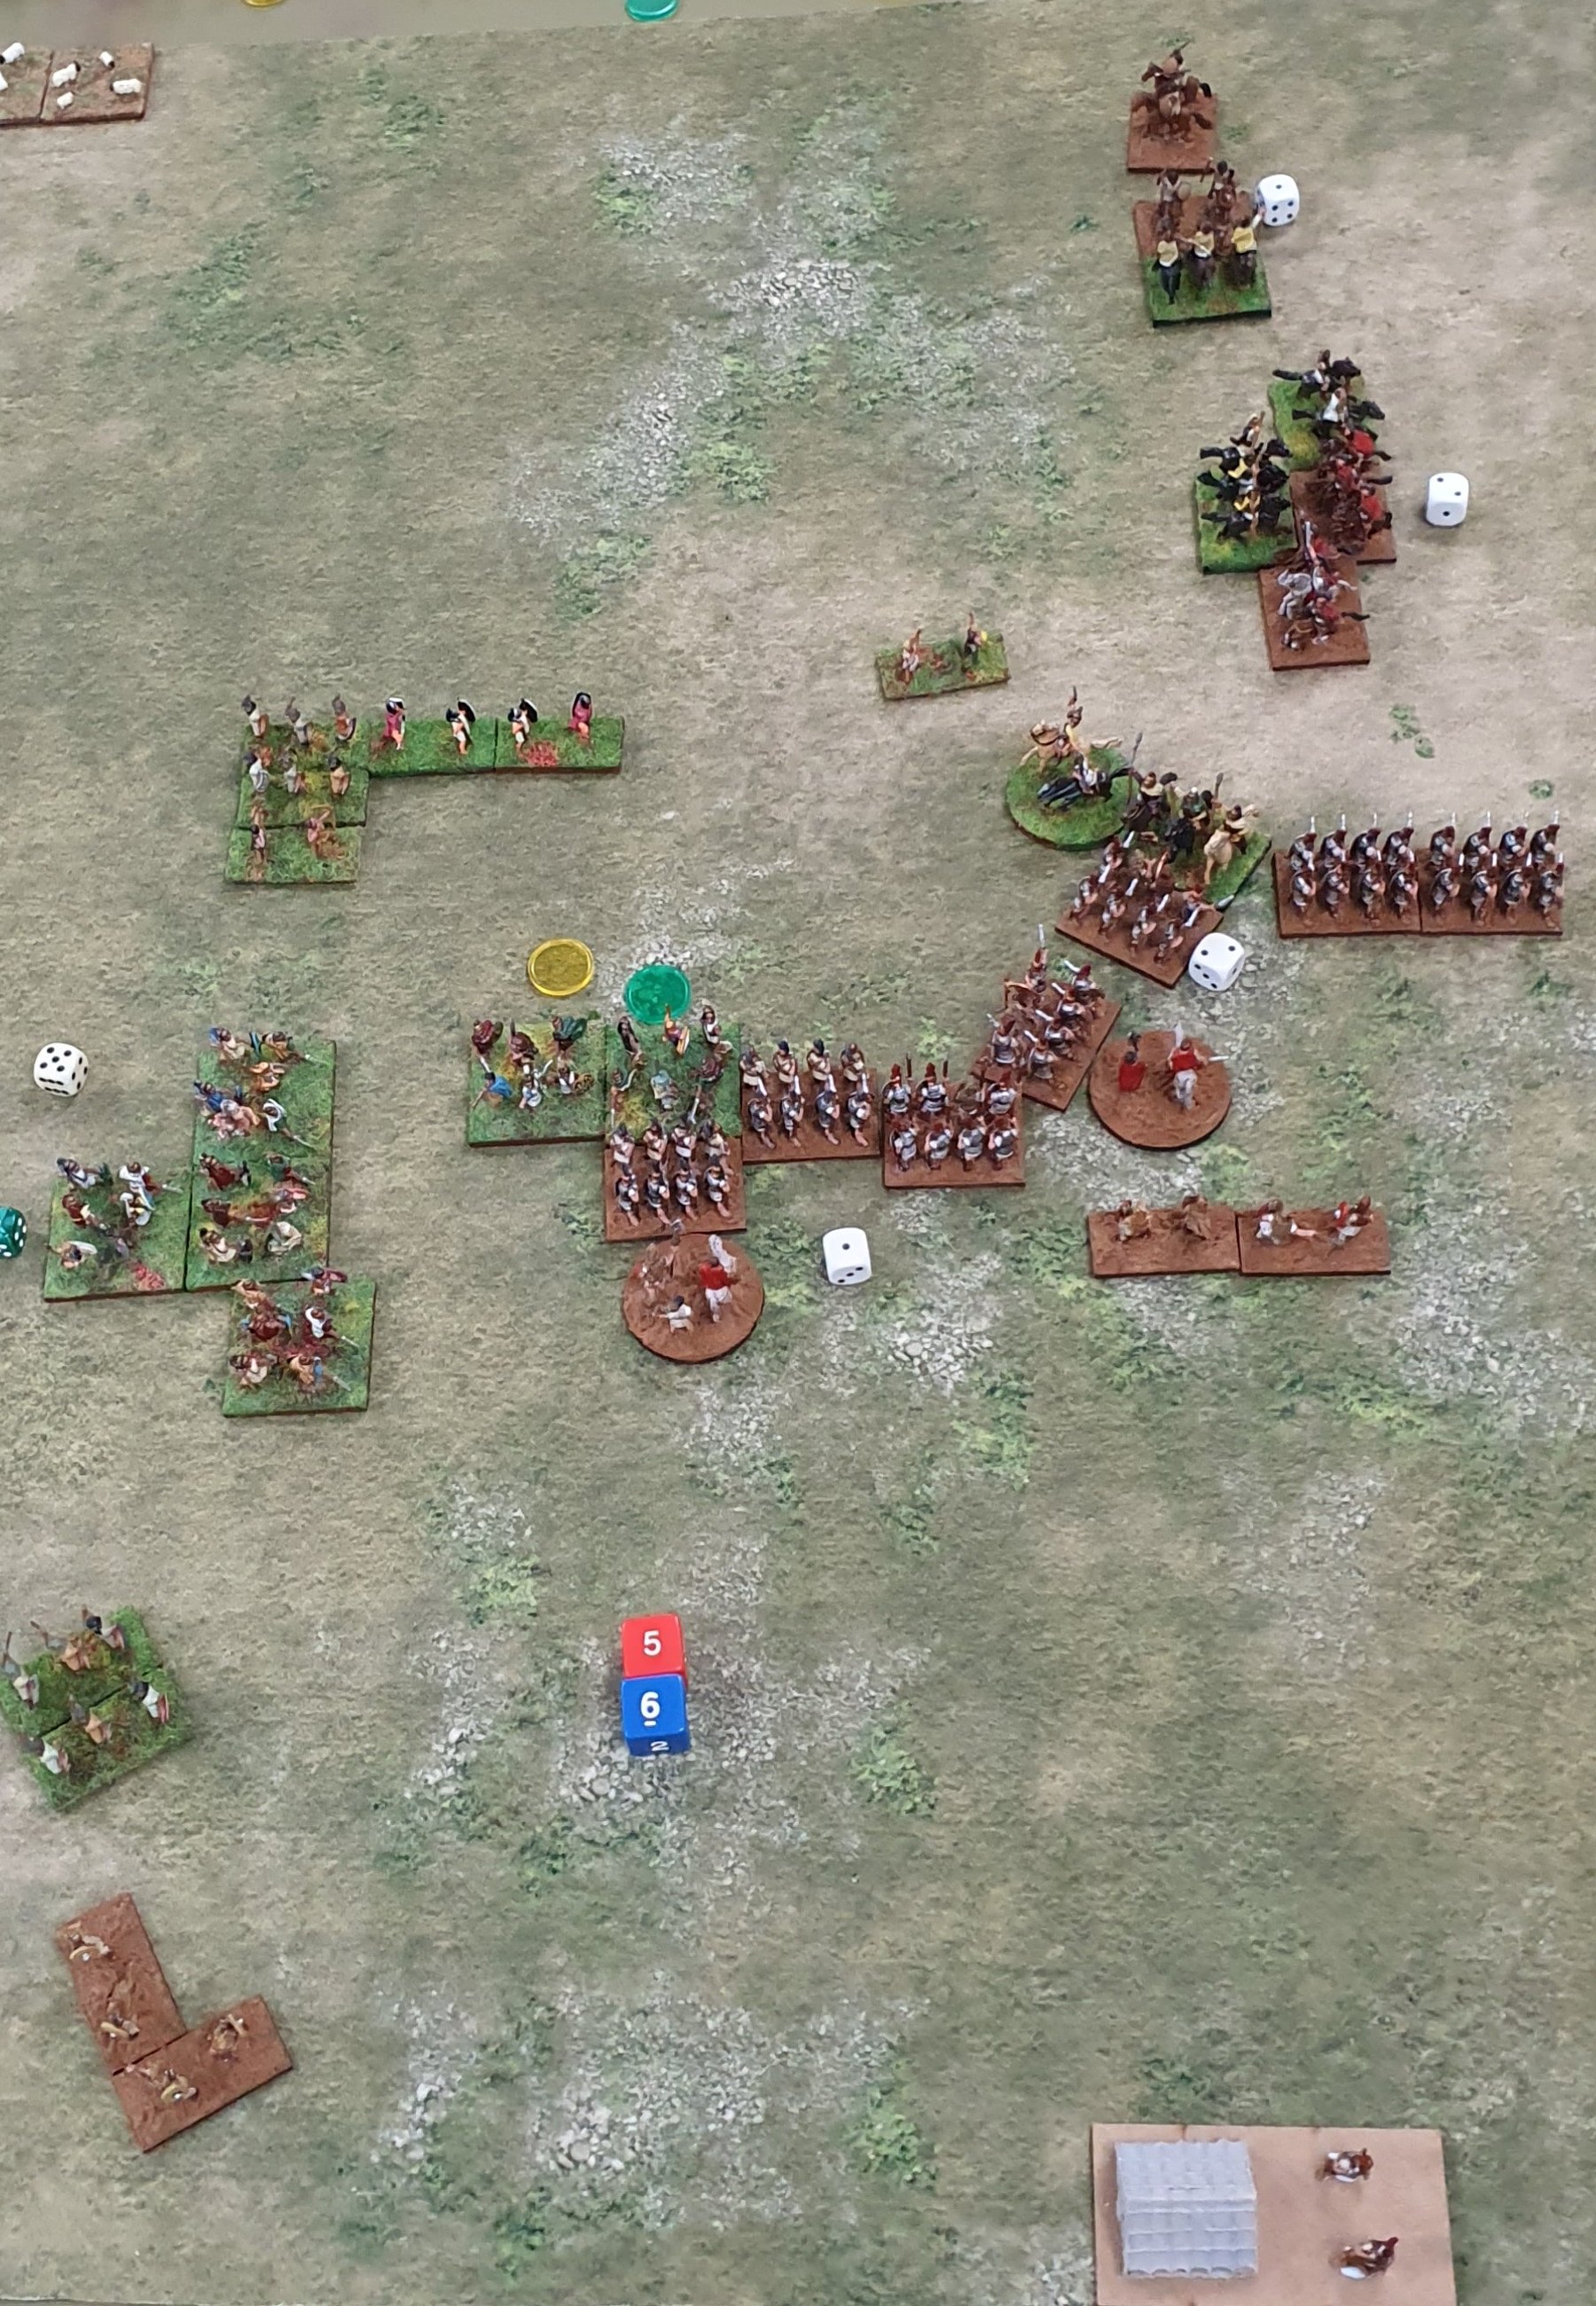
On the left flank of the Roman battle line, the Thracians moved up to attack in
the flank.
Turn five the Roman infantry took out a couple of Thracian light horse, and the Roman cavalry general's unit took out their opposing Thracian HC. Another unit of legionaries were lost on the left flank of the infantry battle. (The game had been progressing so quickly that I thought we must have been up to turn six, but it was still only turn five).
The game continued until the Thracian movement phase of Turn Seven, when the Roman light infantry (bottom left) fled off the board. The elite legion was still intact, but I had taken too many losses elsewhere.
The margin was 14-22 after six turns, 16-23 after Roman turn seven, and the Romans broke at 16-24 after the Thracian charge in their turn seven made the light infantry fled.
The game was a success in that I did well with the terrain, used a flank march, and didn't do too badly.
Given that I had the flank march coming on the right board edge, it may have been better to have the elite legion in the centre of the board rather than on the right flank. I didn't because I was expecting to use MI in the terrain.
In my turn two I knew the flank march was coming on my right flank next turn, but I still slid to the right to prevent the Thracian HC getting around my flank. In retrospect I should maybe have slid left instead to maximise the contact with my veteran legion, who ended up just in support or unengaged at the start of the infantry battle.
The flank march command was starved for command pips. If I had a better general in it I might have been able to attack the Thracian camp with my light horse. However, I didn't want to have too expensive a flank march command. In the game I was very lucky to roll successfully in turn two (arrive turn three), but other players have mentioned that it can take 6 - 7 turns to come on.
The MI were a weak point in my line. Rather than charging them in alongside the HI, I could have held them back to cover my flank. In future games I may consider using elite MI so as to not have such a weak point, or alternatively hold them back behind the main battle line as a reserve.