Indian vs Alexander the Great

A portion of the Alexandrian army. Medium infantry to
the left and pikes to the right
Pregame
I had not yet used my Indians (apart from using a subset of them as an allied corps), so wanted to play with them. Phillip advised that he would field an Alexandrian or Successor army as a historical opponent. This meant that I could face pikes, Companion cavalry and elephants. Given that Indian's have lots of elephants, I did not expect to see Phillip choose too much cavalry.
My main decision was whether to use chariots or not. Against pikes and elephants, two chariots are probably not as good as one elephant. Also I only had two chariot models painted and another two partially completed.
With the Classical Indian list it seems almost the norm to have corps containing two elephants and a number of mixed archer units. I decided on two corps each with two elephants, two mixed archers and one unit of Guardsmen. In one corps I added a couple of horsemen to protect the flank. My third corps effectively swapped out one elephant for two units of swordsmen, and this was intended to be able to be used in terrain.
My general battle plan would be to move up to be within shooting range, and then try to inflict shooting hits before getting into combat. My corps would expect to come off second best against a line of pikes, so disrupting them first is essential.
In terms of terrain, I would want a coastal zone to secure one flank and as much difficult terrain as I could get on the board. I would rely on either the horsemen in the open or the medium swordsmen in terrain for flank protection.
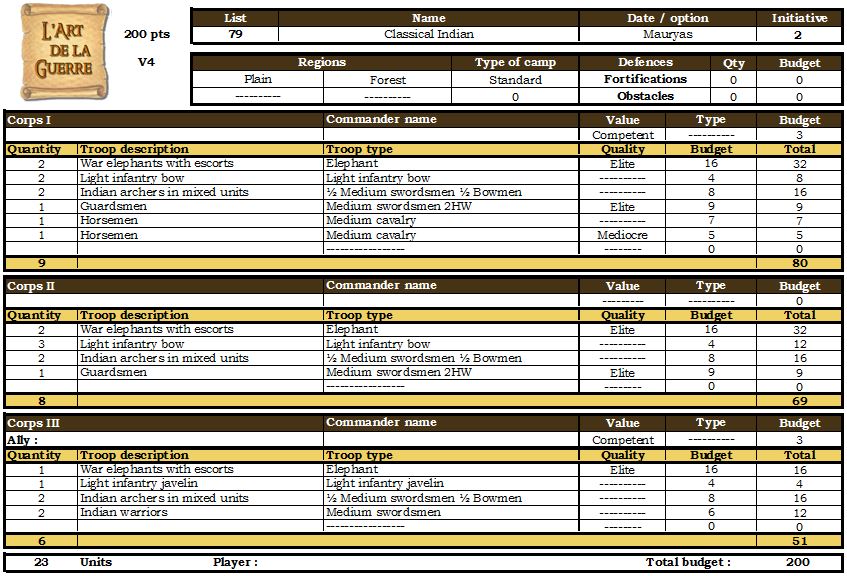
Army lists
My Indian list
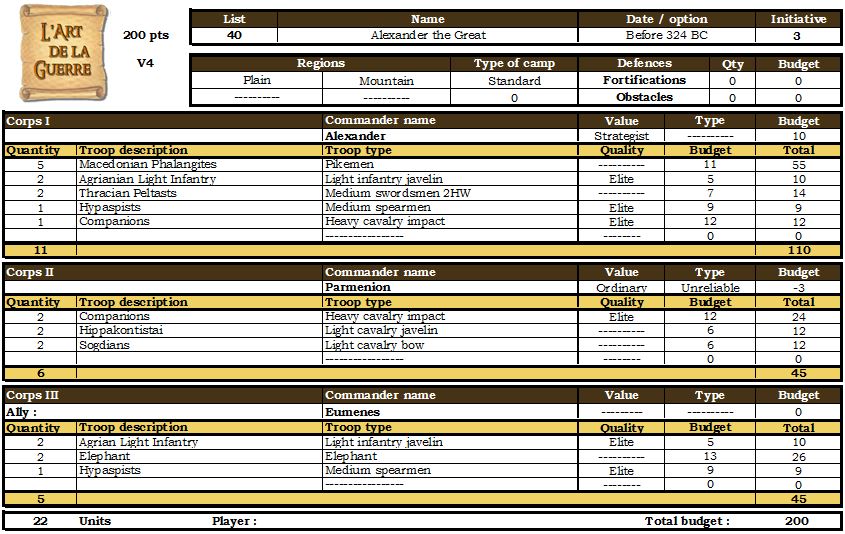
Phillip's Alexandrian list was
The Game
Phillip won initiative and decided to attack in the forest. This was a surprise as I thought he'd want to be in the plains for his pike and cavalry units, so I was happy to take that.
In addition to the compulsory woods, I selected a coastal zone, a large brush and also a hill with brush. Phillip took a gully, an open hill, and a wood. During the terrain adjustment phase I removed the wood that Phillip had placed in my deployment zone to the right of the hill.
I placed my camp near the coast, whilst the Alexandrian camp was diagonally opposite.
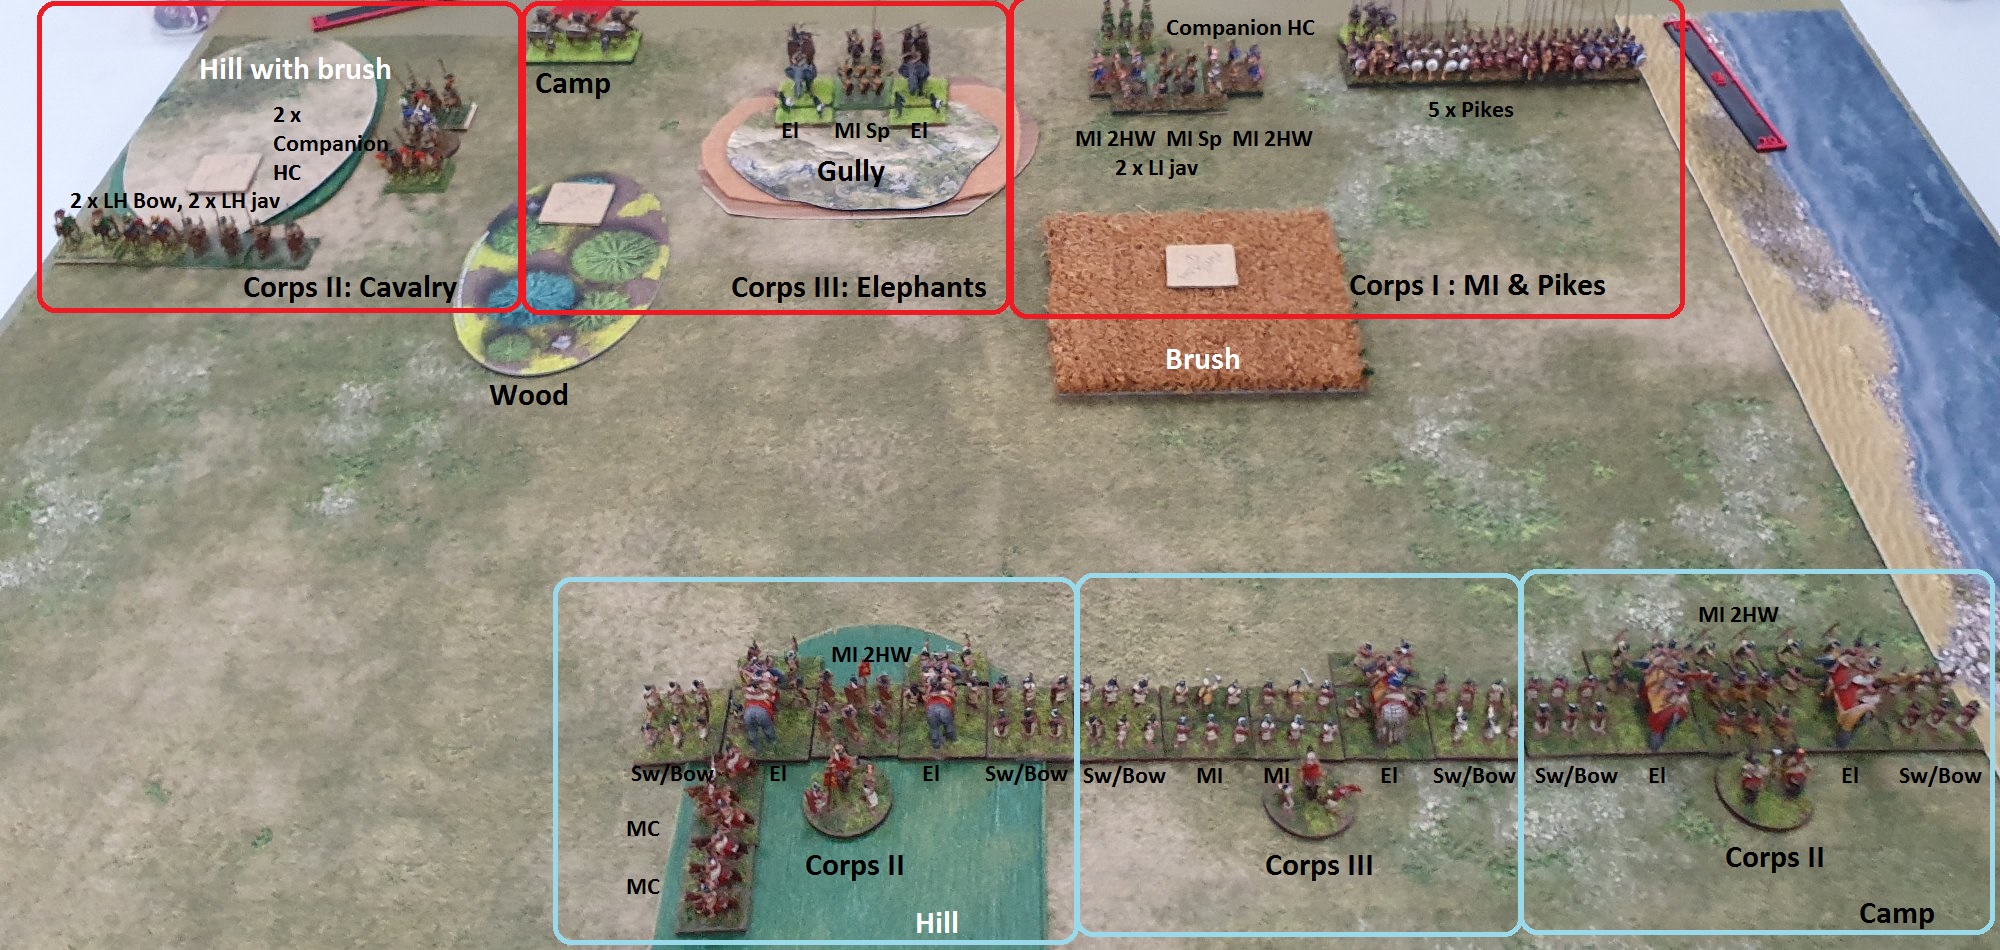
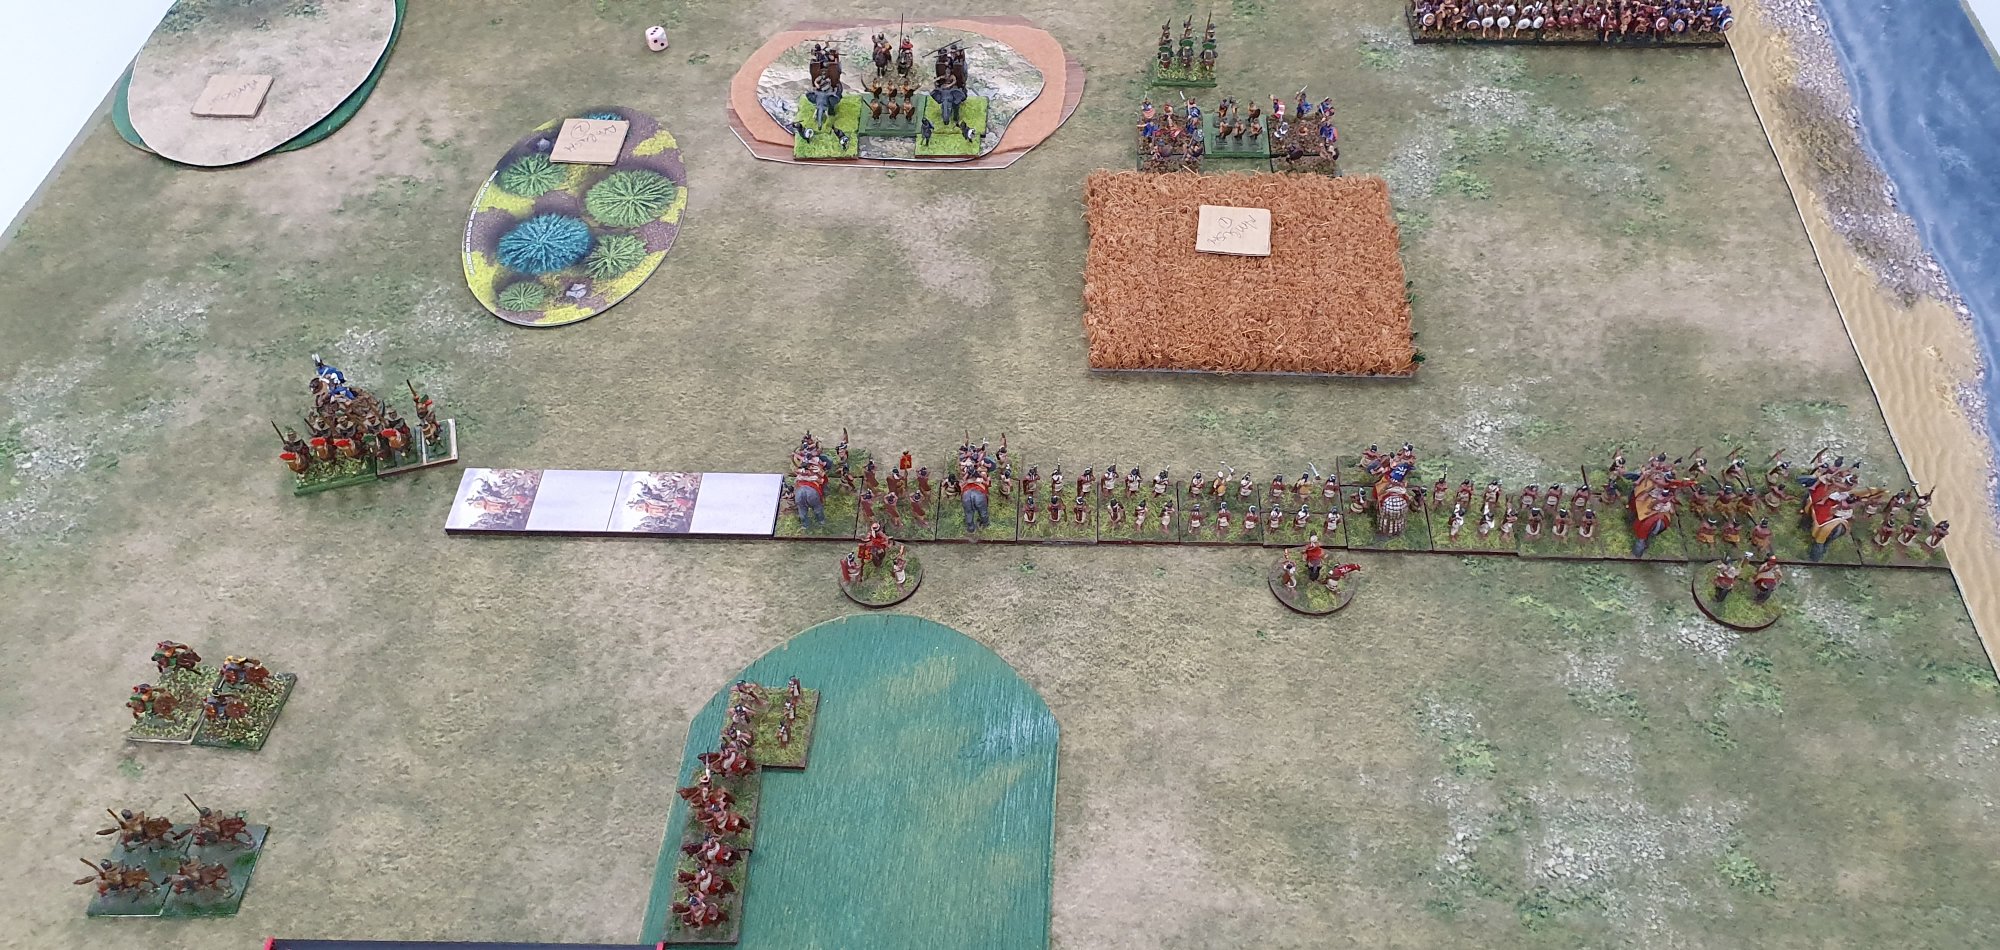
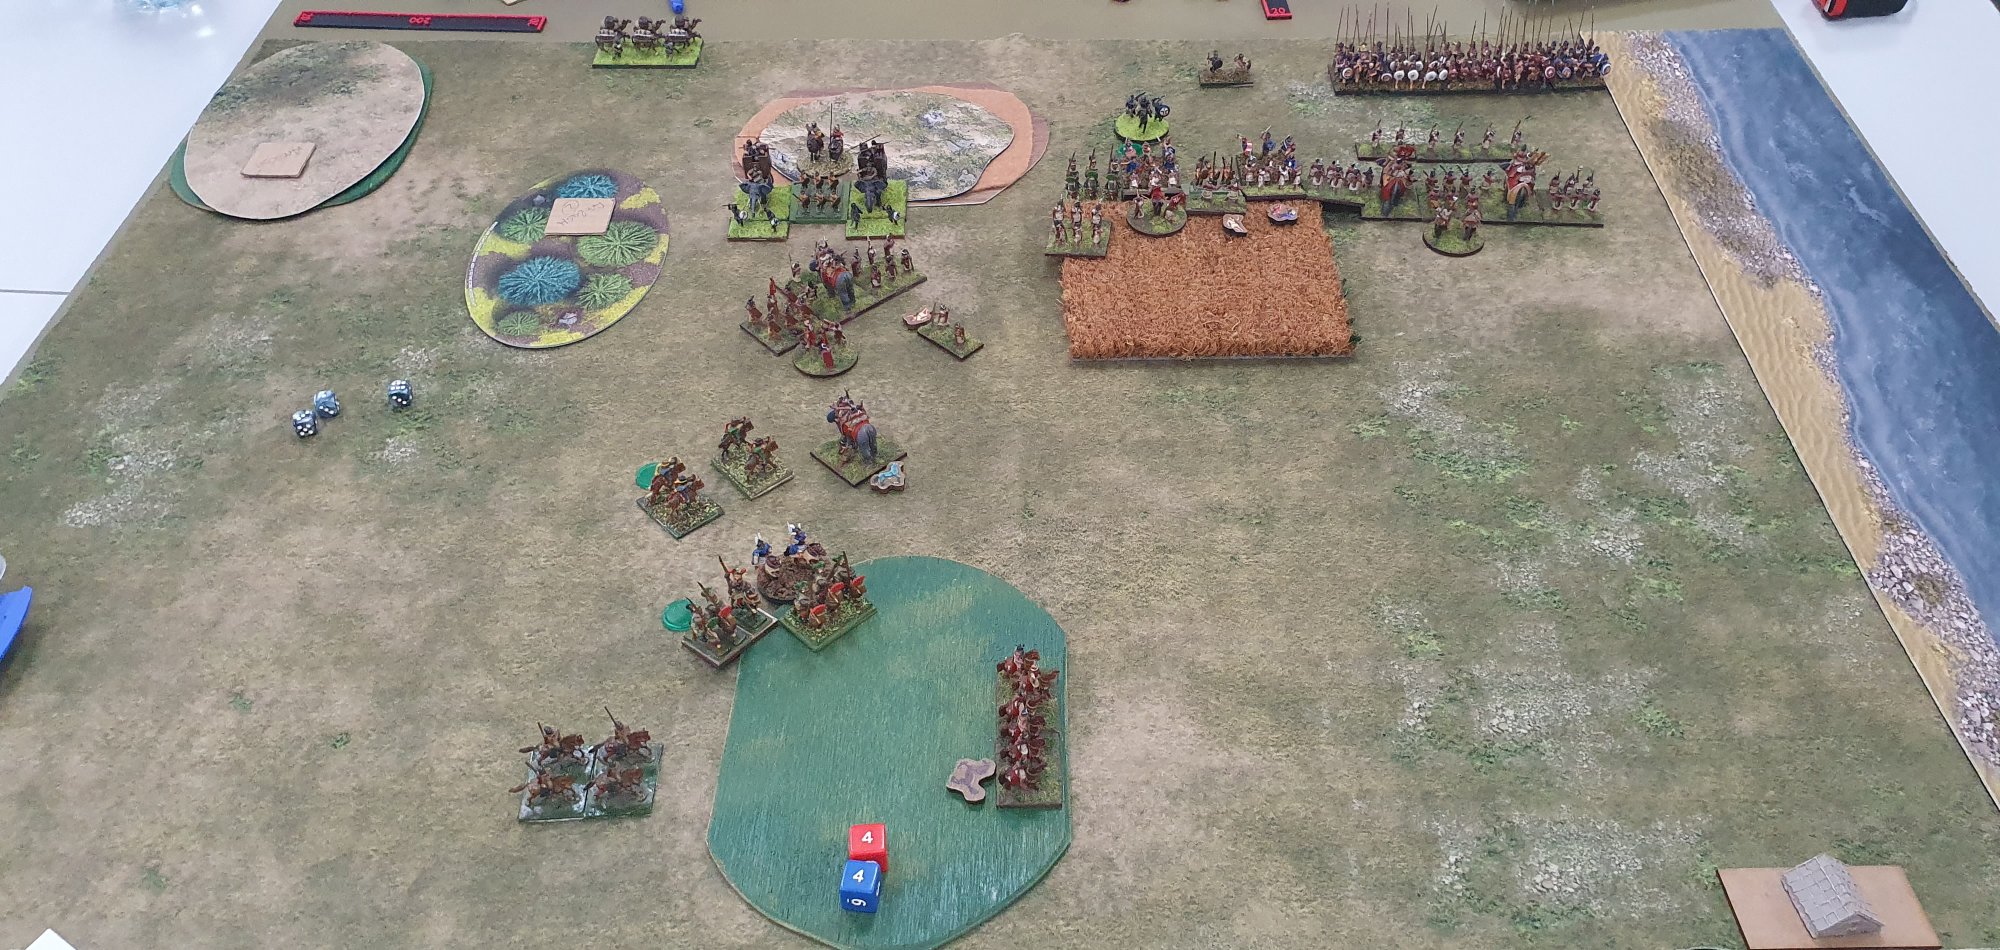
Initial Deployment
As can be seen above, I deployed as a continuous battle line with my flank anchored on the coast. I placed my medium cavalry on the hill, behind and at right angles to my battle line.
Phillip deployed his two infantry corps as three separated groups. This meant that these two groups were approximately the same total width as my battle line, albeit with gaps between them if I could exploit them. There was a moderate sized cavalry command well out on the flank, so he was using the full width of the board for manoeuvre. He also placed three ambushes.

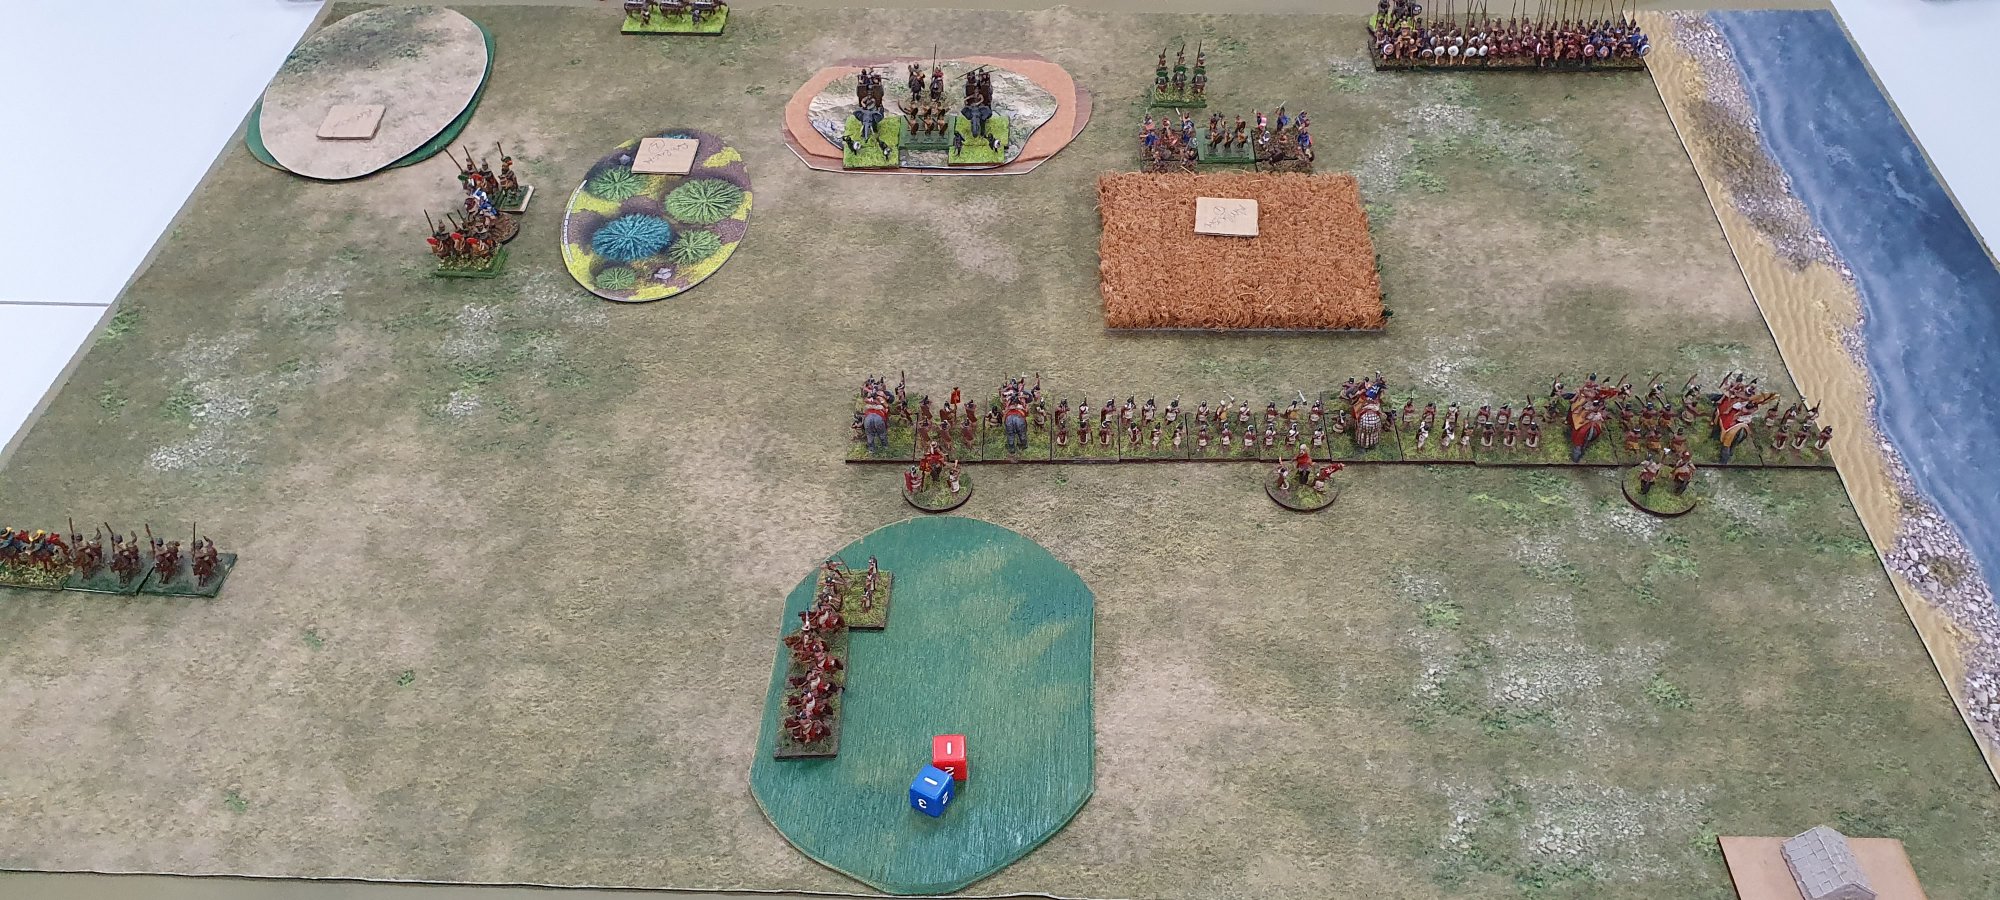
End of Alexandrian Turn One
Phillip's initial move saw his light horse move twice and get into my deployment zone. His Companions did a single move forward.
His elephant corps and the medium infantry group of his large corps both moved forward, but he kept his pike back.
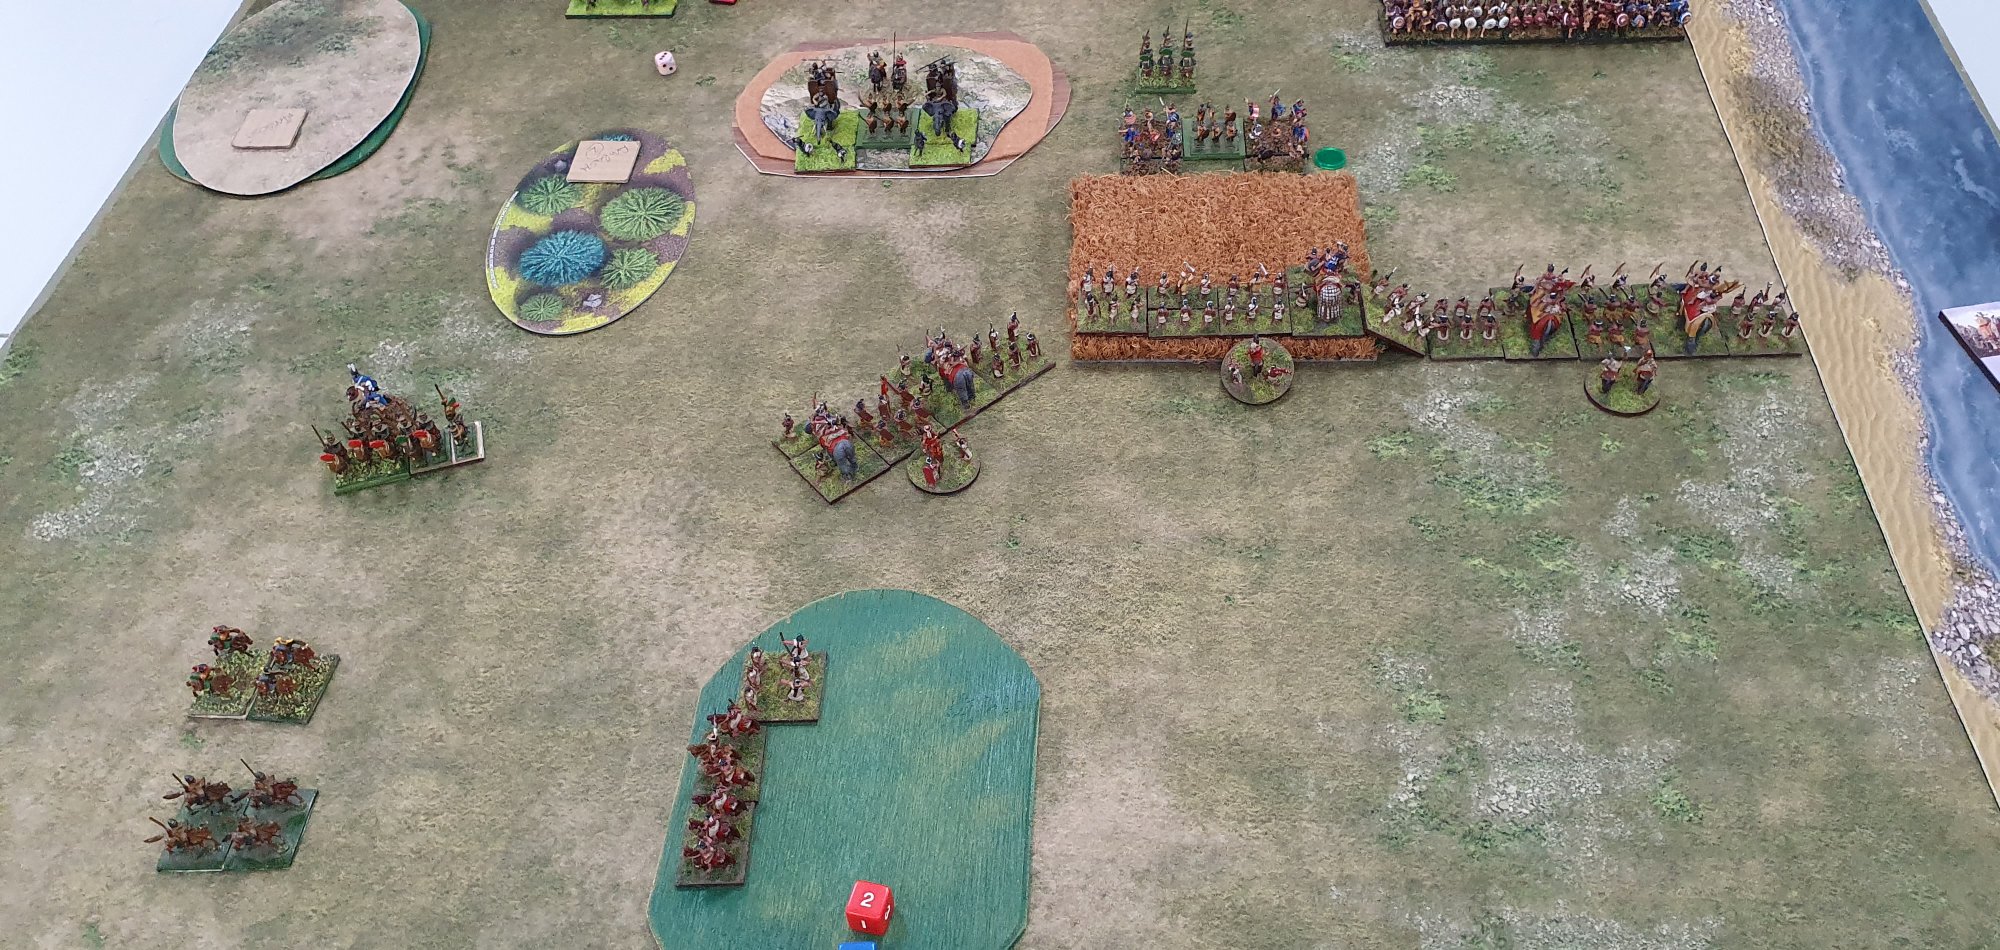
End of Indian Turn One
I moved my battle line forward a full move. I couldn't do a second full move because in a second move your cannot get within 4UD of enemy unit, including ambush marker. I decided against a second partial move because I could not predict whether other corps would have enough command pips for a second partial move, and I wanted to keep a continuous battle line.
I did leave one mixed archer unit behind on the hill to help my horsemen hold off the enemy cavalry. As it wasn't fully on the hill it had to turn right and move up the hill.
End of Alexandrian Turn Two
In his second turn, Phillip continued to move up his cavalry but kept the other two corps stationary.
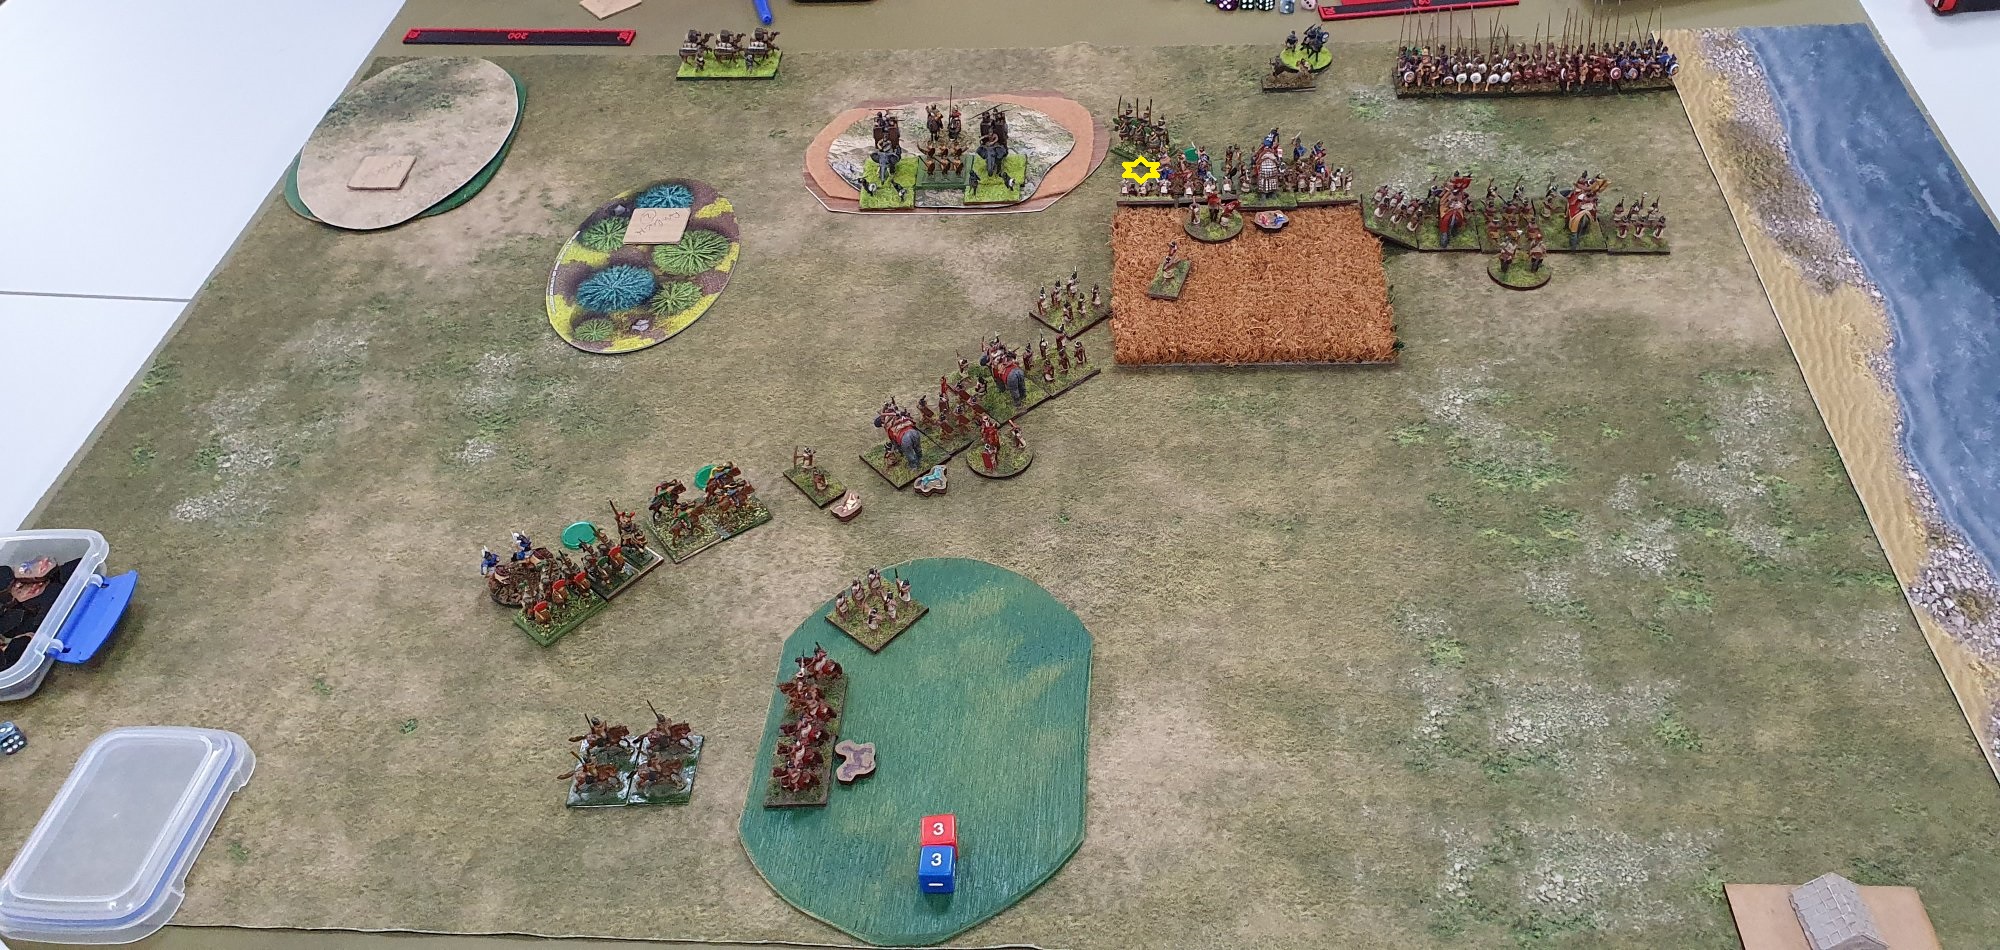
End of Indian Turn Two
I moved my centre and right flank corps forward. This exposed the ambush in the brush as a dummy ambush. I was able to inflict a shooting hit on the enemy light infantry on the far side of the brush.
My left blank corps wheeled so as not to expose a flank to the enemy Companion cavalry. My mixed archers unit on the hill was able to turn 180 degrees to face back towards the enemy light horse.
End of Turn Three
I didn't take a photo at the end of the Alexandrian turn three. I think that he moved his skirmishers up through the brush. I charged them as a group and one of them rolled short and I rolled long and I caught it the rear and routed it. The rest of my group ended up in combat with my medium swordsmen vs Thracians with 2HW, elephant against Hypaspists elite MI spear, and mixed archers against another unit of Thracians. The only match up in my favour was the elephant vs medium spears, but that went 6-1 against me: elite made my die a 2 and impact took it to 3 but I still took 2 wounds.
This charge had been made without my flanking mixed archer unit, which I kept back to support my central corps.
The left most elephant had been exposed to light horse bow shooting from the flank and taken a hit. I moved the light infantry from the front of the elephant to the flank to protect it - effectively sacrificing it to protect the elephant from a second hit. I think that the light horse and my light infantry both did a hit on the other.
The Alexandrian light horse javelin had moved up to shoot at my medium cavalry. I didn't try to charge them because that would expose the flank of my cavalry to the Companions HC.
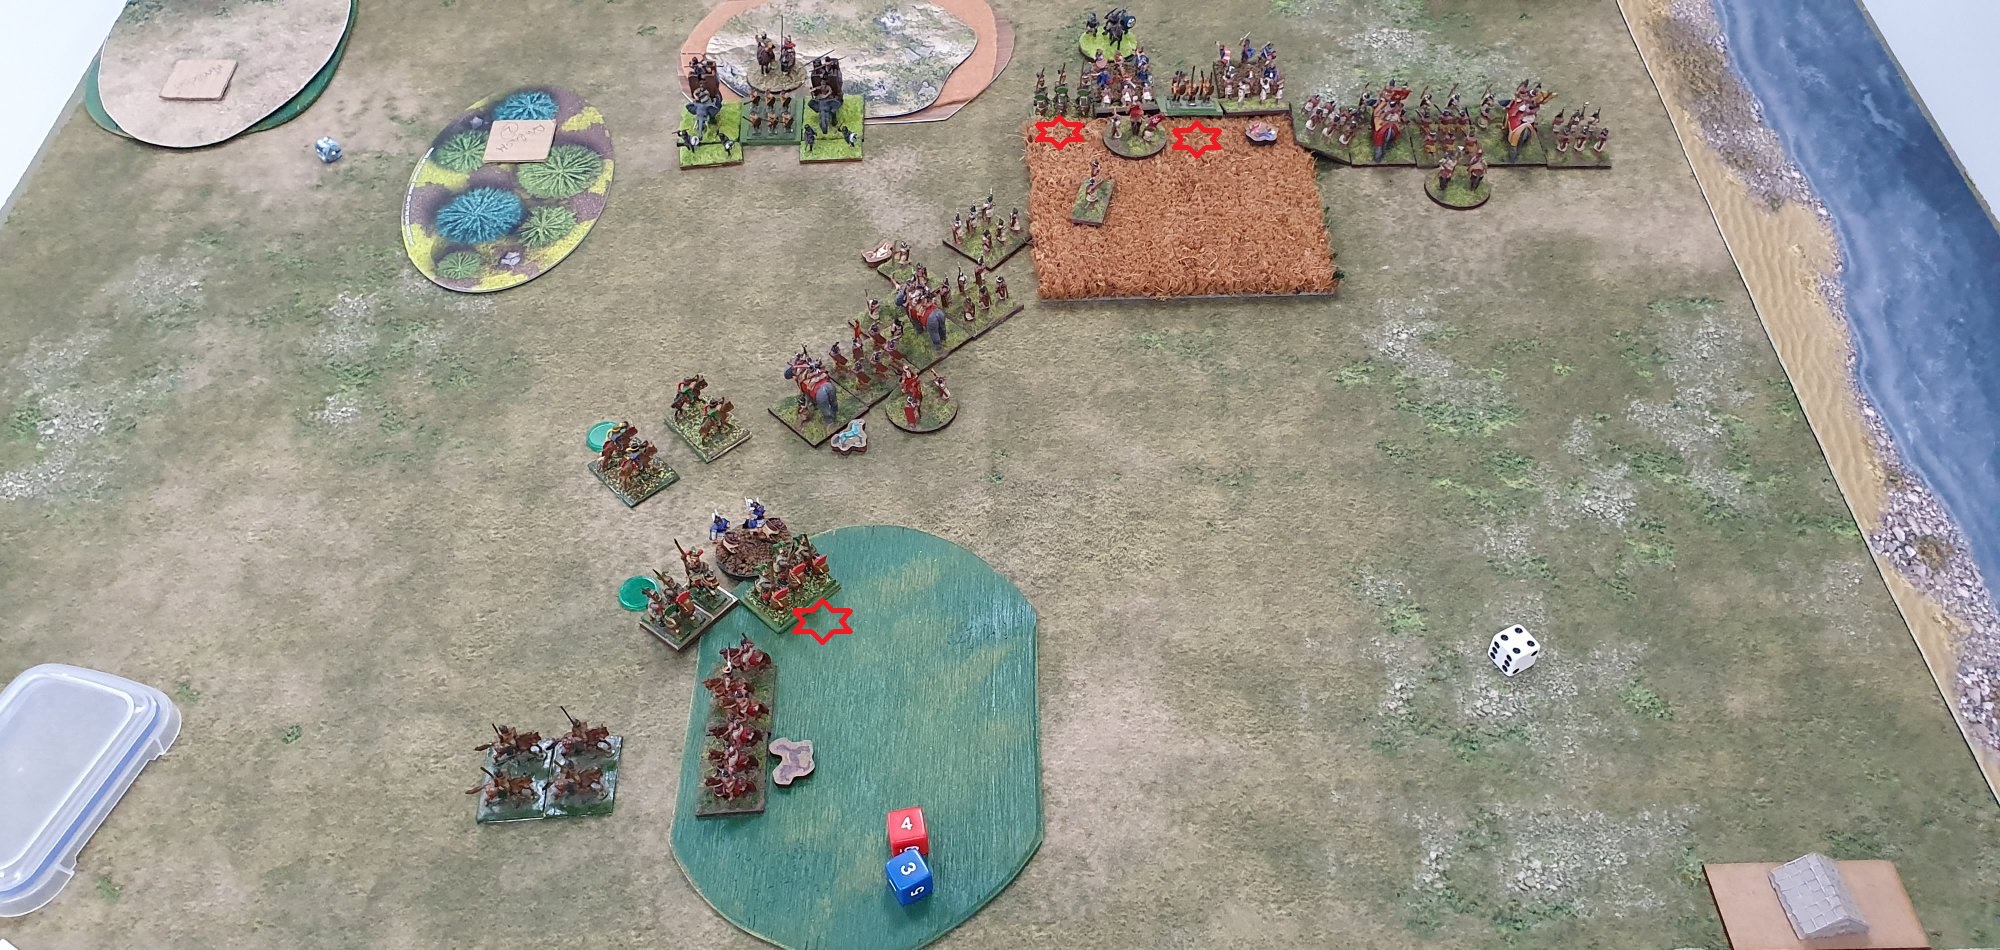
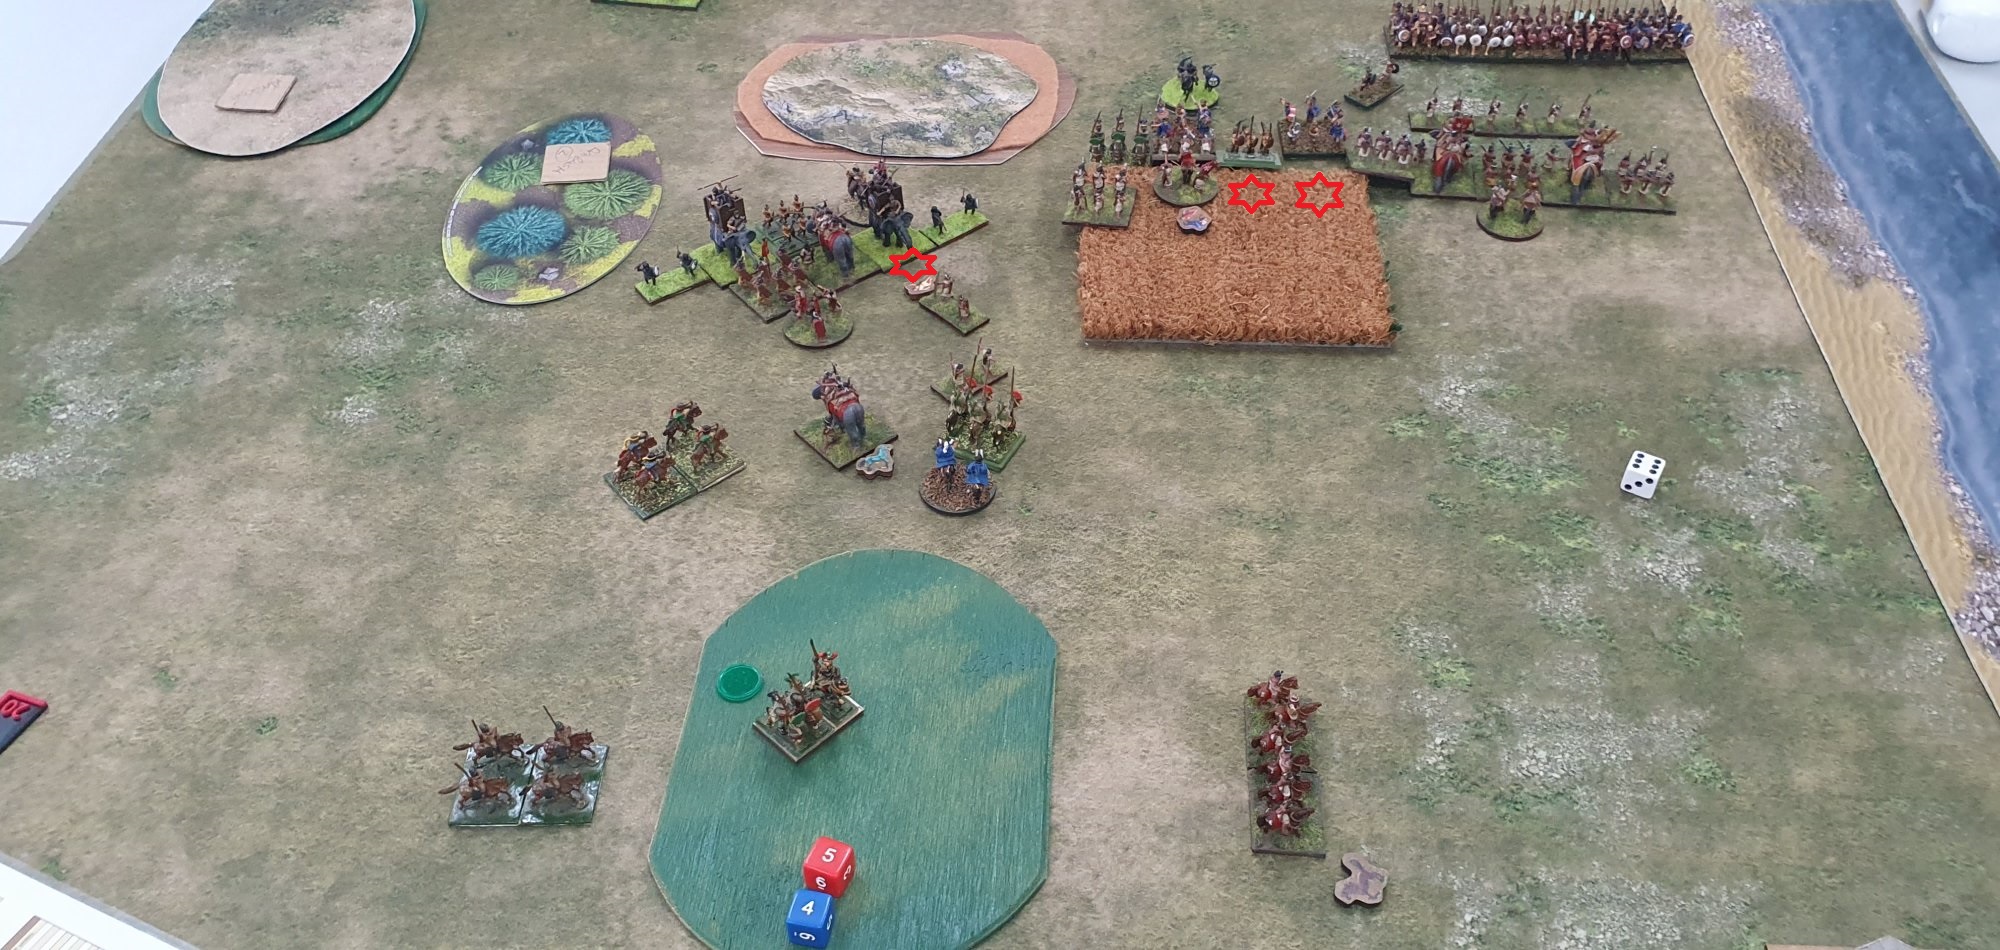
End of Alexandrian Turn Four
In the Alexandrian turn four, the light horse javelin were ZOC'ing my horsemen. Also the Companion's charged and routed the mixed archer unit. The rear bow light horse charged through their disrupted unit in front of them against my light infantry. My light infantry unit evaded through my battle line and ended up in front of it.
In the battle just past the brush, a unit of Companion HC charged and destroyed my medium infantry and my elephant also routed.
The pikes did not move up (and are literally out of the picture above).
End of Indian Turn Four
In the battle just past the brush, I moved my mixed archer unit up to ZOC the Companion HC. The Companions could still provide simple support to the melee, but would not be able to turn to flank charge my unit in combat. I also move the right hand corps to align to support my remaining unit, with the light infantry pushing a little further to shoot at the pikes.
With the horsemen I retreated back. Although I was still in charge range of both the light horse and the Companions, if they had charged me I would just had evaded.
With the other units of the left flank corps I left the left-most elephant behind to occupy the horsemen, and moved the rest of the group up to get get closer to the enemy. I was feeling that I needed to get into combat before the cavalry could attack me in the rear.
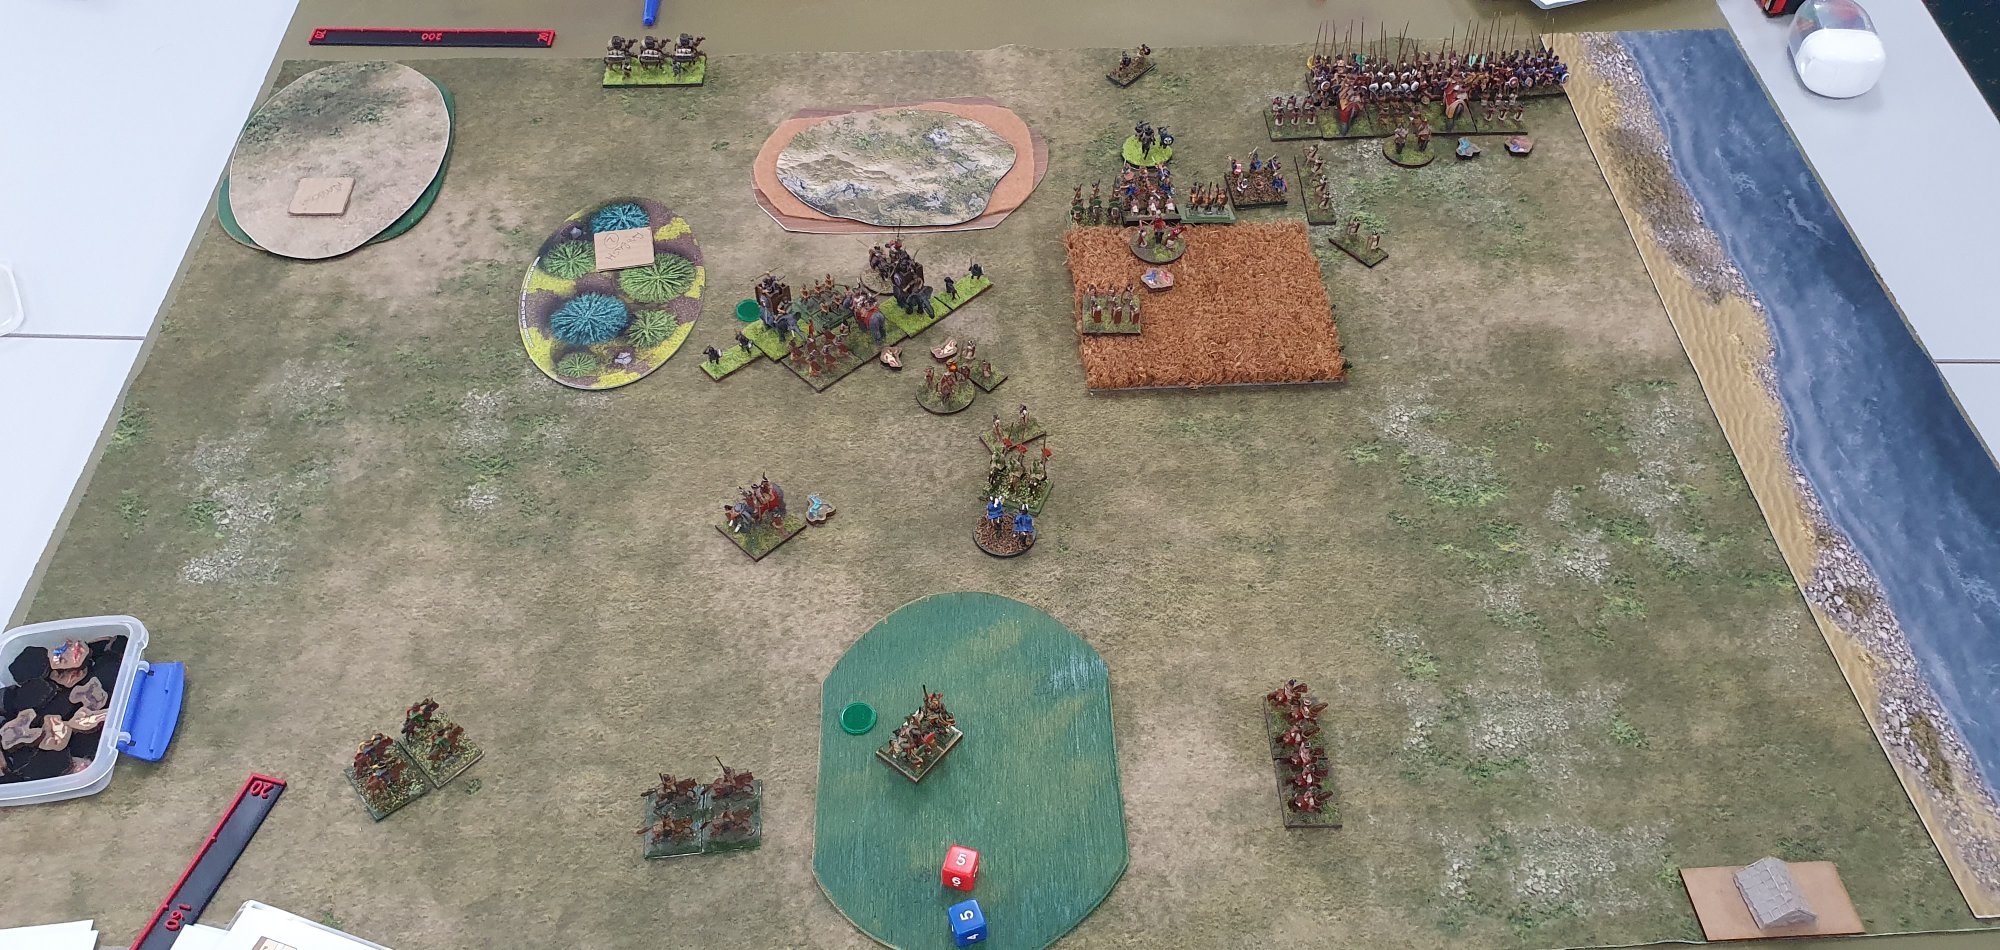
End of Alexandrian Turn Five
Alexandrian turn five saw the one Companion unit charge my horsemen, who evaded. The other Companion unit moved up past my elephant. The light horse bow moved up to ZOC my elephant and so protect the Companions (who being impact would not be allows to evade).
The enemy elephant corps charged my group. The match up was Elephant vs Indian guardsmen, Hypaspists MI against Indian Elephant, and Elephant vs mixed archers. The mixed archers were routed, but the other two matchups were draws.
Phillip pushed a light infantry unit in front of his pikes to shoot at my skirmish line.
In the battle just outside the brush I lost another two units.
End of Indian Turn Five
My elephant out in the open turned and charged the enemy light horse, which evaded. I expected that my unit in combat just outside the brush would not survive another round of combat so I moved back the mixed archers so as to shoot at the Companion HC. No hits from shooting, and the disrupted medium swordsmen actually drew the combat against he Thracians and their two supporting units.
My right flank battle line charged as a group against the enemy light infantry in front of the pikes and rolled long and got into combat with the pikes. I won two combats and lost two combats. My light infantry moved to threaten the enemy MI.
The game went into turn six, but I was totally outclassed and ended up losing by something like 25-7.