Jason and I had pre-arranged a historical match up, Carthaginians vs Numidians in North Africa in the period 202BC - 146BC. As such I could expect to face lots of skirmishing shooting in the form of light infantry, javelinmen, and light horse, with only 4 medium swordsmen and 2 elephants for the heavy hitting.
The troops with the best combat factors against such an army would be heavy infantry. However it is unlikely they would be able to catch the skirmishers. I expected that the enemy would want to come as far forward as quickly as they could to give them the maximum space to evade from my charges, and would fall back during the game. With so many light and medium infantry I could expect that the Numidian's preferred terrain would be mountains.
I also anticipated that as I would be facing a large number of units. This meant it would be better to run a largish army myself of slightly better units, rather than spend a lot of points on more expensive units. As such I decided against the Hannibal in Africa list.
I decided to run with 1 medium command, 1 heavy infantry command and 1 cavalry command. The medium command was a mixture of medium infantry and medium cavalry. As I didn't have as many stands of Gallic medium swordsmen painted as I would have liked, the command was reinforced with the medium cavalry (which left my cavalry command fairly light). To command this mixed medium command I used a brilliant general. My light infantry was all javelin rather than slings, as I wanted them to be capable against opposing elephants, and getting into a shooting fight with the Numidians would be playing to their strengths.
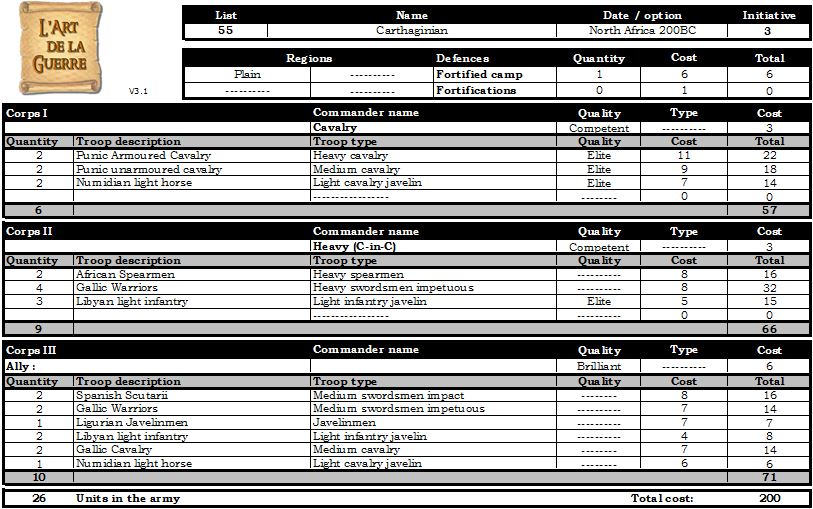
My Carthaginian list.
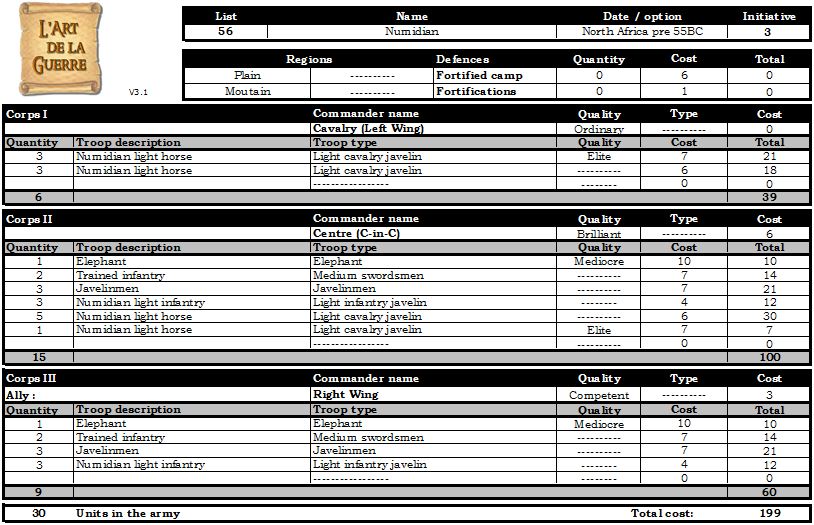
Jason's Numidian list, as far as I can remember it.
I won initiative and decided to attack in the plains. As I anticipated facing a larger army, I wanted to reduce the width of the battle field and so rolled for a coastal region (which was successful).
Jason took a hill with a plantation on top of it, and two fields. In addition to my coast I took another plantation. When adjusting terrain my only successful roll was adjusting the plantation in my deployment zone. I moved it to the board edge (previously it was against the hill) so that I could ignore it. In hindsight I should have left room for my camp between the coastal zone and the plantation.
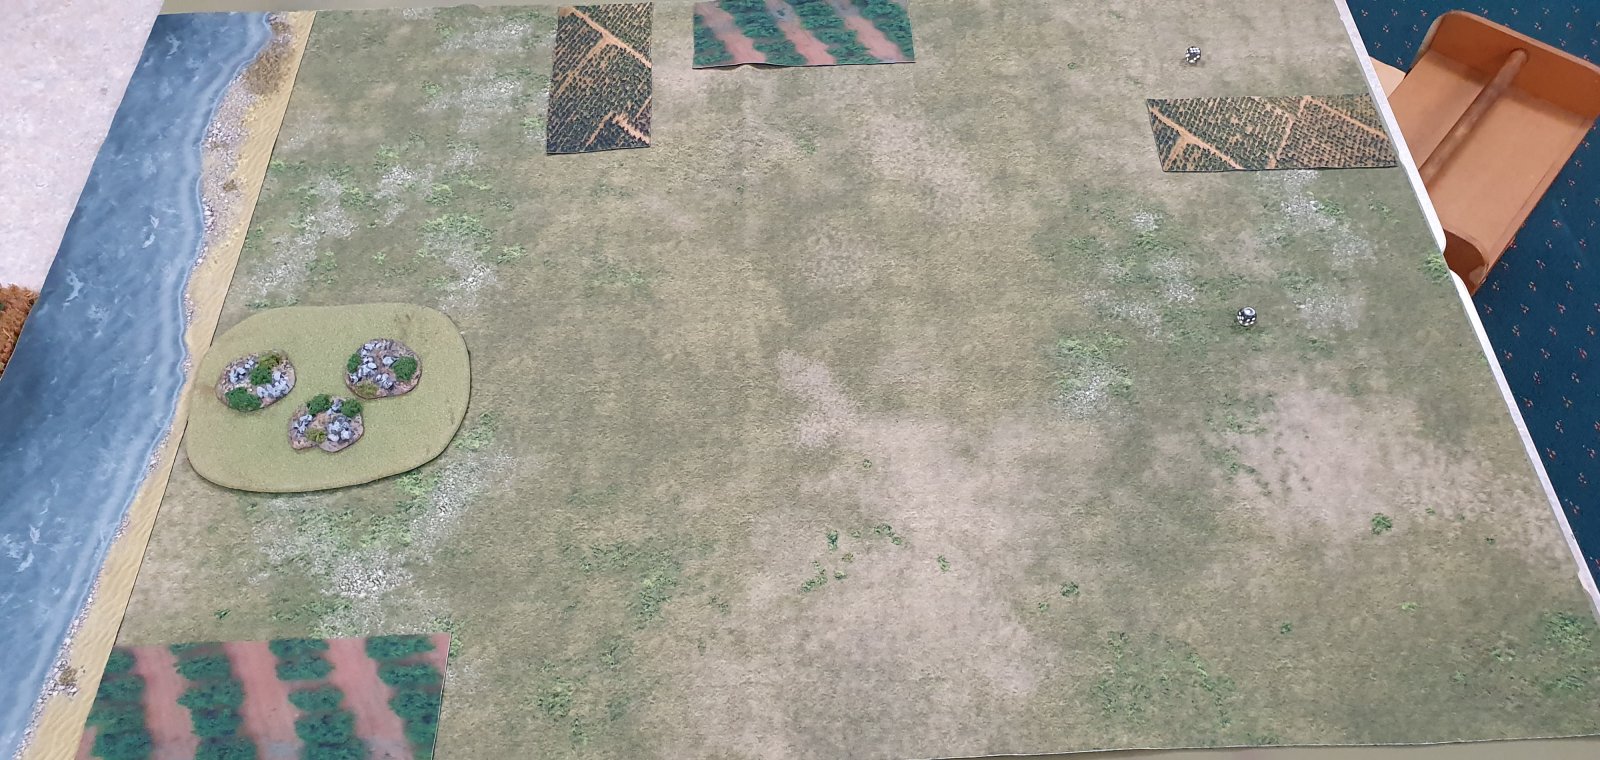
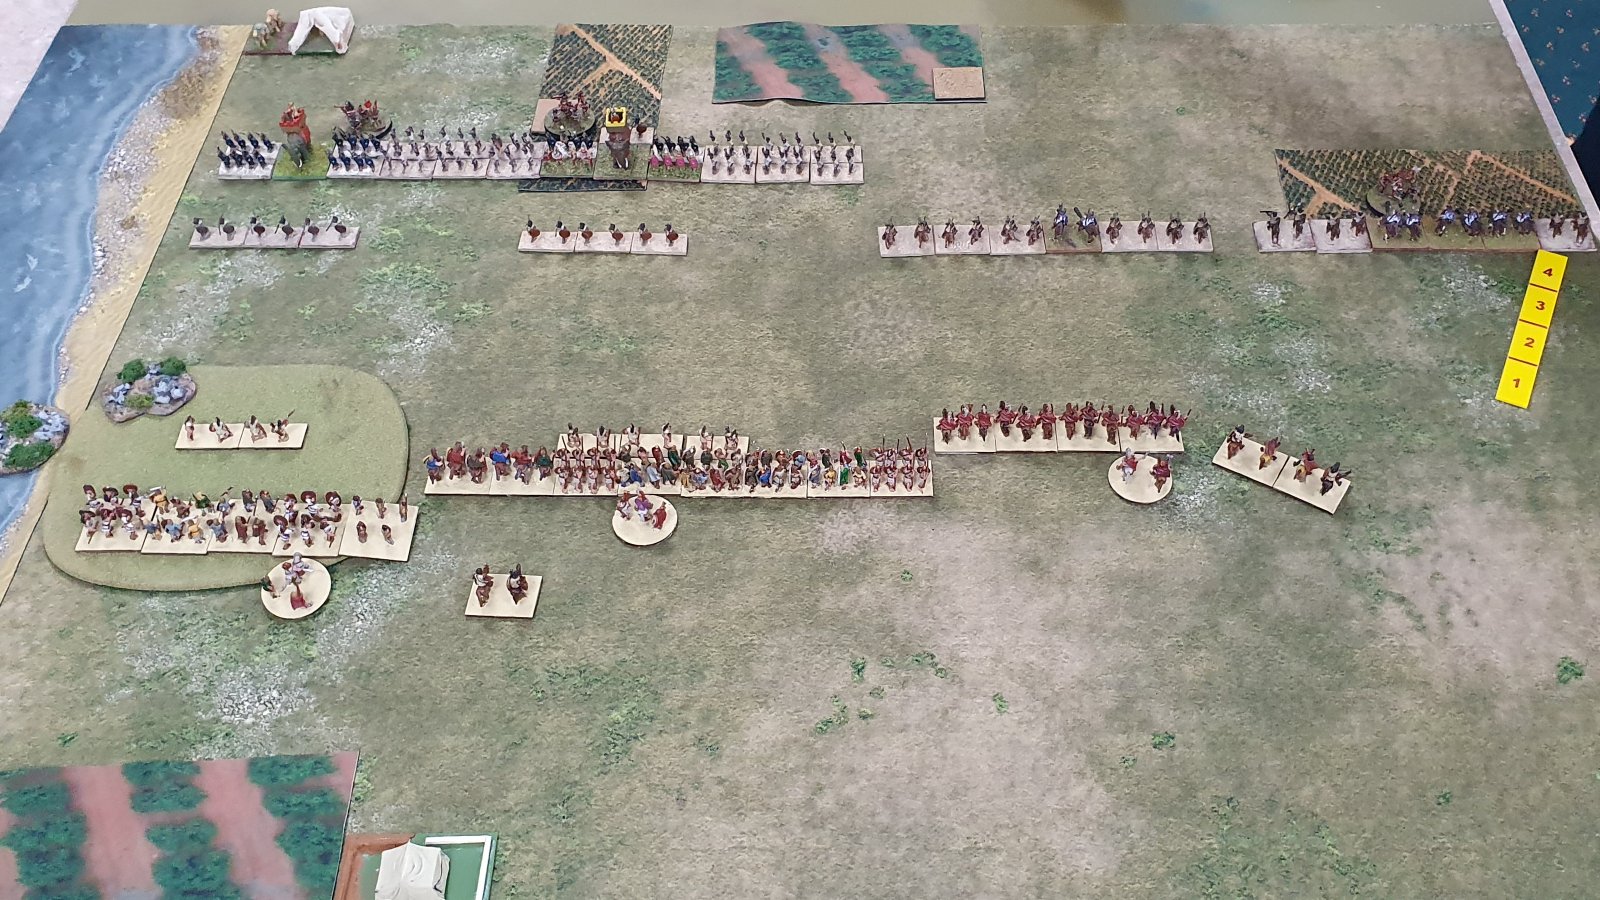
Final terrain placement
The Numidians deployed their light horse corps first. I responded with my medium corps against the coast. This was a mistake - I should have put my cavalry wing out first so that I could see where his elephants were going to be. Jason's second deployment was his coastal corps, and I responded with my cavalry corps. He then deployed his final corps in the centre of his line and I responded in kind.
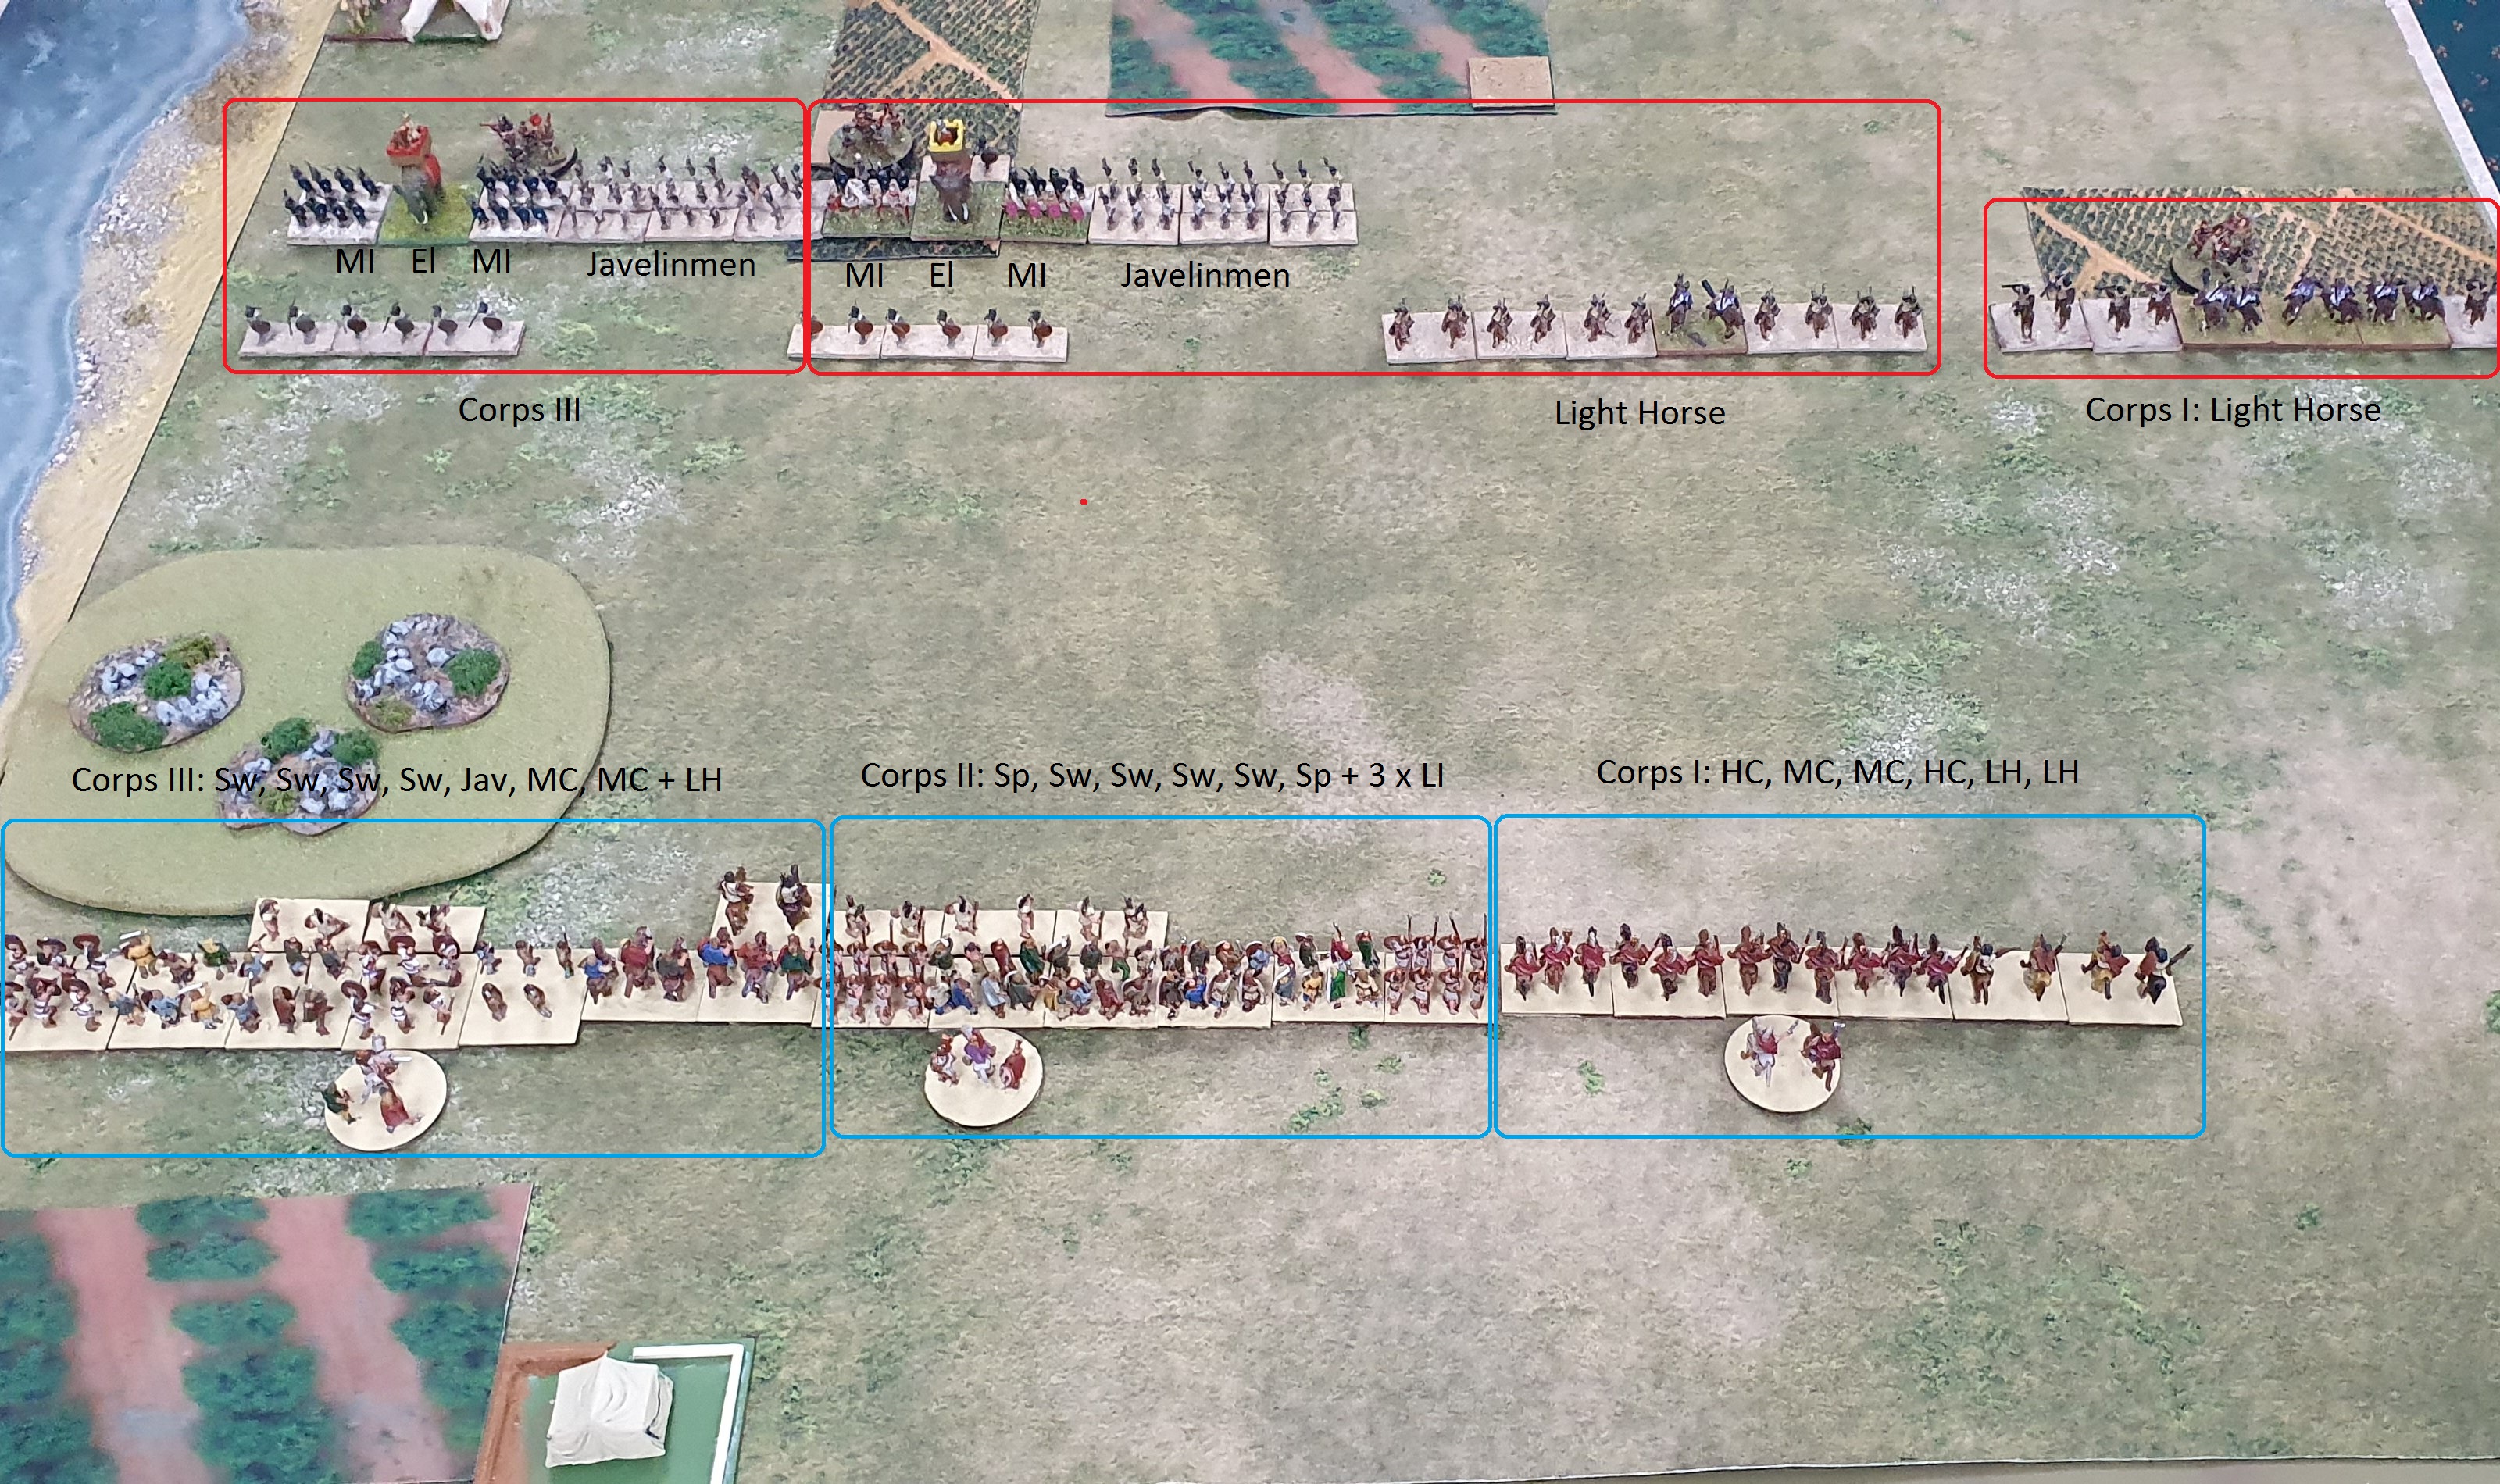
Initial deployment
I was frustrated with the deployment of my medium corps is that I really wanted the Javelinmen aligned with the elephant. However I had to settle for my initial alignment as it would take too many command pips and turns to fix the deployment, and I wanted to get into combat as soon as possible.
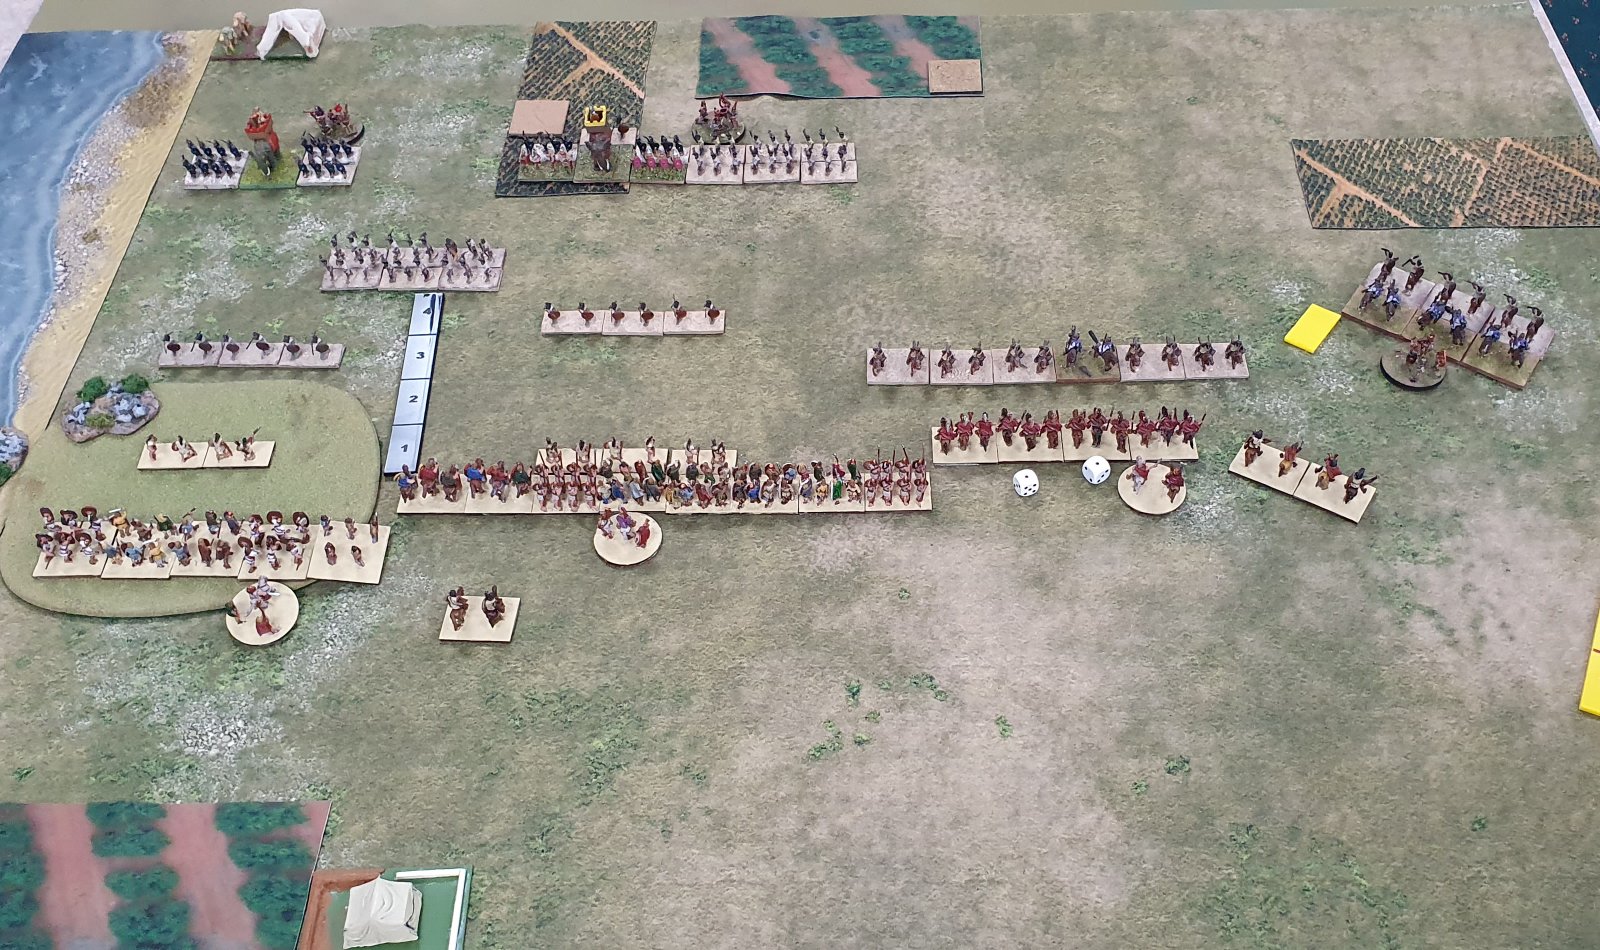
End of Carthaginian Turn One
In my first turn I moved the HI corps twice, to move a total of about 3 UD. I moved the cavalry corps once, moving about 4 UD. The medium corps had the light infantry move the full distance but the mediums moved short. I also moved up the medium cavalry through the light horse. The LH didn't get to move for the rest of the game due to lack of command pips.
End of Numidian Turn One
In their turn one, the Numidians moved up their light infantry, javelinmen and light horse. My two medium cavalry each took a hit from shooting.

In my turn two the medium/heavy cavalry charged the body of Numidian Light Horse facing them, and the 5 in the charge arc evaded. I moved my light horse up to protect the flank of my cavalry. The central command used a unit of spears to charge the remaining light horse in front of it, which evaded and my spearmen rolled short. My central light infantry charged the Numidian light infantry, which evaded. On my left flank the medium infantry moved through my light infantry to threaten his, staying just out of javelin range. The Gallic medium cavalry moved up to align with them, and I had no command pips left for the light horse.
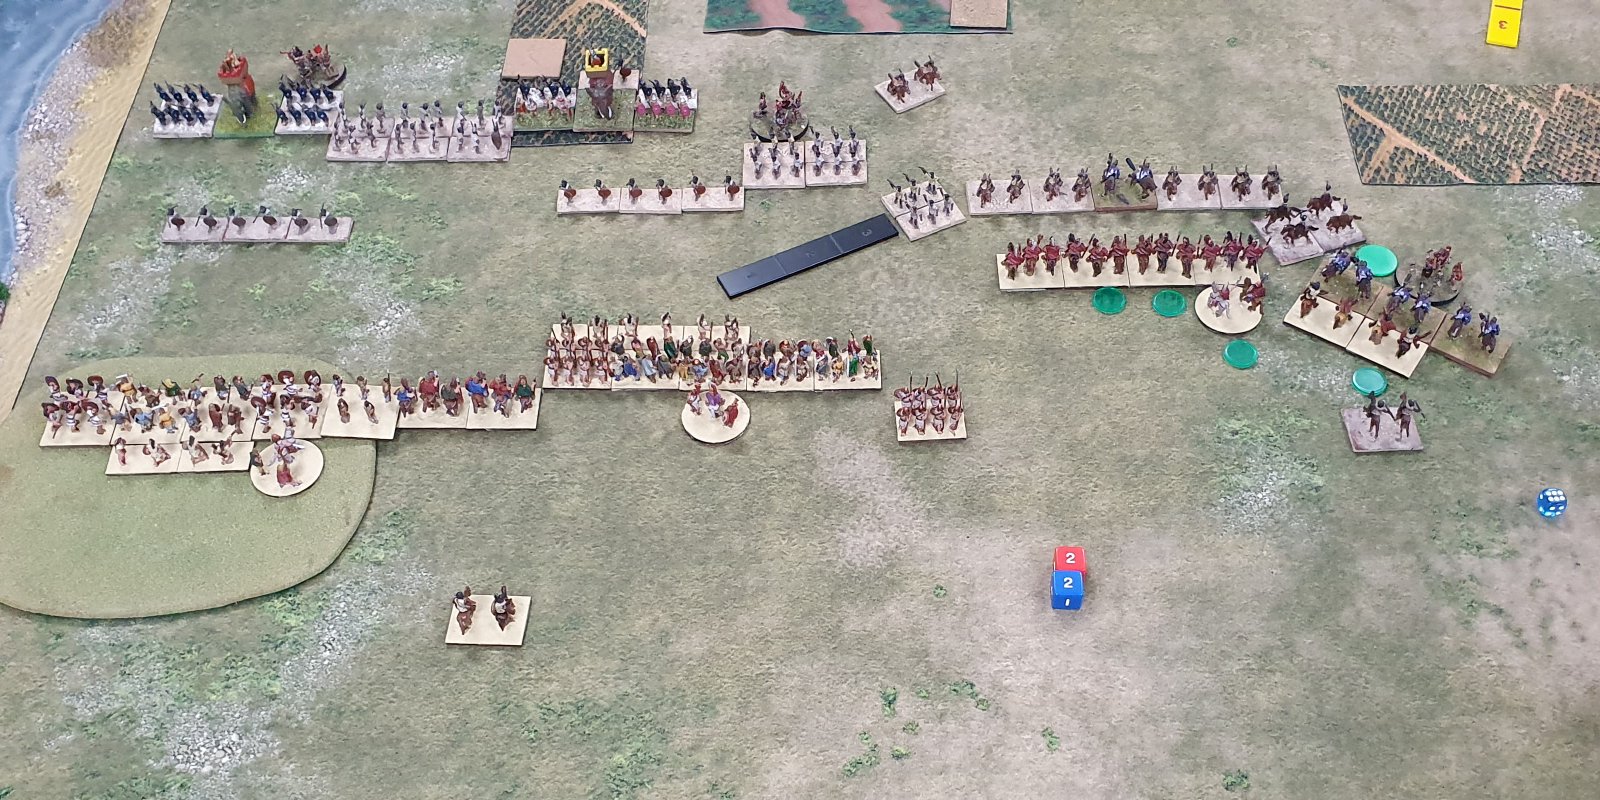
End of Numidian Turn Two
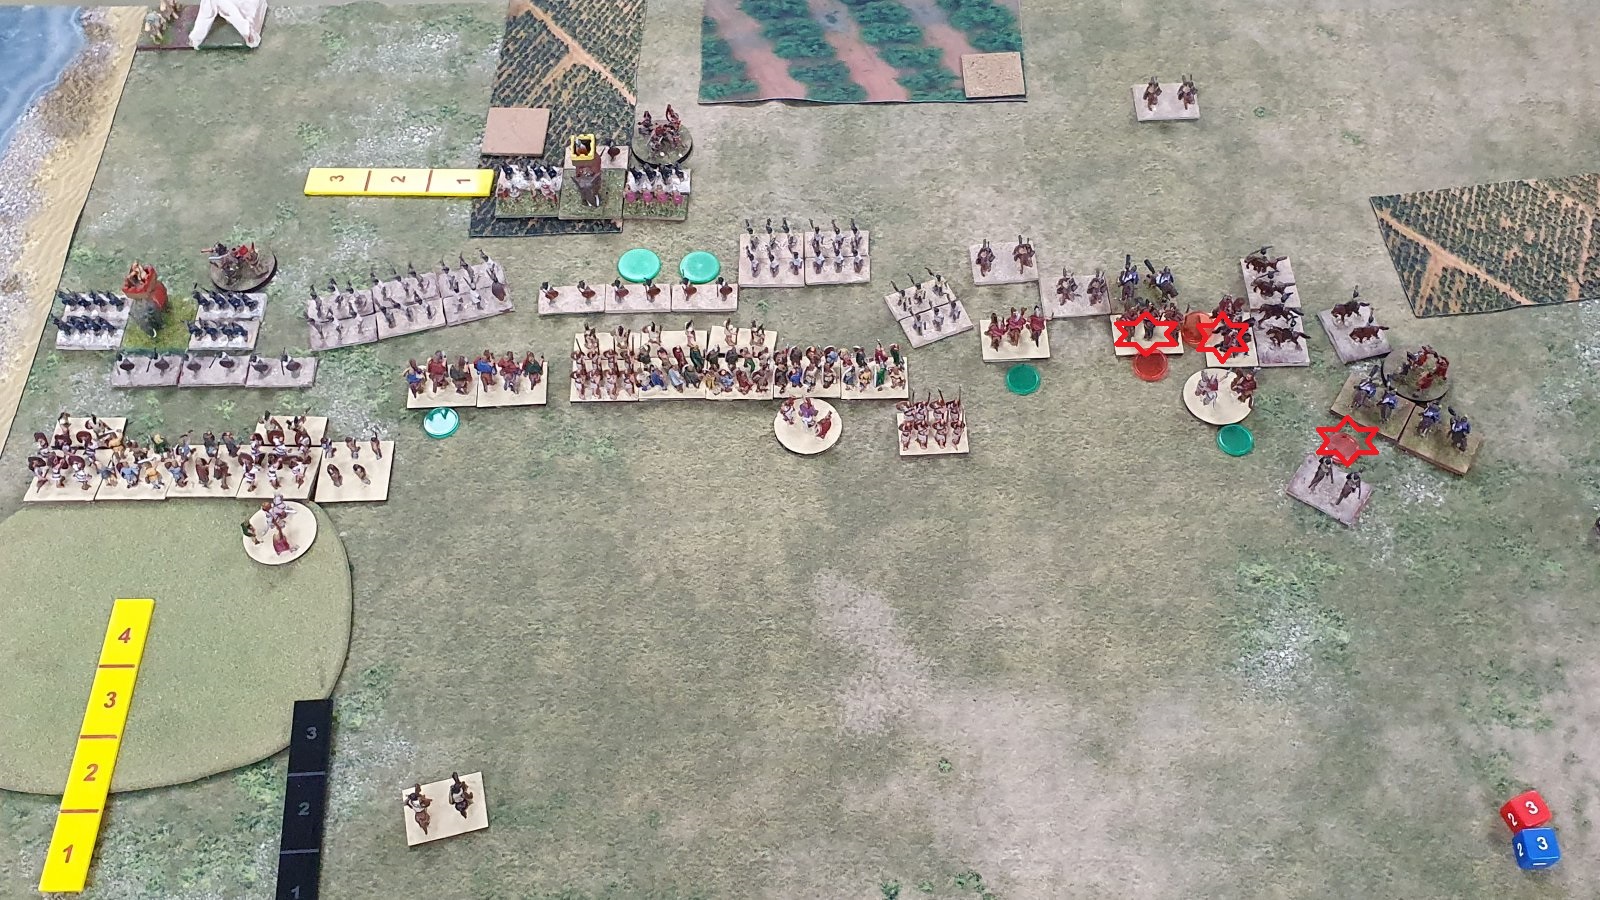
The skirmishers on the Numidian right flank fell back. The skirmishers in the Numdian centre moved forward, with one unit of javelinmen moving to throw javelins at my heavy cavalry (which took no damage). His light horse moved back up and my other heavy cavalry unit took a hit from the combined shooting of 4 light horse. Jason cleverly manoeuvred a unit of light horse behind my LH flank guard, and then charged in with three against my two. He put his general into the combat. Both sides took one hit.
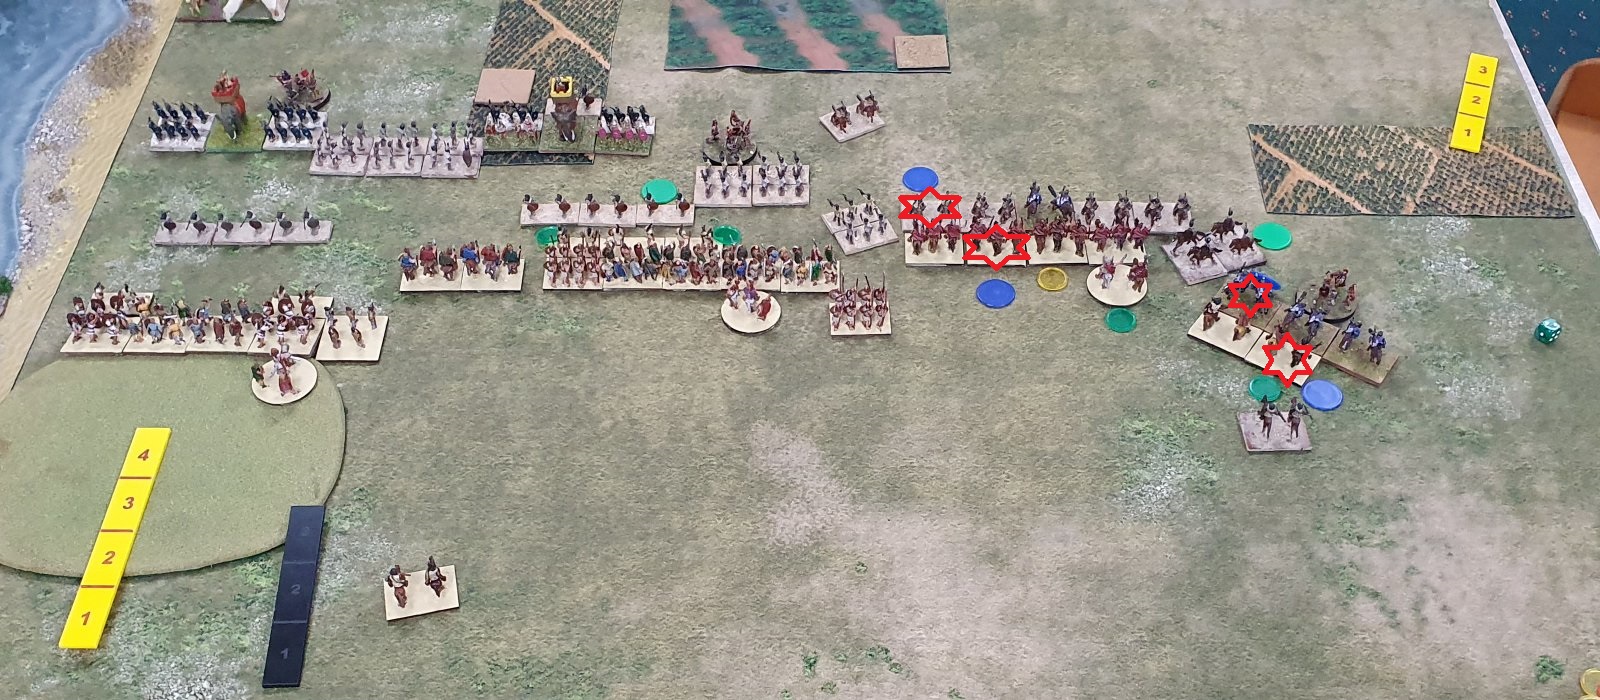
End of Carthagian Turn Three
In my turn three I charged with my cavalry and moved up both my left and centre commands. I had to get to grips with the enemy before I took took much shooting. In the battle of our skirmishers in the centre, two of my units took shooting hits and one of his took a hit. Note that my heavies slid right slightly to ZOC the javelinmen on the flank of my cavalry.
In the cavalry battle I destroyed two light horse for the loss on one light
horse and one medium cavalry. The cavalry battle was not going well.
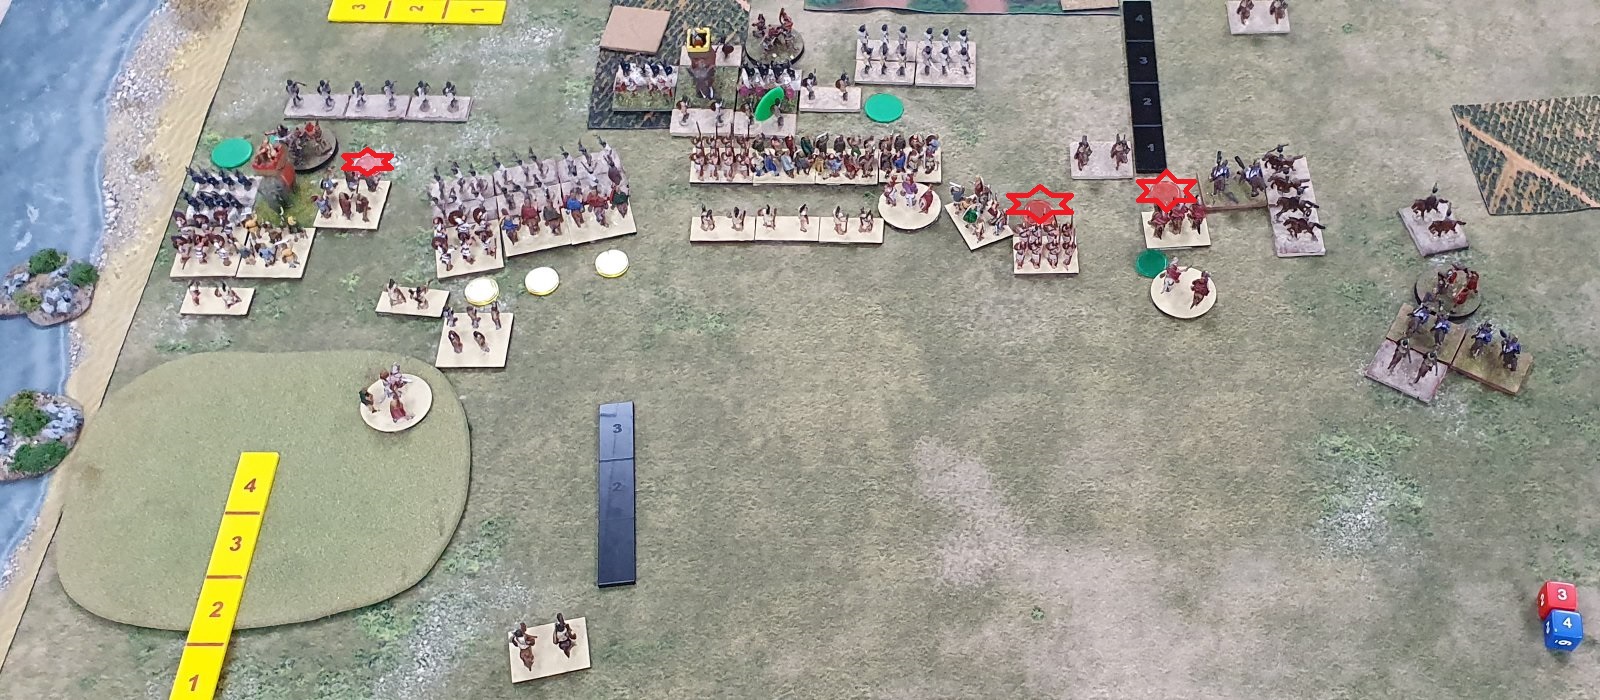
In Jason's turn three, the Numidian right flank advanced and did a shooting hit on the Gallic cavalry. In the main cavalry battle Jason did a couple of clever moves. He disengaged the LH facing the front of my right most cavalry unit, and then hit it in the flank. When my unit died, it had to orient to face the flank attack (as shown in the photo above). Thus when it routed my adjacent cavalry unit also took a hit (which was enough to take it out too). My last light horse died in the battle on my flank.
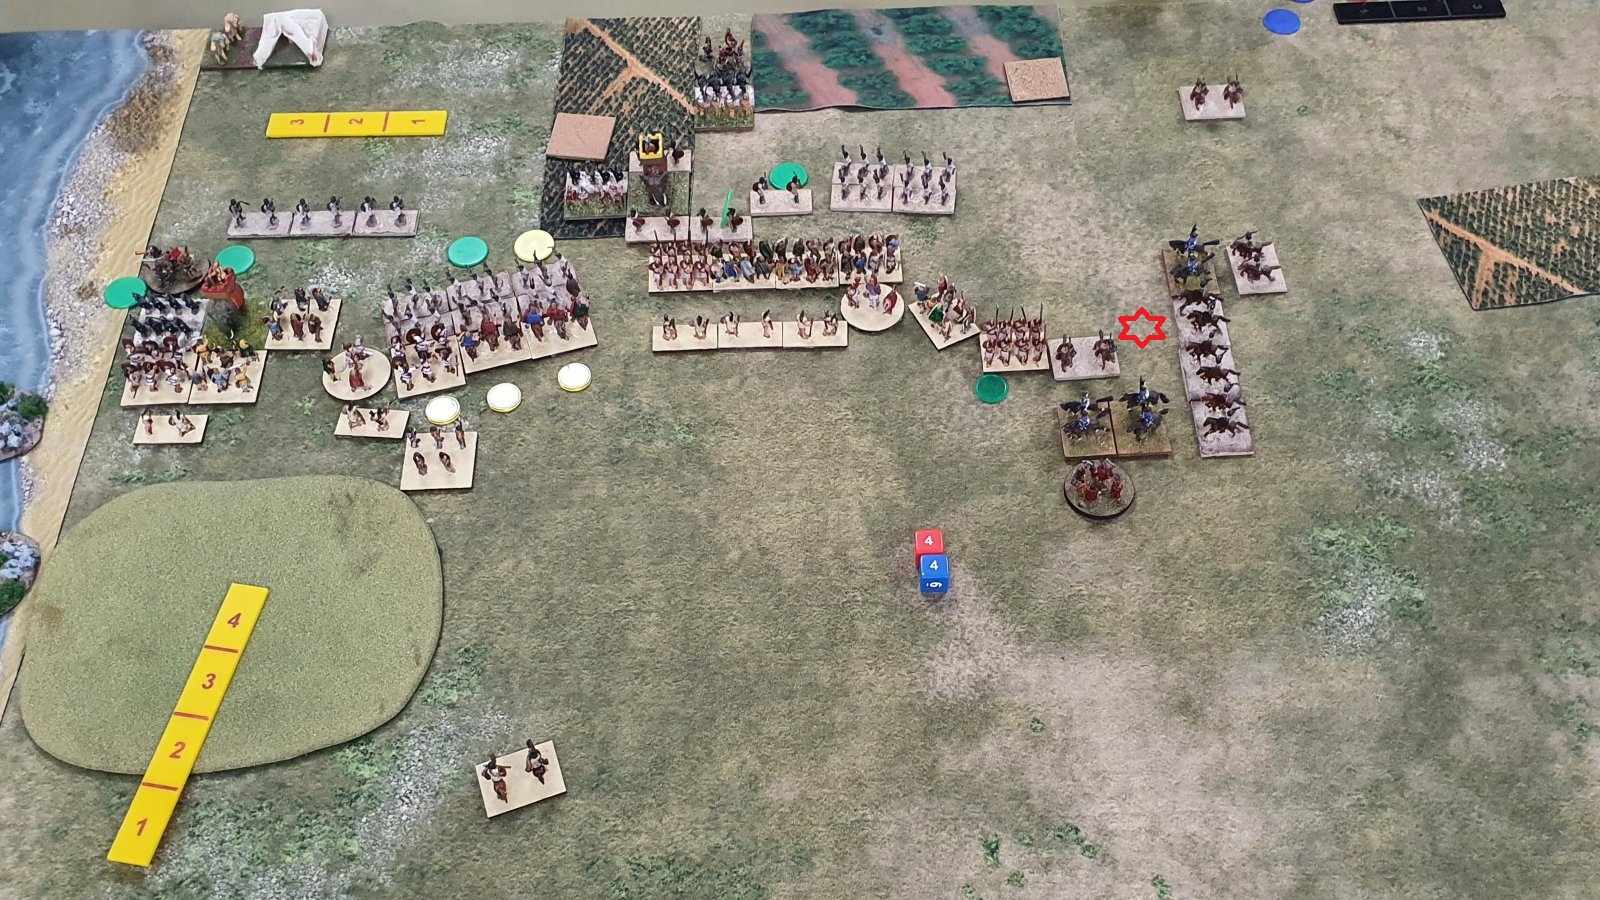
In my turn four I launched an all out attack from my infantry. Against the units on my left flank I rolled 3 sixes and won my combats, destroying one unit of medium infantry. However the next three combats I rolled low and lost all three. In the centre I charged my heavy infantry in against his light foot and Javelinmen, which must have evaded.
On the right side of my centre command I was able to charge his javelinmen in
the flank with my Gauls (he had no room to evade) and then the charged the front
of the same unit with my
spearmen (which couldn't conform due to lack of space). This removed the
ZOC on my remaining cavalry unit, which conformed to his light horse and took it
out. The general took part in the combat as it was the last unit in his
command.
In his turn four, Jason slipped a light horse behind my last Punic cavalry unit and charged it in the flank to kill it. He retreated one of his units of swordsmen in the centre.


In the Numidian turn five there was a bit more shooting. In the combat phase I destroyed an elephant and another unit of Javelinmen, but lost a Gallic cavalry unit and also my light infantry died to the other elephant.
The Gallic HI got into combat in my turn six. I was very close to breaking with 24 losses out of 26, whilst I had inflicted 26 out of 30.
The end of Numidian turn 6, the Carthaginians broke with 26 losses to the Numidian's 29 out of 30. However Jason declared it a draw.
It must be remembered that the Numidians pre 55BC are a weak list, but it was still pleasing to do well. It was satisfying to get nearly all my units into combat, and also to kill so many enemy stands. However, having two large armies meant that the game went for about 4 hours of playing time to get a result by the end of turn six.
It was a master class to see Jason destroy my cavalry wing with his light horse. Conventional wisdom is that if my cavalry is outmatched I should keep it near my supporting infantry, but if I hadn't charged his light horse they would have just kept shooting at me. I will have to ponder this further.
I felt that I manoeuvred my forces appropriately during the game, especially using ZOCs and the way I handled the battle on my left flank. I did make a mistake in deploying my left flank first. If I had done the cavalry first I could have matched up Impact, Javelinmen, Impact vs his MI, El, MI and had advantageous match ups.
Having impetuous medium infantry, medium cavalry and light horse all in one command meant that I didn't have enough pips for the light horse even though the command had a brilliant general. Perhaps I should have have concentrated all my cavalry in one command. However if I didn't get the coastal zone it would have left me with an exposed flank.
In the cavalry battle, it worked out that 8 LH (49 pts) could take out my 2 HC + 2 MC (40 pts). I would have thought that my heavier cavalry would have been more resilient. I may consider using more LH in the future.
In this game I was able to use my light infantry aggressively. After reading the "Julian guide to ADLGv3" I have to reducing my use of light troops. I will need to consider whether my successful use of the LI in this game was just because of the match up, or if I can make more general use of them.