When Jason and I arranged the game ahead of time I knew that I was facing some sort of Successor army, so I assumed that I would be probably facing pikes and strike cavalry. Both my infantry and cavalry would be out classed but I should have superior numbers and overlaps.
When I wrote my list my plan was to have a cavalry command on one flank, a strong elephant based command in the centre and the HI spears coming up more slowly on the other flank where the spears should see off the enemy cavalry.
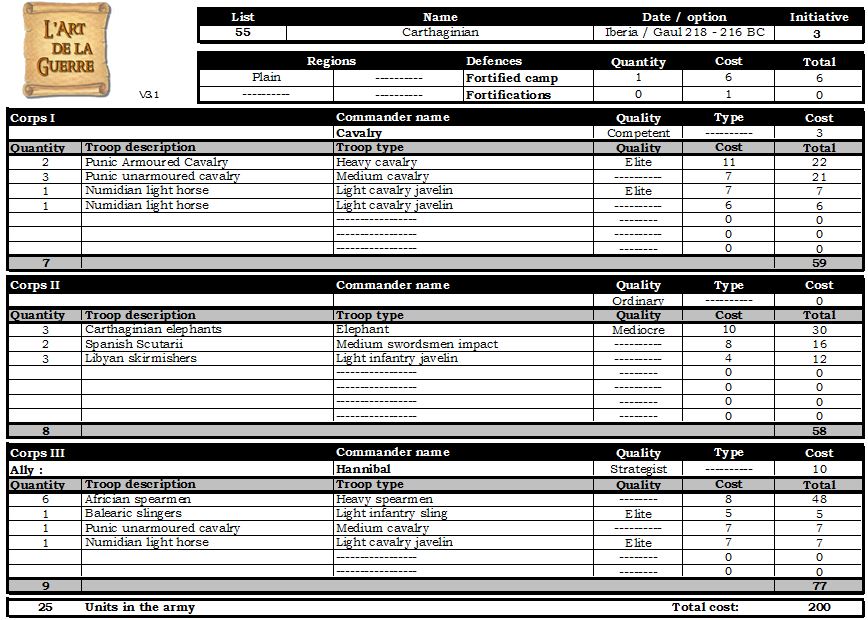
My Carthaginian list used all the "non-light" models that I have painted.
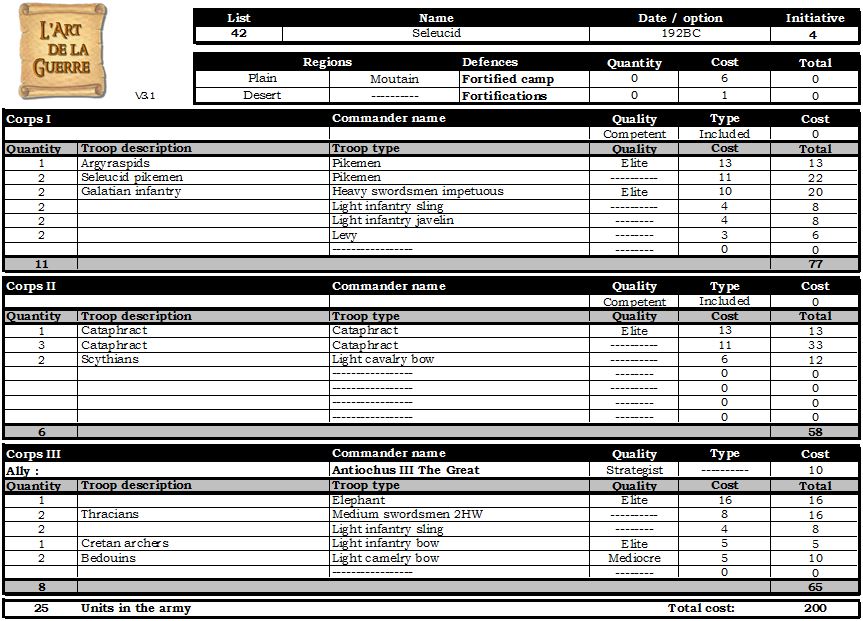
Jason's list is one that he was trialling for Cancon
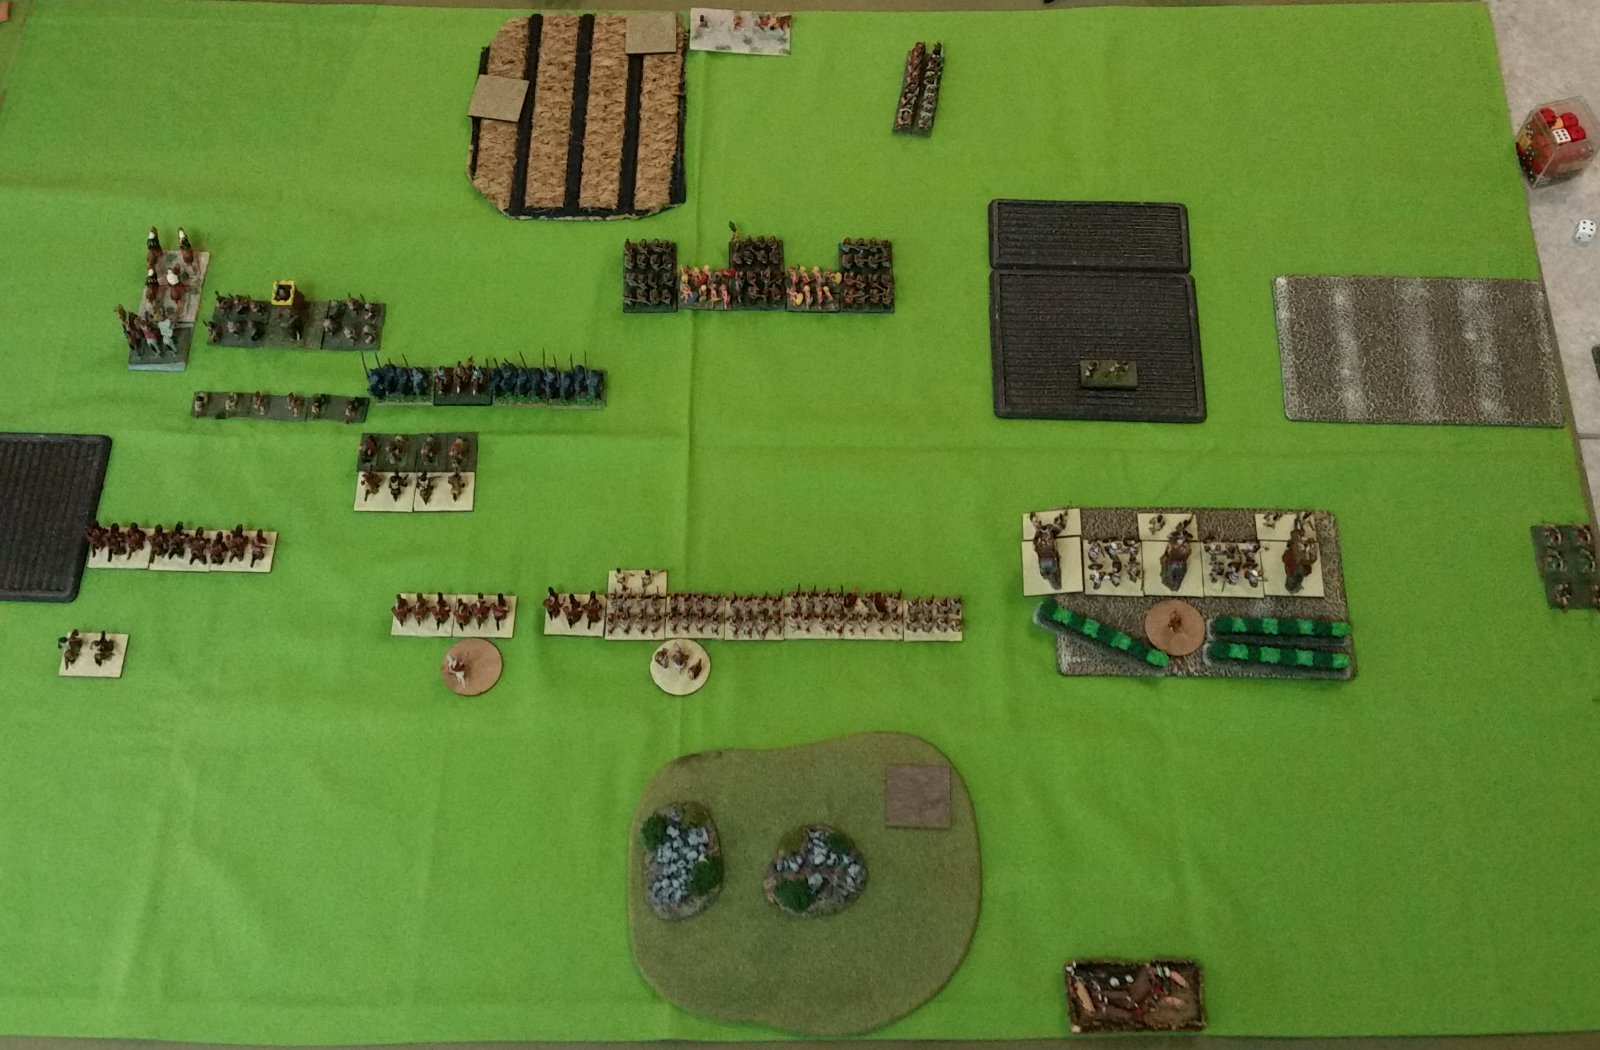
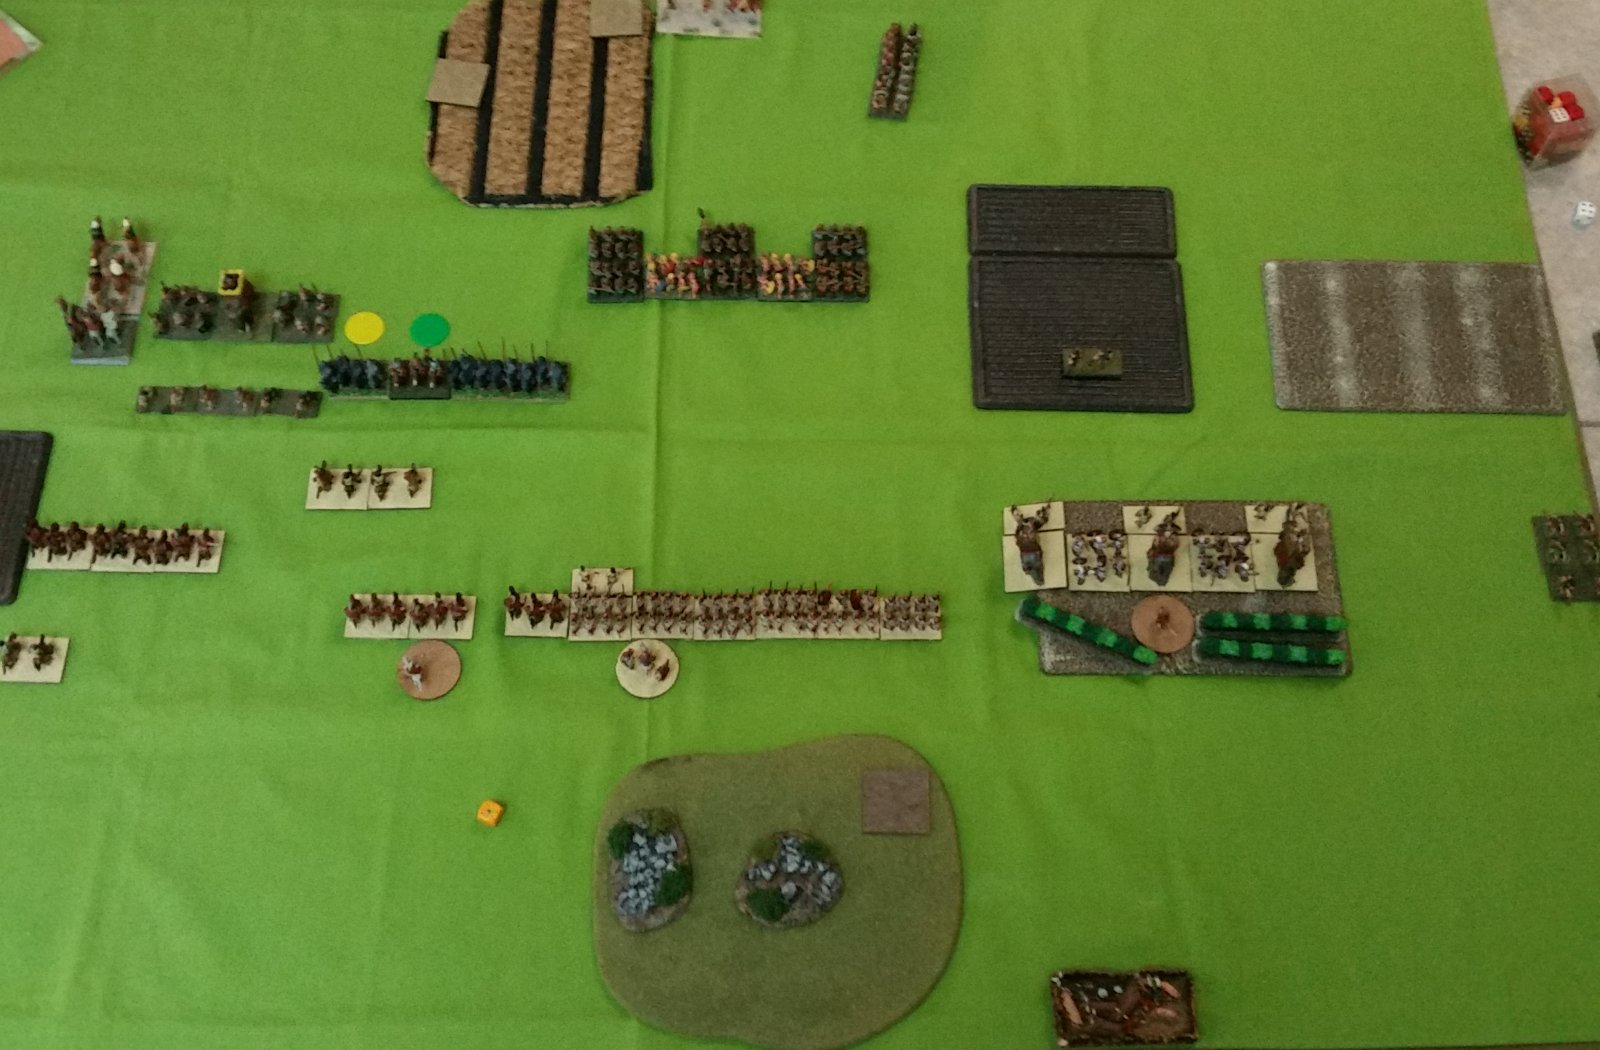
After two ties for initiative, on the third roll off Jason won and decided to attack. The resulting terrain was mainly on my right flank, so I decided to put the elephant command on the right flank and the HI spears in the centre. Note that we did not exchange lists before the game, and only nominated units as we deployed them.
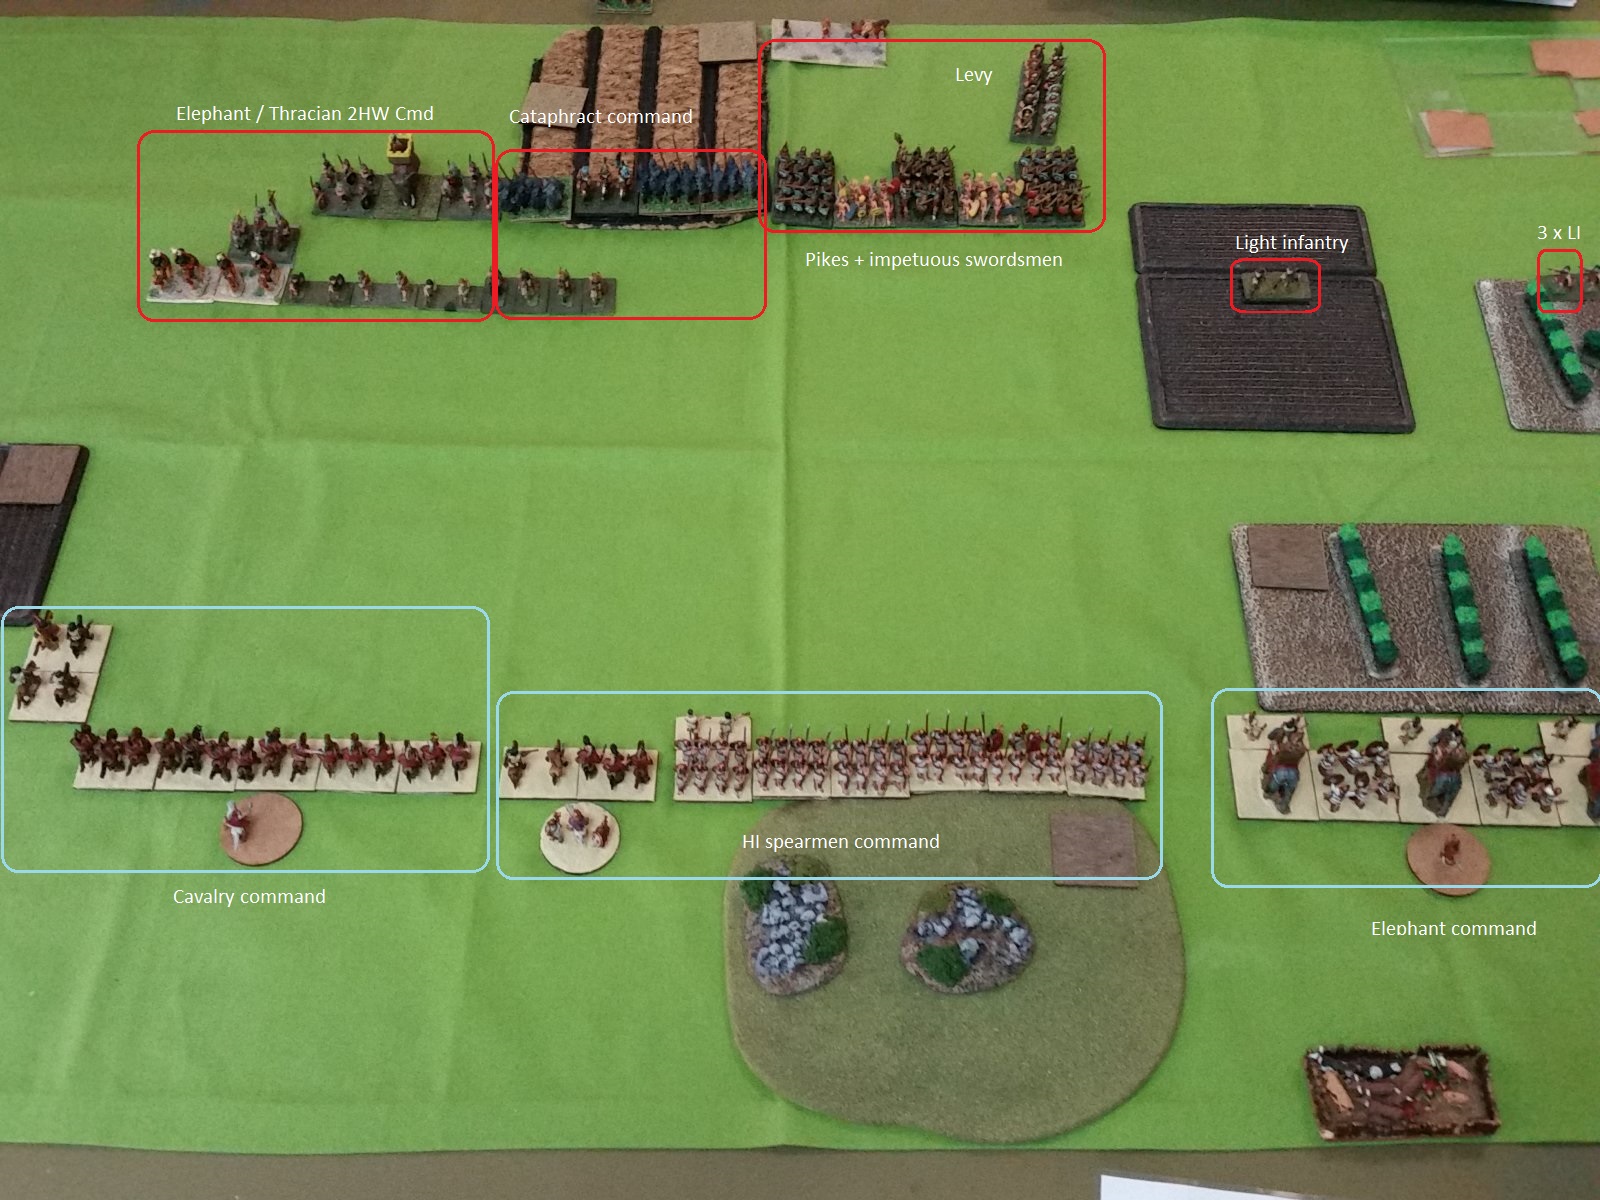
I had to deploy first and so placed the elephant command on my right flank. Jason responded by putting his elephant command on his right flank. I put my spearmen in the centre, and he responded with pikes opposite, with a few light infantry on his left flank. My last deployment was my cavalry command on the left flank (opposite his elephant and camels) and Jason's cataphracts then filled the gap between his other two commands, aligned with the elephant command and a small gap between it and the pikes.
Deployment of the two armies
The majority of the Seleucid force was thus facing off against my cavalry and spearmen, with the elephant command only having 4 LI opposing it.
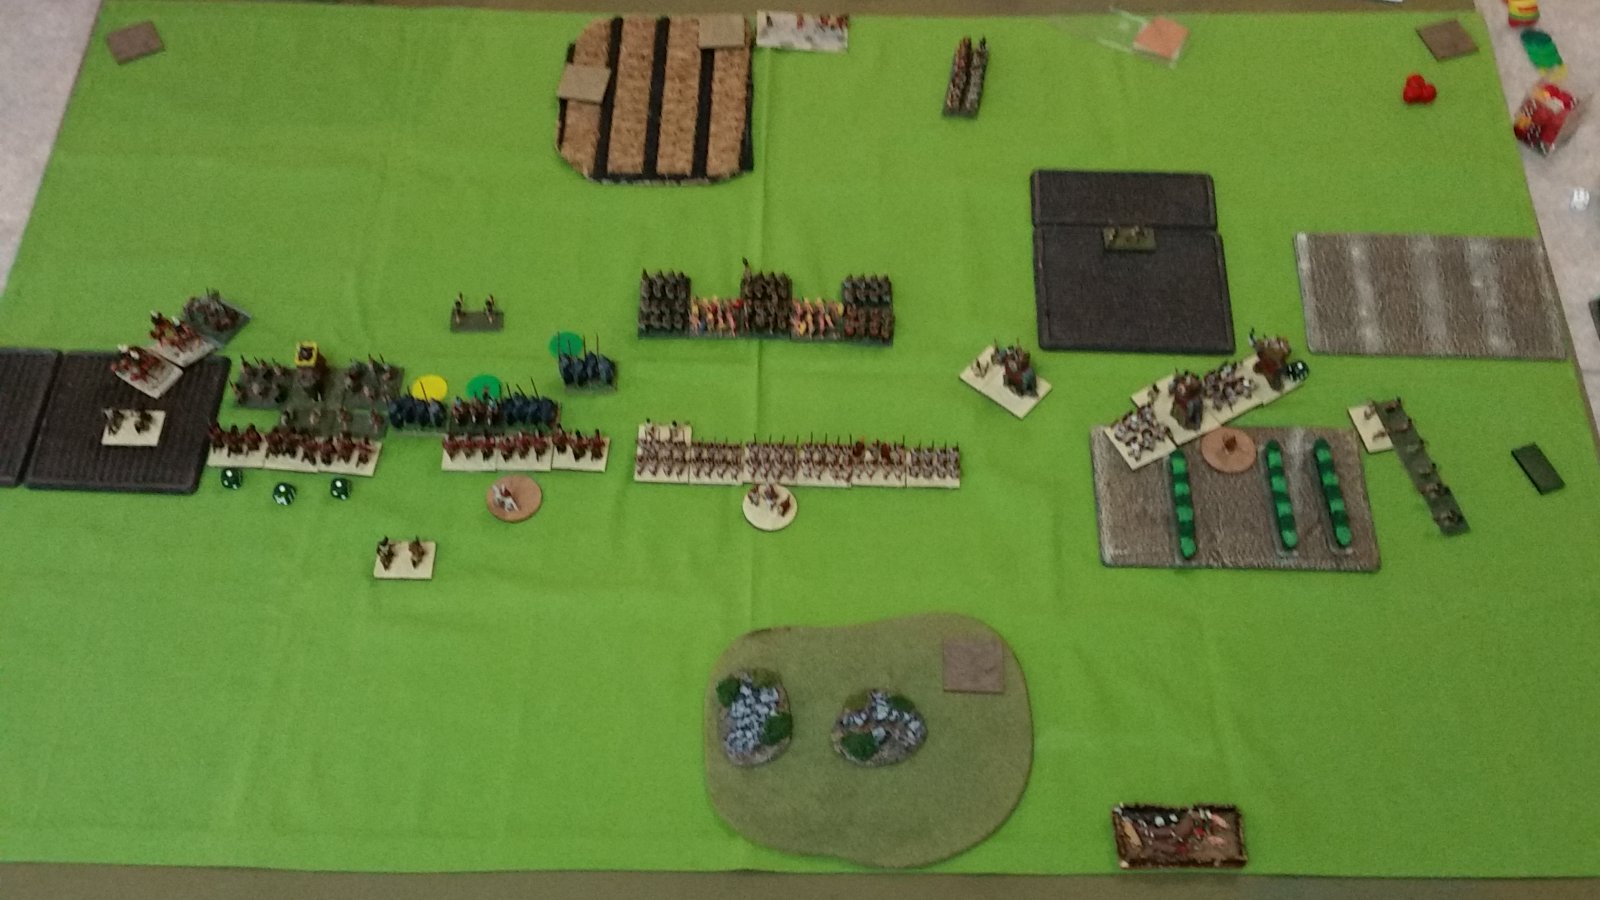
The first turn had us both moving forward aggressively. The Seleucids had the first turn and nearly the entire army moved its maximum distance forward. I was able to do a first turn charge against his light cavalry bow with my elite light cavalry javelin (one from each command), and also moved the rest of my army forward.
After Carthaginian Turn One Movement
The Seleucid light cavalry were routed and caused a total of 3 hits on the cataphracts behind them as they weren't exactly aligned. This was probably the high point of the game for me.
End of Turn One after combat resolution
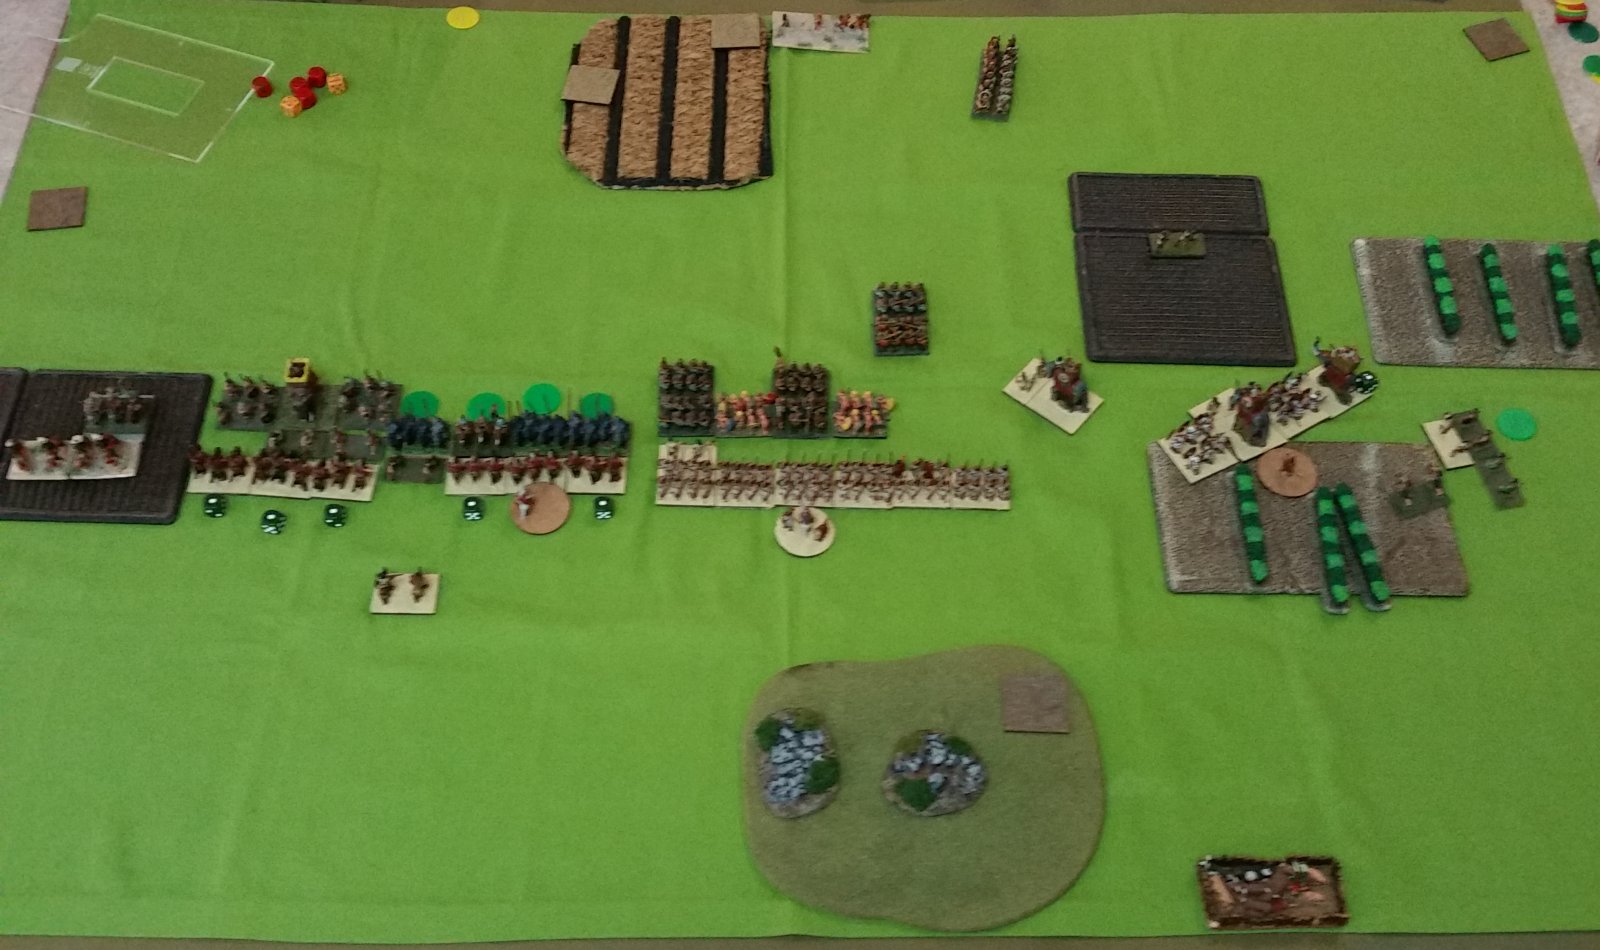
The Seleucids started turn two with three of the cataphracts charging my light cavalry, which evaded. The Seleucid elephant command and pike block both moved up, whilst their light infantry tried to work around the flank of the Carthaginian elephants.
As the cataphracts were in charge range after their failed charge, they were in charge range of my cavalry. In my turn two the two heavy cavalry charged in and were supported by the medium cavalry attached to the HI spearmen. The medium cavalry from the cavalry command ended up in front of his light infantry screening his elephant and 2HCW command. I did not want to charge in against the elephant, but also did not want to fall back and expose the flank of my heavy cavalry.
My elephant command was still working its way towards the action. In turn two I moved the left most elephant separate from the group to try and get into the action sooner. Also one LI stand had been ZOC'ed by the enemy LI so I charged them into contact.
After Carthaginian Turn Two movement
The enemy LI in front of my unit continued to shoot at my flank elephant (whose screening LI had moved off to charge the flank LI) which eventually died to shooting.
Jason rallied a hit of the supporting cataphract unit and also charged the remaining cataphract unit into my supporting MC unit. There followed a grind where my cavalry lasted for some time but over time the cataphract's extra heavy armour and overlap support ground them down my cavalry.
After Seleucid Turn Three
My Numidian light cavalry charged the mediocre Bedouin light camels in the fields. Despite a superior rating of the Carthaginian light horse and javelins vs bows, the Seleucid general joined in the fight and the camels defeated the Numidians.
Eventually the Seleucid elephant command charged my MC, which by that time were unable to evade because the Bedouin light camels had got around behind them. Also his pikes made contact with my spearmen. I had a single overlap with the spearmen but eventually the superiority of the pikes told and I started to use HI. I did successfully engage the pike unit that held back, but even after being engaged to the front and an elephant rear charge it was still hanging it when my army broke due to the losses in my cavalry.
I had lost two light horse against the camels, three medium cavalry against the elephant command, two of the cavalry against the cataphracts, one elephant and one light infantry unit and a couple of HI spears. Eleven units dead and others injured, my army broke.
The first lesson was before even the first model was placed, in that I didn't place my commands where I had originally intended. This left my elephant command without any flank guard. Not a big issue, but I did lose an elephant to some pesky LI.
Placing the elephant command first on my right flank gave Jason the opportunity to use a refused flank strategy against me. It also revealed the placement of my hammer unit. I should have deployed the spearmen in the centre first.
Be very careful of having fragile units 1 UD in front of other units, and if I do this make sure they are aligned. One cataphract stand had two light horse route through it and so took two hits.
Jason was very good at getting LI and LC behind my units so I couldn't flee. Most of the time I wouldn't have fled anyway, but it was an instructive lesson in the use of these units. Perhaps having the commands butted up against each other would have stopped this.
The elite HC was surprisingly resilient against the cataphracts. Their armour didn't count so it must have been their elite status. With respect to cavalry vs cataphracts, both MC and HC have the same combat factors so maybe I should have been more eager to get my MC engaged with them.
The spearmen held up quite well against the pikes. They were losing overall, but they were hanging around. I just needed to get that flank charge in earlier. It might have helped if I had got my elephant command aligned with the HI (there was about 1 UD gap), which meant that they had 1 UD further to get where they were needed.
In the after game briefing Jason suggested that I should have deployed my HI spears first in the centre, and held back both the spears and the cavalry whilst getting the elephant command into position.
If I had held back the spears whilst moving the elephants up this could have meant that the elephants would be fighting in the plantation (-2 modifier) near my lines, which would have been a problem. I wasn't worried about it because I intended to aggressively move up, but if I had held back it would have been a problem.
I should have a terrain plan before I start the game so I know what suits my forces (Elephants like brush/fields). Also I had assumed that my Carthaginians would operate better in terrain than the Seleucids, but in practice we pretty much matched on that point. I should have placed terrain so as to suit my army rather than trying to disrupt an enemy force whose composition I didn't know.