Alexander the Great vs Feudal Spanish
Pregame
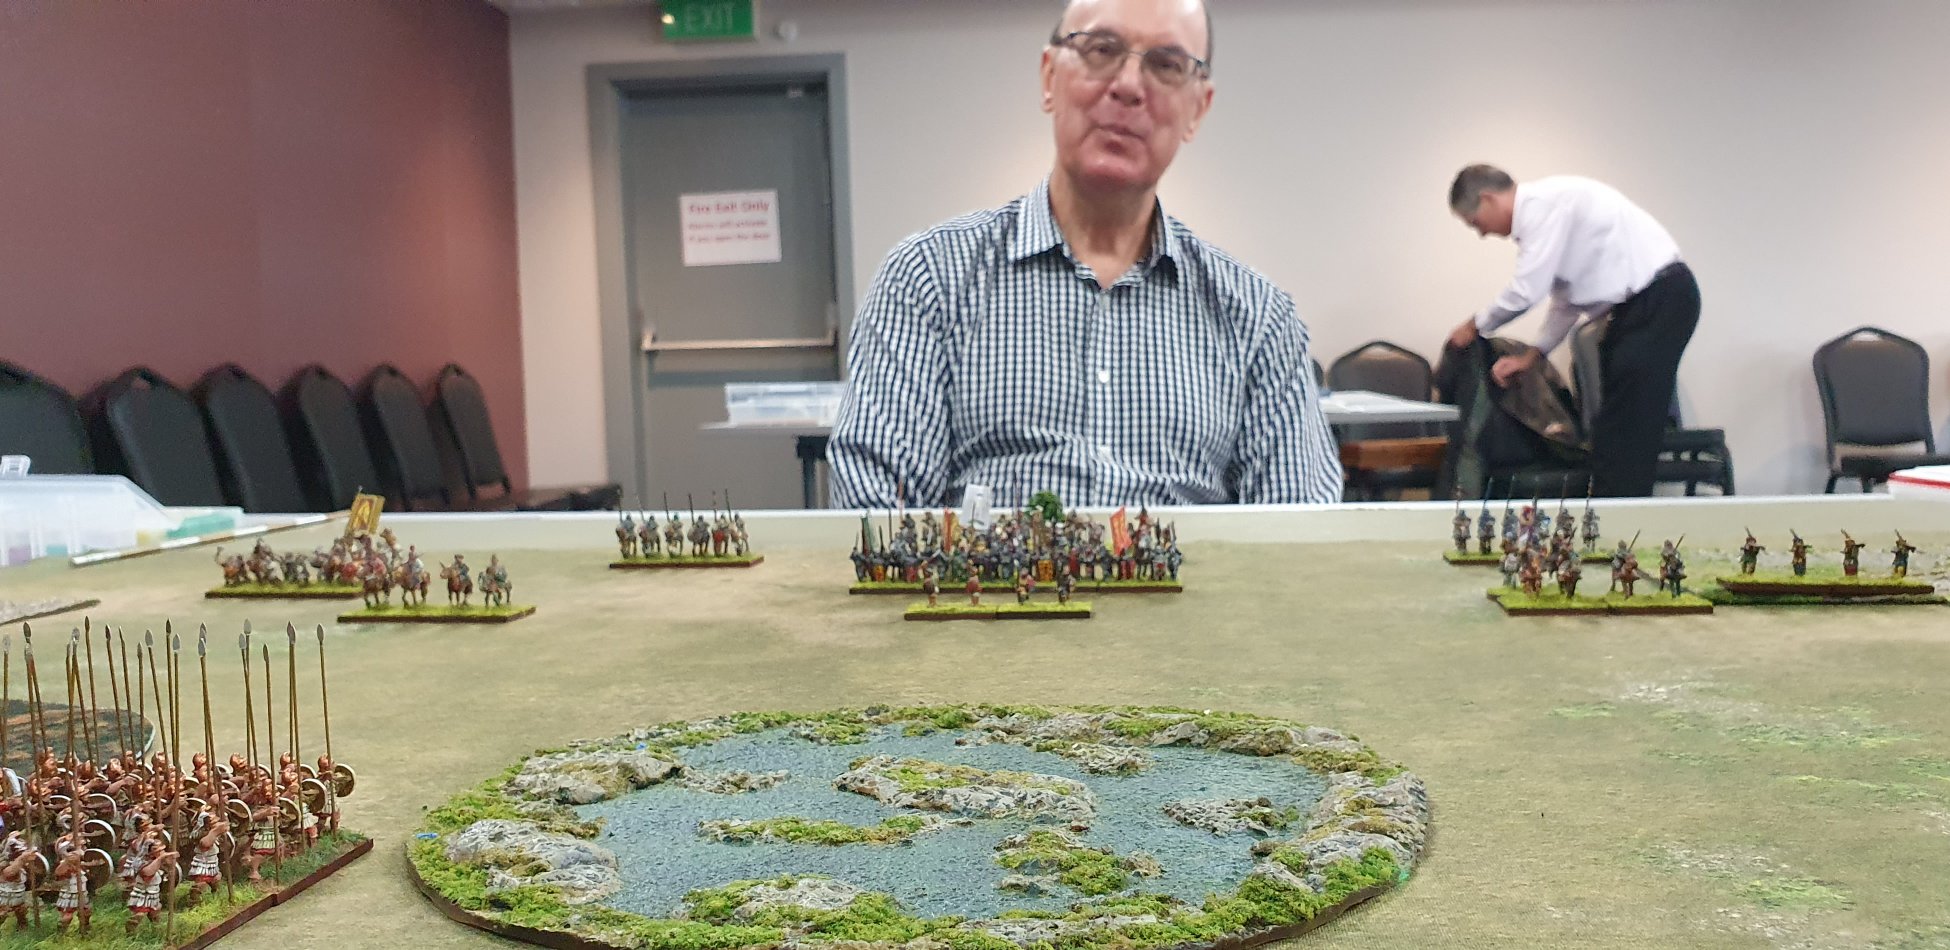
I was playing against Graeme Ralph, who I hadn't played against before. I didn't know what army he would be bringing, but I was guessing it would be later than the Classical period. All my armies (Alexandrian, Classical Indian, Carthaginian and Republican Roman) are Classical period armies, and my Alexandrian army would be best suited to an open game.
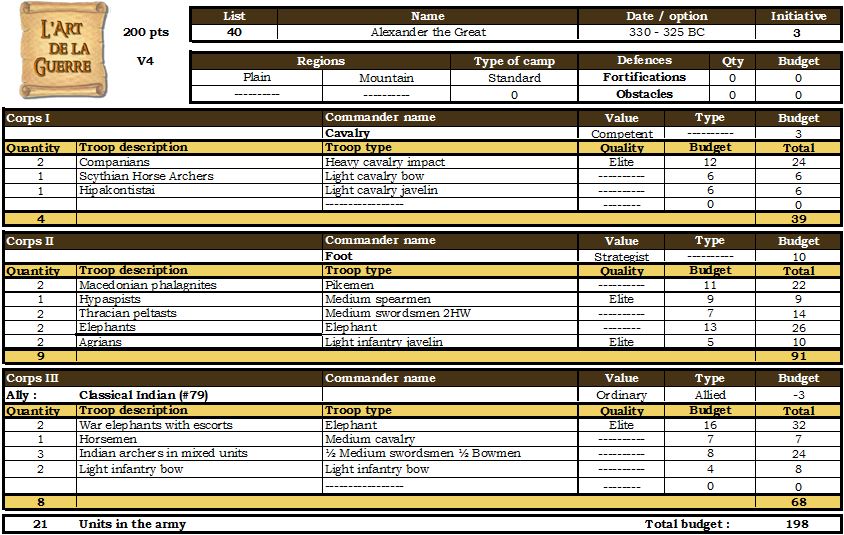
Continuing my recent efforts to make elephants work, I decided to take Alexander the Great with Indian allies. By reducing the pike and the cavalry, this would allow me to take a total of 4 elephants. Surely some of them would have to do something useful?
Army lists
My Alexander the Great list
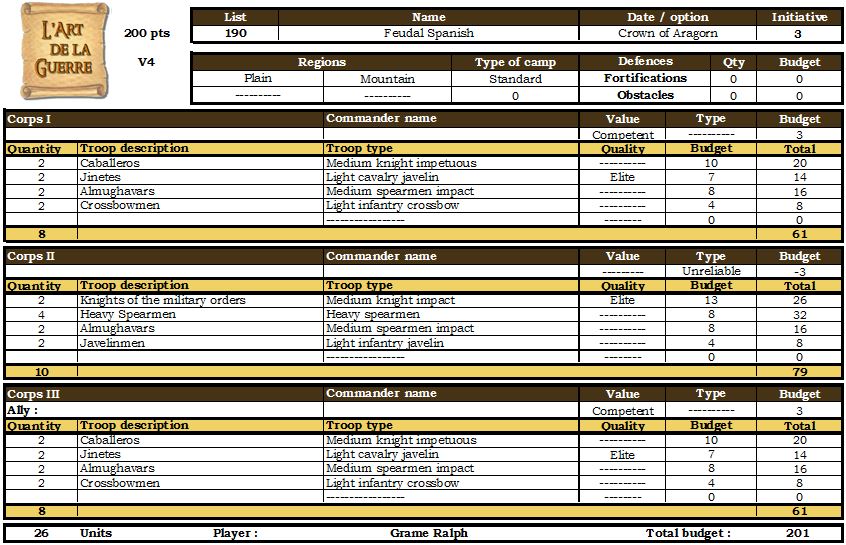
I didn't get a copy of Graeme's list, but I think it was pretty much the below. I am sure the total was 200pts or under. Maybe one of the elite light cavalry wasn't elite or I got a general wrong.
The Game
I won initiative and chose to attack in the plains.
Graeme chose the mandatory field, a marsh and a village. I selected two fields and a hill with a field on top. During the terrain adjustment I moved the marsh out of the centre of my deployment zone (using the strategist re-roll) but Graeme moved it back. As we only ended up with two fields Graeme must have been able to remove one. Despite us both talking about a village getting a road, we both forgot that the road needed to be deployed.
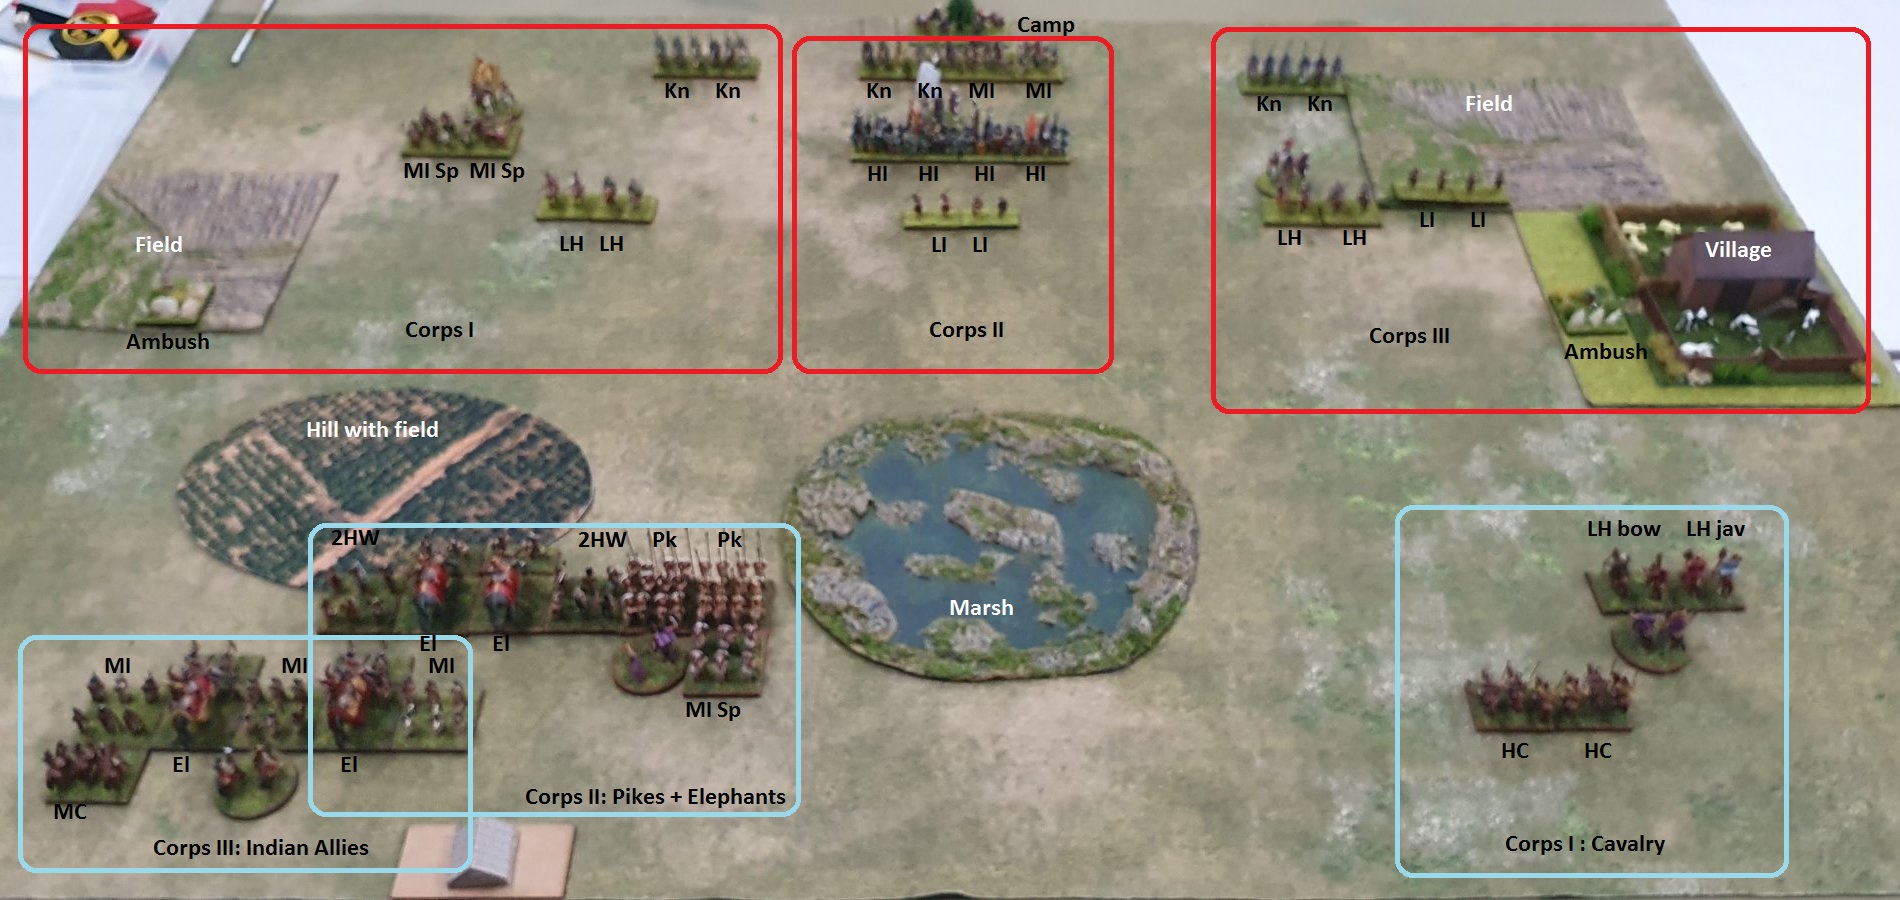
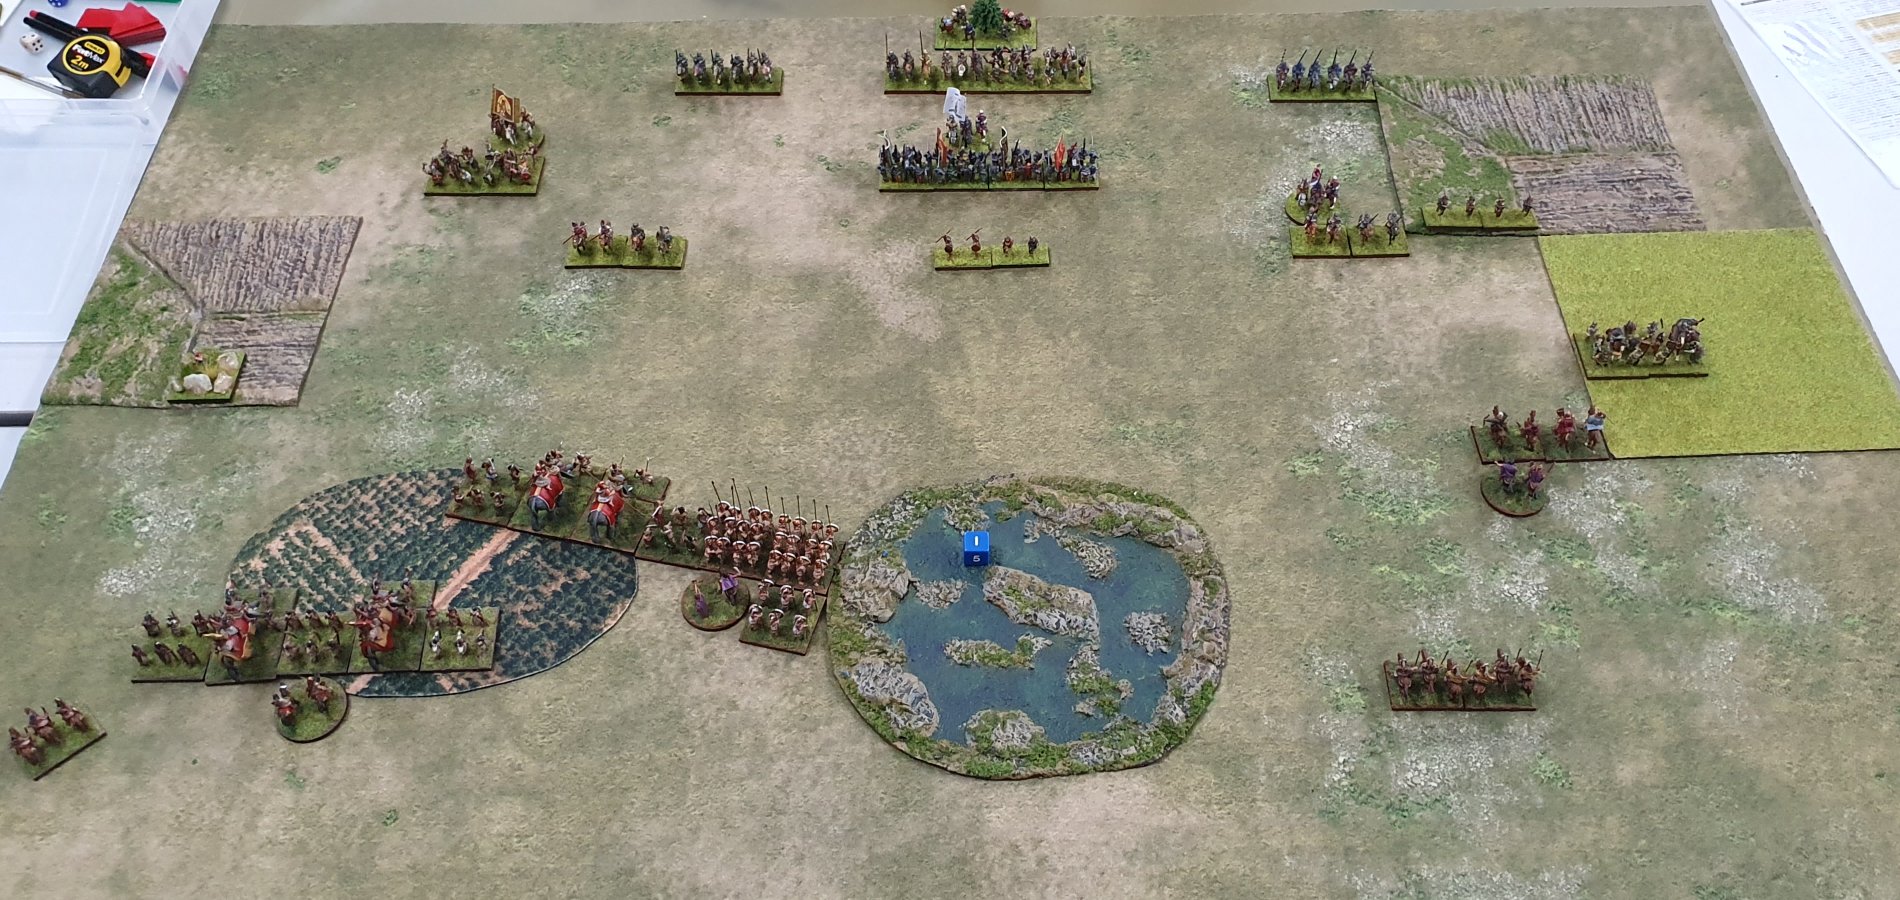
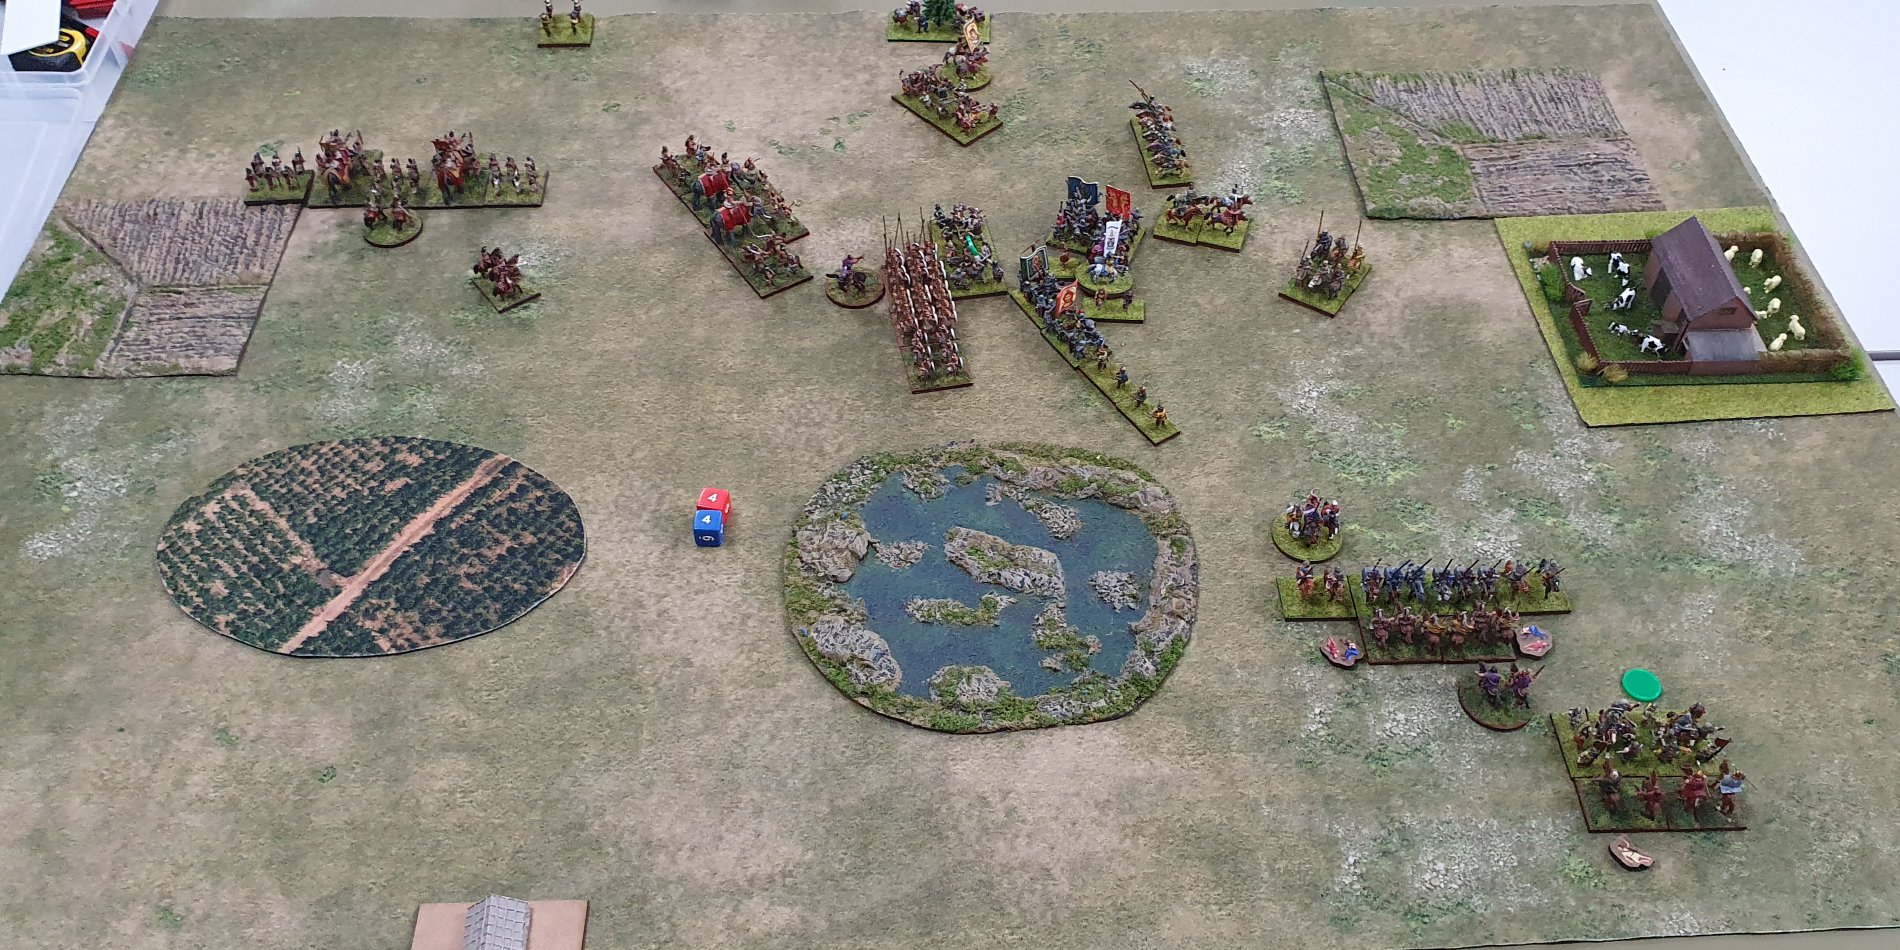
Initial Deployment
Graeme's first deployment was in the centre. I responded with the cavalry corps well to the right to try and hide my intentions to stack the left side of the board. I think that Graeme then deployed the corps on his left, and I then deployed the Indians.
Yes, I had an illegal deployment as the Indian allies and the main Alexandrian corps overlap. I didn't realise when I was doing it, and Graeme didn't realise it either. I guess we are so used to trying to cover the width of the table we just didn't think of it.
My plan was to try and get the two large corps out past the marsh and be more conservative with cavalry corps.
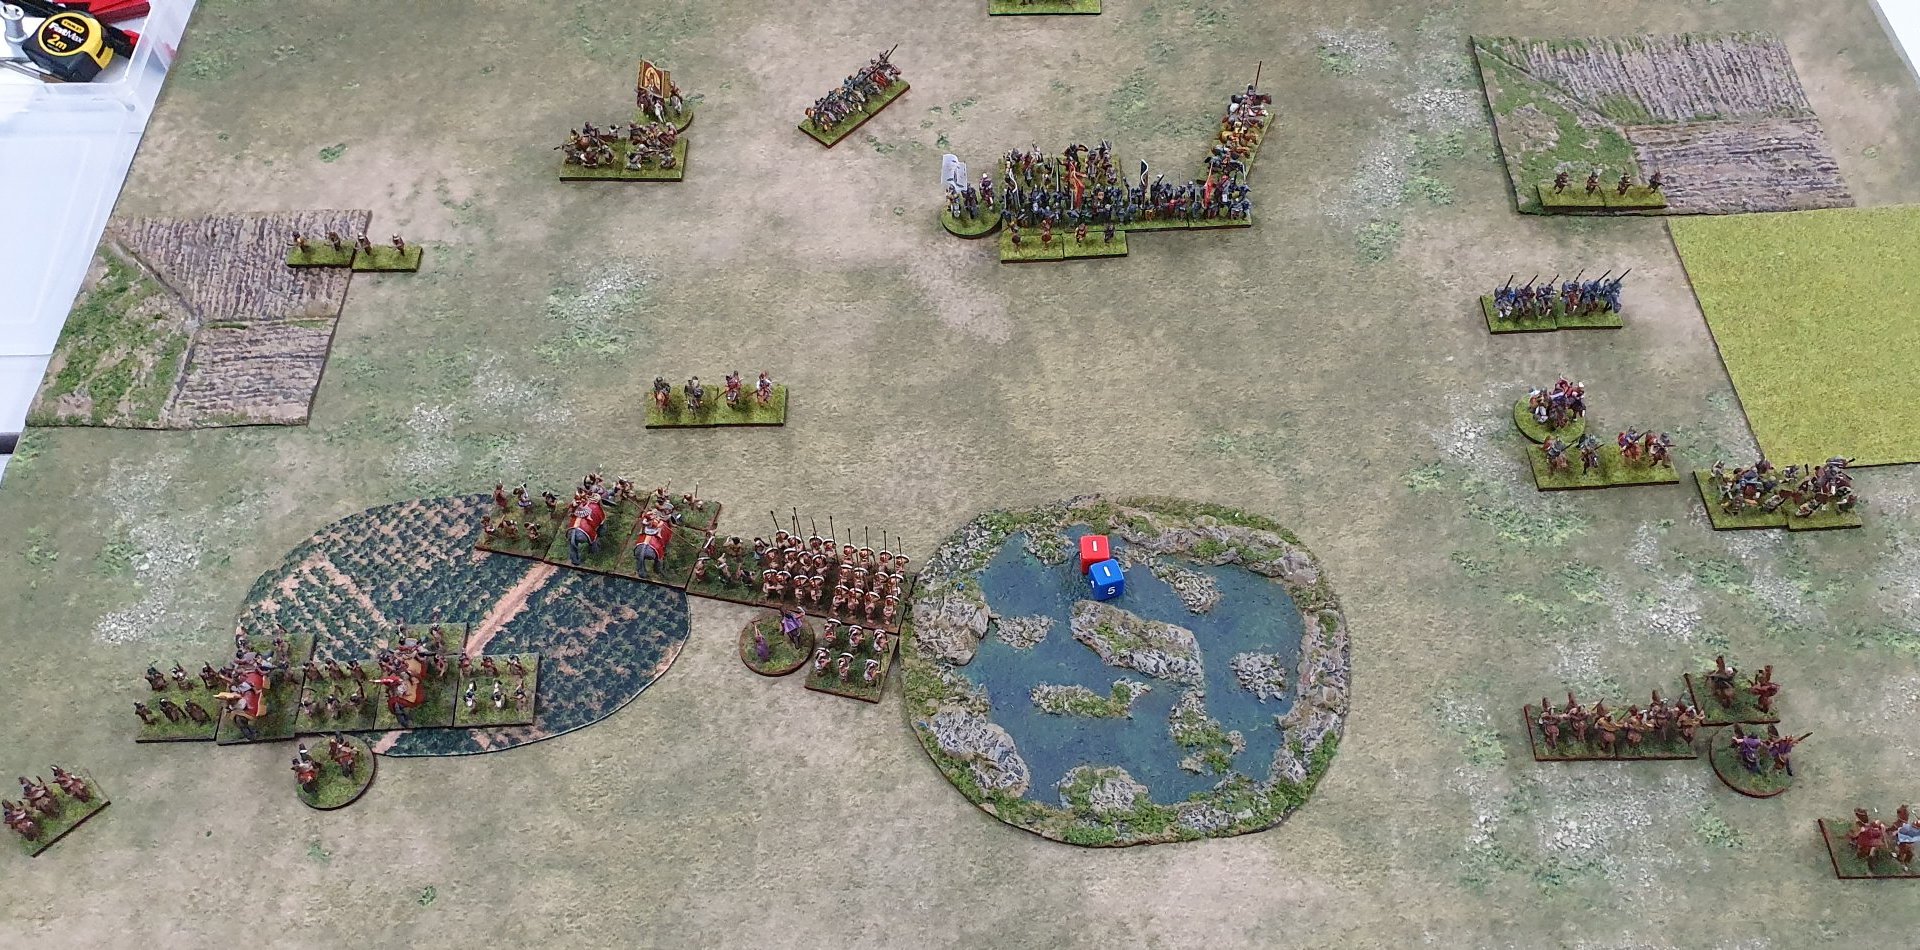
End of Alexandrian Turn One
In my first turn I moved forward the main Alexandrian corps forward and wheeled. The Indians moved up behind and slid left. My light horse moved up to investigate the ambush, which had two MI Spear. The Companion HC moved forward slightly.
End of Spanish Turn One
Graeme started refusing his right flank and pushing forward on his left flank. The ambush on his right flank held two light infantry crossbow which moved as far as possible towards his board edge. Only his light horse moved towards my main battle line.
On the Spanish left flank he charged separately with his light horse and MI Spear, and my two units of light horse evaded separately. His knights did a double move forward.
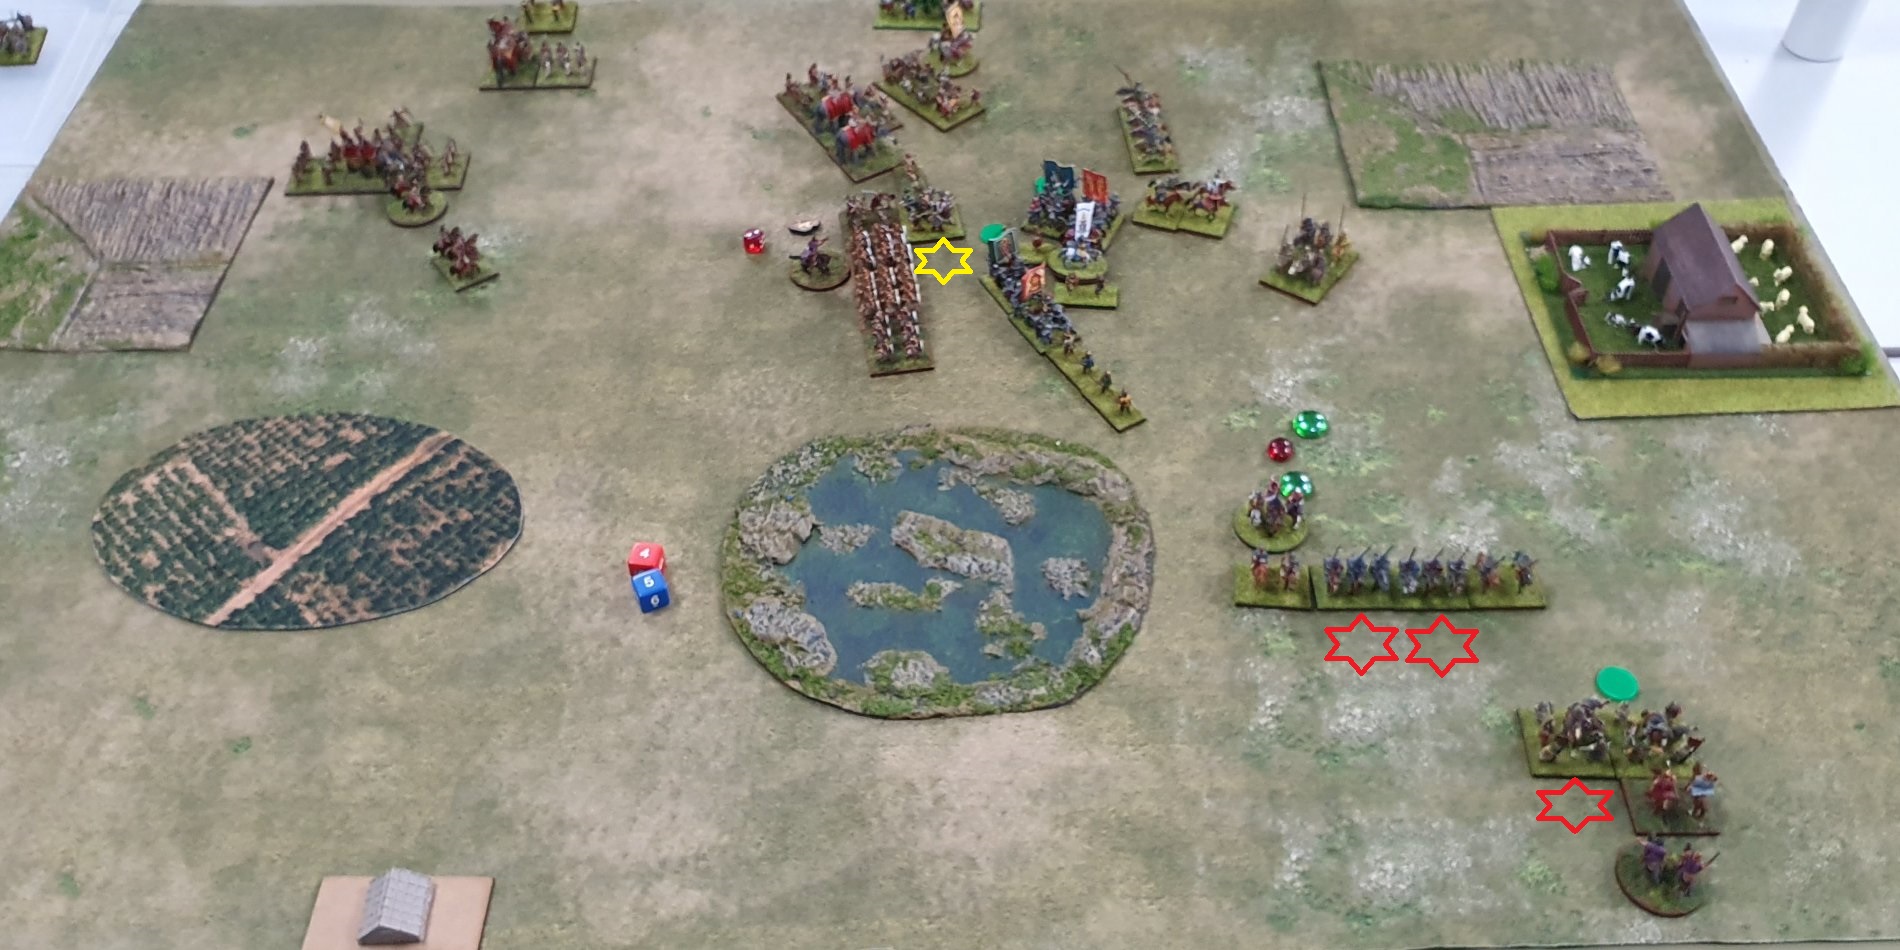
End of Alexandrian Turn Two
On the left of the marsh I was moving my large corps forward as quickly as I could. The elephants and medium infantry charged the opposing light horse, and I then was able to move the pikes 3UD to align as they were more than 4UD from any enemy, and the light infantry moved up again to screen them.
The Indians moved up and were in shooting range of the light infantry.
With my cavalry I was short of command pips. I brought one unit of light horse back and moved my general to the Companion HC. If I had one more command pip I would have moved back the Companions. In retrospect it may have been better to leave the LH out there (they could evade if charged) and moved the Companions.

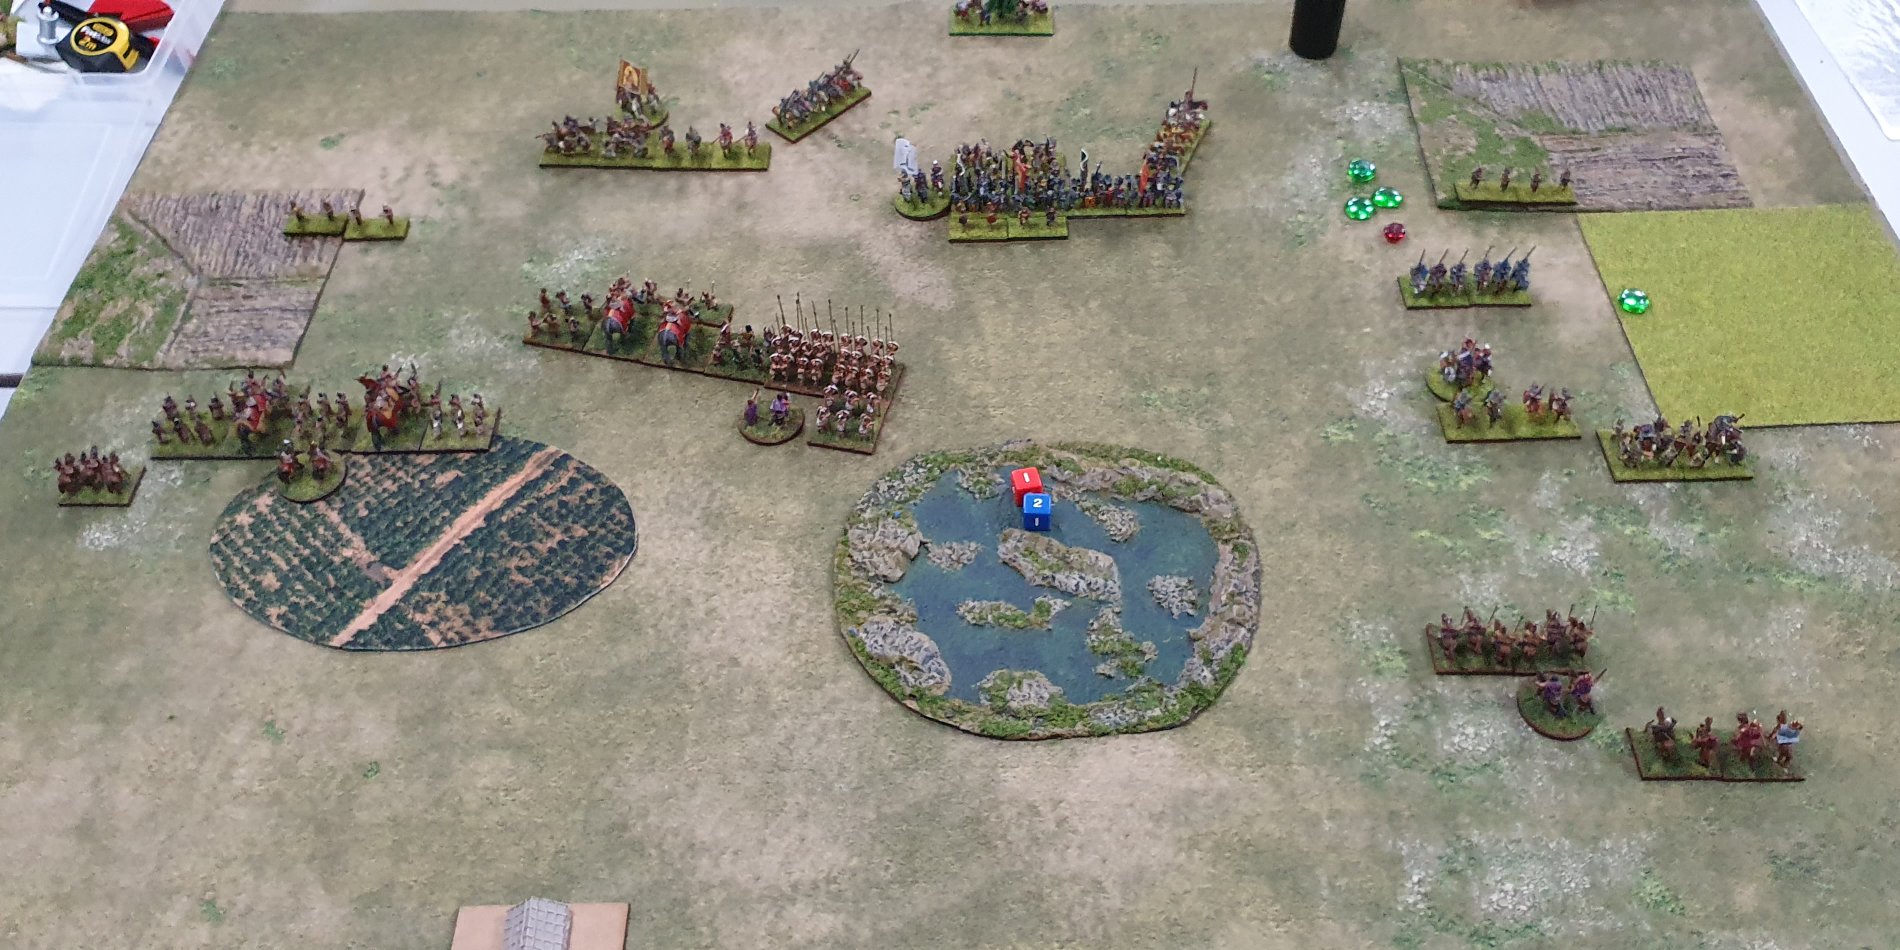
End of Spanish Turn Two
Graeme continued with the repositioning of his army onto his left flank, and push his left flank corps forward. His light horse were less than 2 UD from my Companion heavy cavalry.
End of Alexandrian Turn Three
I split my mixed corps into two and moved the pikes and elephants separately. I also moved the Hypaspists MI forward to the right of the pikes. The Indian allies continued to move forward, sliding right.
On my right flank I moved back my light horse. It was already too late to turn and move back my Companion HC as the enemy light horse was less than two UD away and would have been able to charge me in the flank. As the Companions are impact heavy cavalry they would not be able to evade

End of Spanish Turn Three
In the centre, Graeme turned around two units of MI spear impact to face my oncoming forces. His HI spear have not yet moved to face me, but other units around them are preparing to build a new battle line. On his left flank the knights moved up to just short of my Companion HC and the light horse moved to each side of them to shoot at my cavalry, inflicting one hit. The MI spear impact moved up to ZOC my light horse.

End of Alexandrian Turn Four
In the centre I was able to move the pike block to just ZOC one of the MI spear. The elephants are still moving up to catch up. The Indian allies are chasing down the enemy light infantry - I should have split them up at this point, but may have been short of command pips.
My cavalry was ZOCed and I didn't want to charge into combat so I just rallied off the shooting hit.
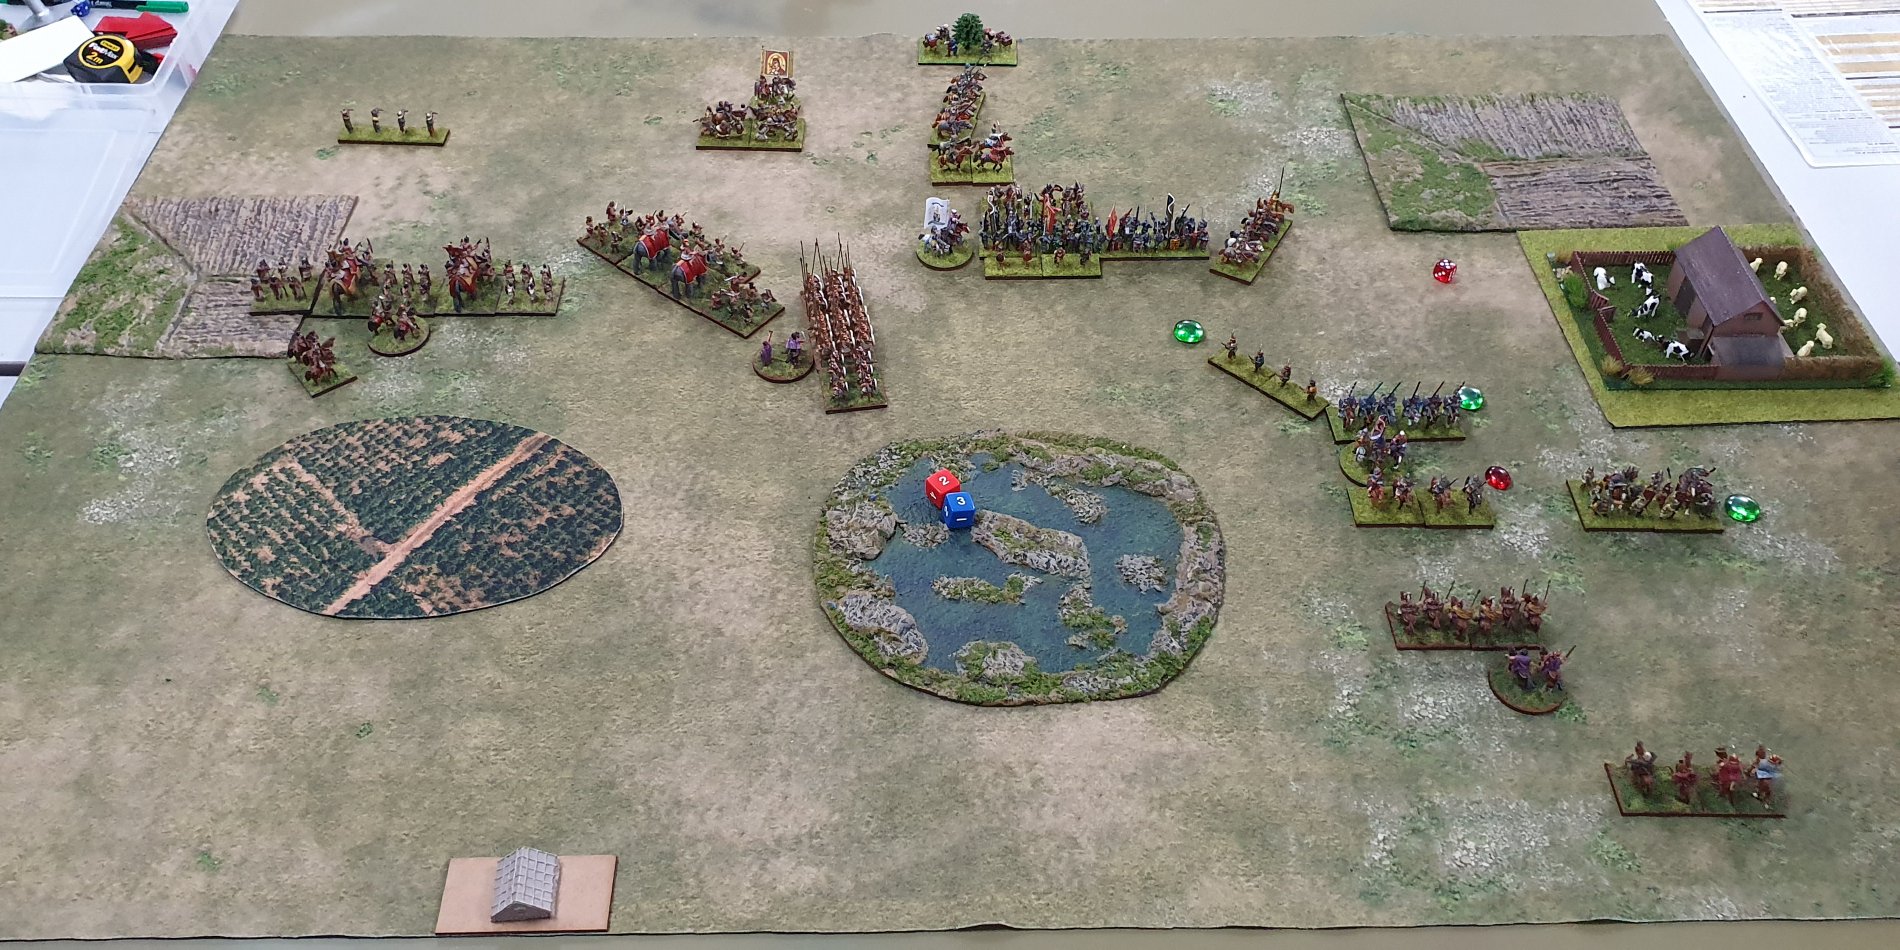
End of Spanish Turn Four
In the centre a melee is starting to take place with the Spanish MI impact spear charging the pikes. The Spanish HI spear and supporting LI are also moving up.
On the Spanish left flank the knights and supporting cavalry charged my Companions. The knights were up by 2 points (+4 vs +2) and each did two hits on my Companion HC. The MI impact spear also charged my light horse, but this was a more even combat as I won one combat and lost the other.
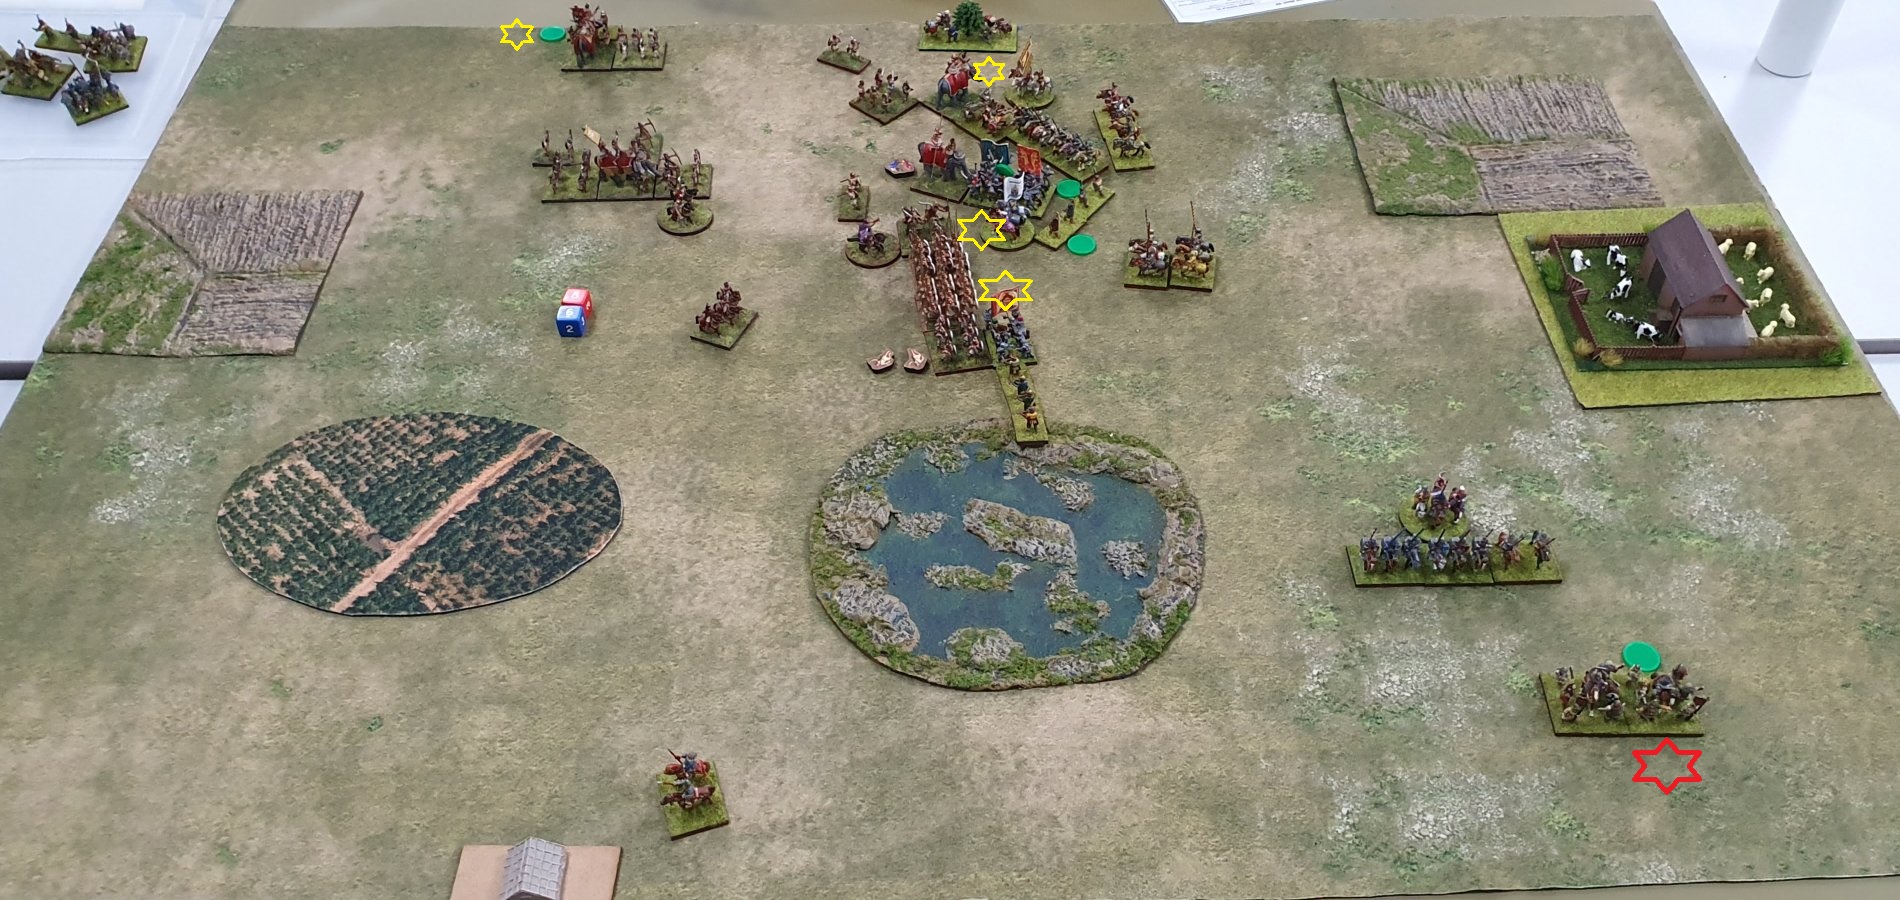
End of Alexandrian Turn Five
In turn five I split my Indian allies. One elephant and supporting MI moved up to chase the light infantry, whilst the rest of the corps performed a difficult right turn and moved 1 UD towards the centre of the battlefield. I would have got further if I had wheeled each unit separately (1.5 UD for the 90 degree wheel and 1.5 UD move) but I would have needed to use 3 command pips.
In the centre my Alexandrian elephants have moved up to ZOC the enemy MI. One unit of Thracians moved up to engage the enemy impact MI spear, but even with a supporting LI lost the combat. The pikes routed a unit of MI, which disordered the unit behind it.
End of Alexandrian Turn Six
No photo for Spanish turn five. In the melee in the centre, the Spanish have committed their troops. Near the marsh were two units of HI spear supported by LI. Further along they have brought in two units of HI spear in column. The knights are moving up behind. A unit of light horse in the left flank corps has mad a dash for my camp.
In my turn six my Indian elephants routed a unit of LI which disrupted the other unit behind them. One Alexandrian elephant routed its opposing MI and pursued. The other Alexandrian elephant ended up fighting a column of HI (they may have charged it in the flank). The column of HI was disrupted by my Thracians routing their opponents which fled through the column.
On my right flank my last unit of cavalry was routed.
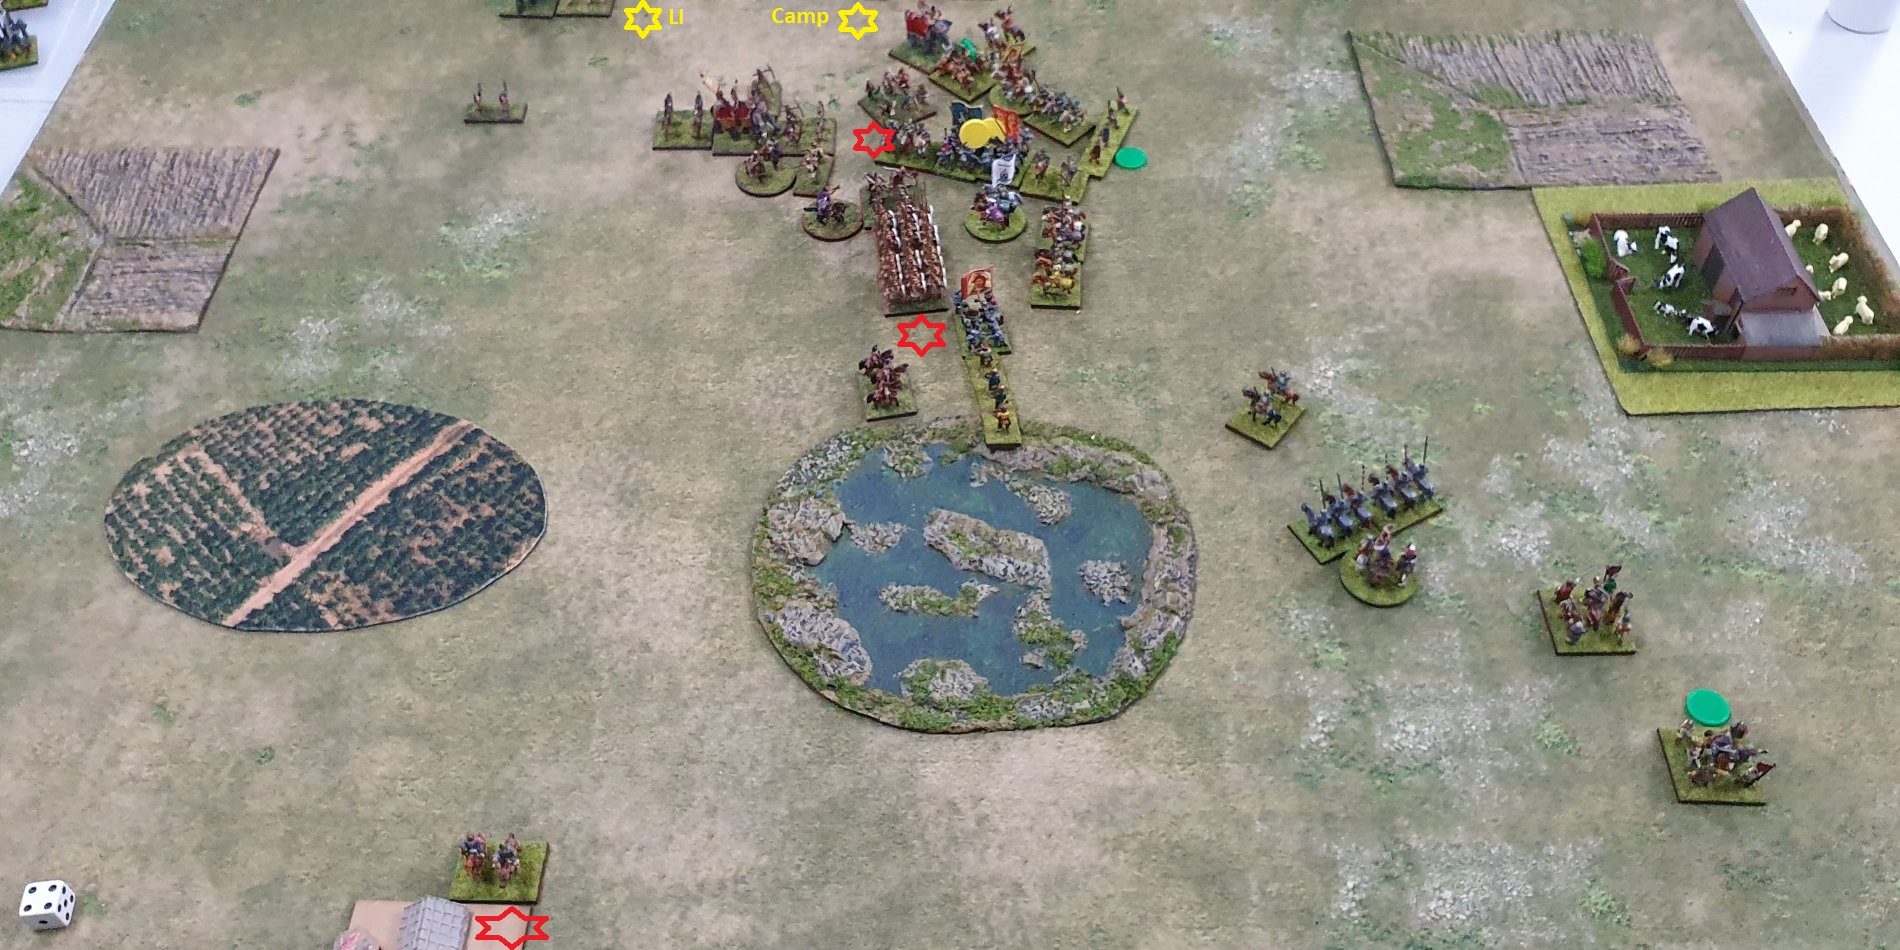
End of Alexandrian Turn Seven
Once again no photo for the Spanish turn six. The light horse looted my camp. The rest of the corps started moving back to the centre, except a unit which stayed put to attempt a free rally.
My Alexandrian elephant routed, and the elephant rampage took it straight ahead through both units in the column of HI facing it. Both units ended up with two hits: one from friends routing through them and one from elephant rampage.
In my turn seven my Indians finished off the light infantry at board edge and a unit of Agrian light infantry looted the Spanish camp. My Thracian MI were likely to receive a flank charge so I moved up a unit behind them to ZOC them and also moved up the Indian column to also exert a ZOC on the flank.
At the end of my turn seven I was on 16/21 break points and the Spanish were on 21/26 break points.
Due to time constraints we decided to end the game after the Spanish turn seven. Graeme was able to rally off a couple of hits (back down to 19 break points) and charged his knights into my mediocre Indian infantry on their flank (we may have played the ZOC rules wrong here). They lost combat but didn't route. I think he also conformed his HI spear into the pikes and charged in with his knights.
At the end of Spanish turn seven I was on 20/21 break points and the Spanish were on 22/26 break points. A hard fought draw.
Post game comments and lessons learnt
An exciting game. The first time I have ever had my camp looted. The first time I have ever looted a camp. An elephant rampage doing hits on two enemy units.
The game evolved to a swirl around the centre, with Graeme able to destroy my right flanks corps and distract my Indian allies on the left flank with just two LI resulting in about 1/3 of my army not getting into combat quickly enough.
With Impact cavalry being unable to flee, when they are outmatched like in this game you have to think a couple of turns ahead to keep them safe.
I made a mistake by ZOCing the impetuous knights from both the flank and rear. Impetuous units don't have to perform uncontrolled charge to units to the rear. Mounted units whose rear is in ZOC by a slower enemy can exit by moving ahead their full movement allowance, but MI and Knights both move 3 UD so that wasn't an option here. We played it that the knights ignored the ZOC to the rear and charged the unit ZOCing them to the flank. I am not sure if we got the rules right there.
Checking after the game, the most threatening enemy (MTE) if no unit with a ZOC directly in front is the closest unit, where closest means closest to the front edge of the unit. Based on that, it would have been a toss up with respect to which unit was the MTE. The lesson here is that if I am going to ZOC with multiple units I should think about which is going to be the MTE when I move them and can ensure the desired result, rather than trying to work it out in the opponents turn. There was also a discussion on the Facebook group about impetuous troops whose MTE was to the rear. Page 46 states that an impetuous unit restricted by its MTE to the rear is not subject to an uncontrolled charge.
Another rule I got wrong was when the last unit of my cavalry corps was destroyed. Page 26 "Commander with units" states he is removed from table but does not count towards losses. This is the way we played it. However page 27 details that if a unit to which the commander is attached is destroyed, the commander must move towards the nearest friendly unit within 5 UD or be captured if he does not reach a friendly unit (even of another corps).
Hopefully having inadvertently broken the rules about deployment once, I will never make that mistake again.
With respect to deployment, I may have been better off putting the Indian allies on the right flank and have the small cavalry command perform a flank march. The two commands on the table would have moved forward and tried to meet up on the other side of the marsh.
In terms of my army composition, the elephants being in my army caused the Spanish to base their battle plan around avoiding them. However the most useful thing that they did in combat was elephant rampage when they died. Am I just not using them correctly? There's been a couple of games where I start with elephants on the flank and they just don't get into combat in time. I keep wheeling them when maybe I should be sliding.
Maybe I should use just one elephant in the Indian allies. If I dropped one elephant and its screening light infantry I could save 20 points and that's nearly two units of pikes. However I still need to think about what to do with my tiny cavalry command. Would a better general have allowed me to move the Companion heavy cavalry to a position of safety on turn two? However if I had just been smarter in my movements on turn one I wouldn't have needed to move them to safety in turn two.
I've played 4 games in a row now where I've had a single MC in a otherwise infantry corps, and in each game its done nothing useful. I have to take the MC when using Indian allies, but maybe I should make it mediocre. Alternatively if I put the Indians in the centre, maybe the MC could help support the tiny cavalry corps, though putting the Indians in the centre just to support the cavalry would seem to be a mistake.
The strategists command with both the elephants and pike, which I split into two groups from turn three worked okay and I had enough command pips.