Alexander the Great vs Armenian
Pregame
I had painted but never used my Indian allies, so my aim in this game was to use the models that I had painted. By the time I added in the compulsory units in the Alexander the Great list, that only left about 40 points to play around with. I decided to not use a fortified camp, left the cavalry corps with only the compulsory units, and beefed up the infantry corps.
Kevan had advised that he would bring a classical army. Knowing that Kevan likes quality troops, I thought that a successor style army was more likely than a horde. I was worried about being outnumbered anyway, so the units I used to beef up my infantry corps were the cheaper options. This was two units of Thracians 2HW, one of MI spear, and one of Greek hoplites to protect my flank. The Thracians would be useful if facing pikes.
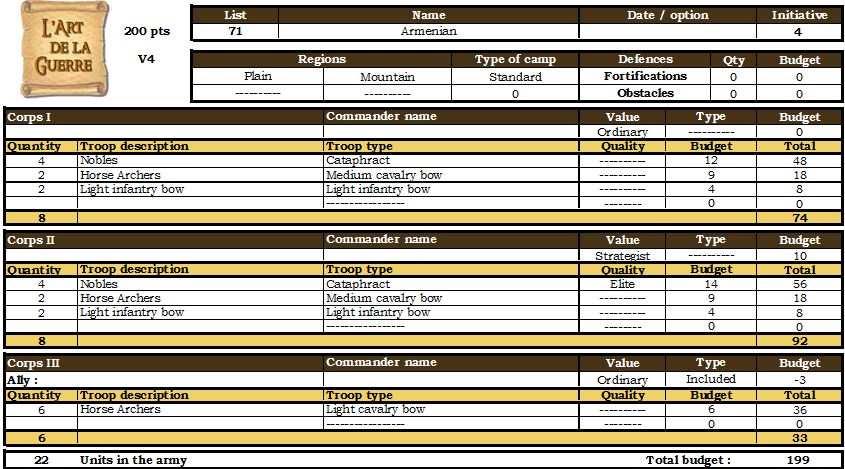
When Kevan turned up with Armenians I was interested to see how they would go as Armenian allies are on my list of things to do. Rather than my army being outnumbered, both lists were 22 units.
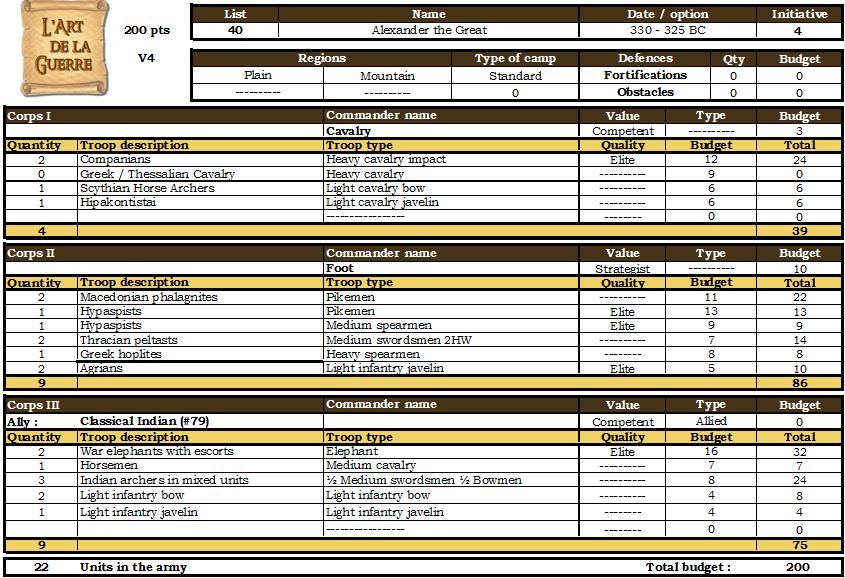
Army lists
My Alexander the Great list
Kevan's Armenian list was
The Game
After two ties on initiative, I won on the third roll and decided to attack in the plains. Kevan chose a hill, two minimum sized fields and a minimum sized plantation. Kevan placed the fields and plantations in the corners of the battlefield and the hill in the centre of his long table edge. I chose a coastal zone and two large fields. These both ended up on my side of the board, one near the coast and the other in the centre touching my table edge. We both rolled to move the central field. I failed on first attempt but using the strategist re-roll was able to move to forward and right 6 UD. Kevan then rolled to move it, failed on his first attempt but succeeded on the second to move it back 4 UD.
We both placed ambushes, though it turned out that they all were dummy ambushes.
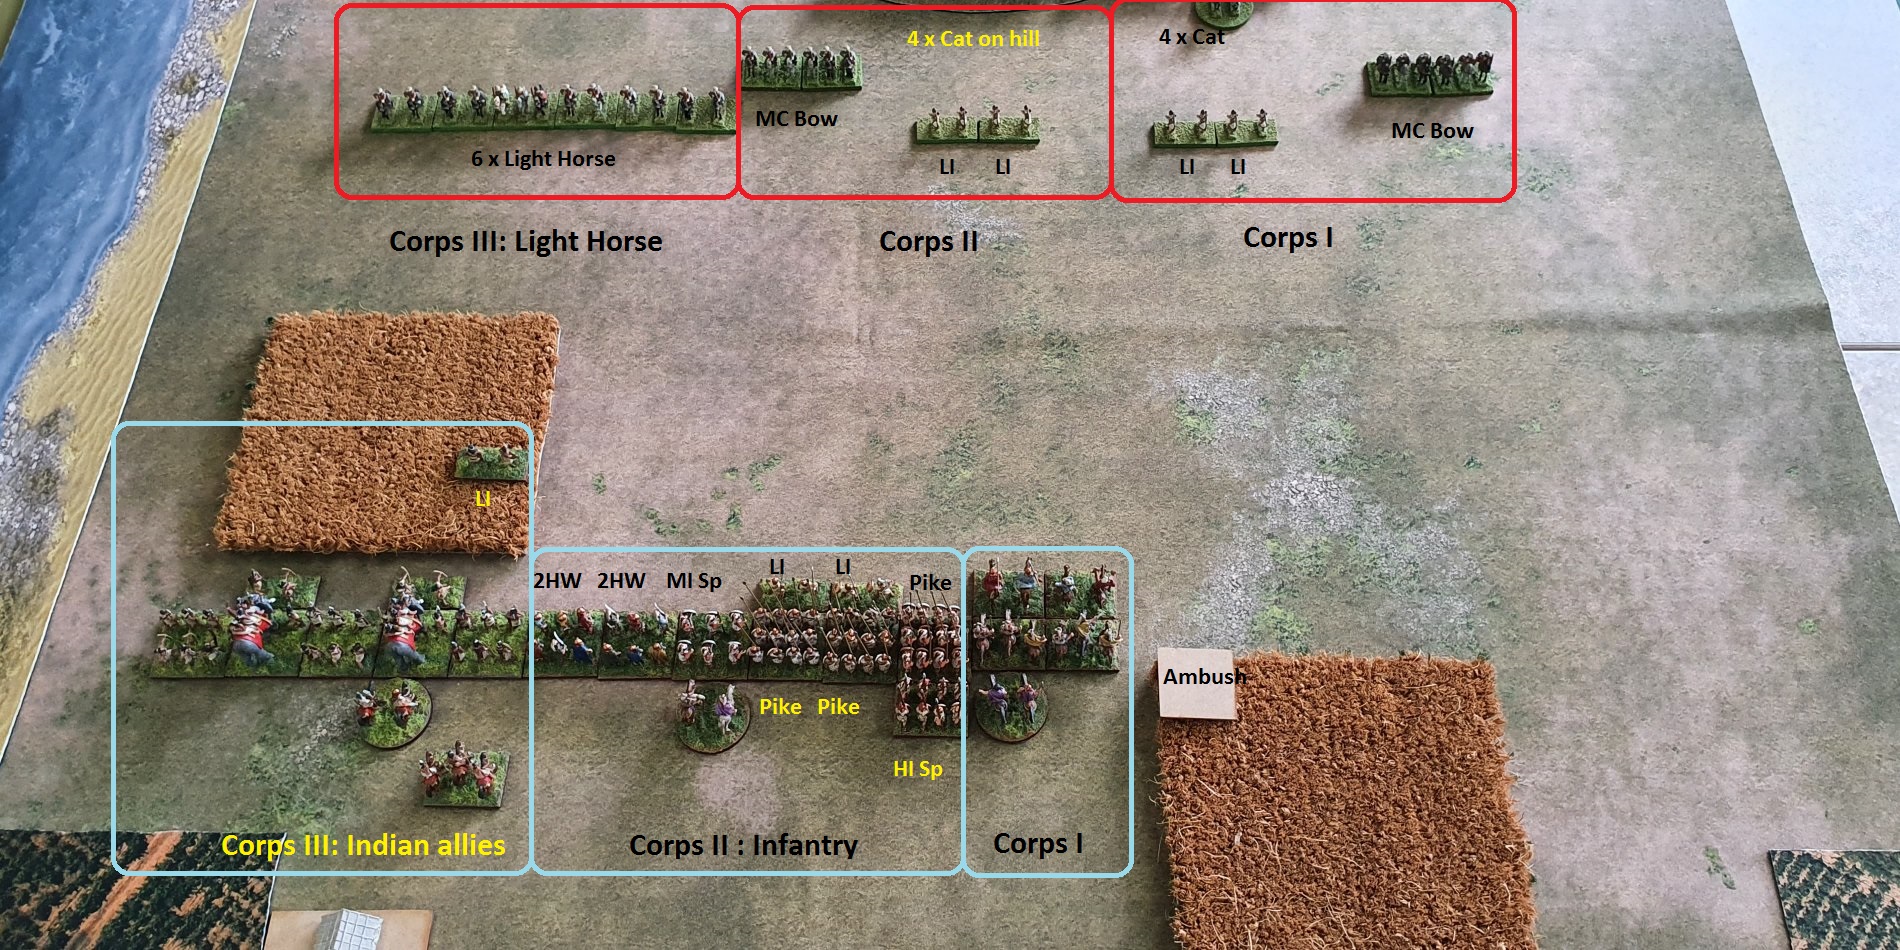
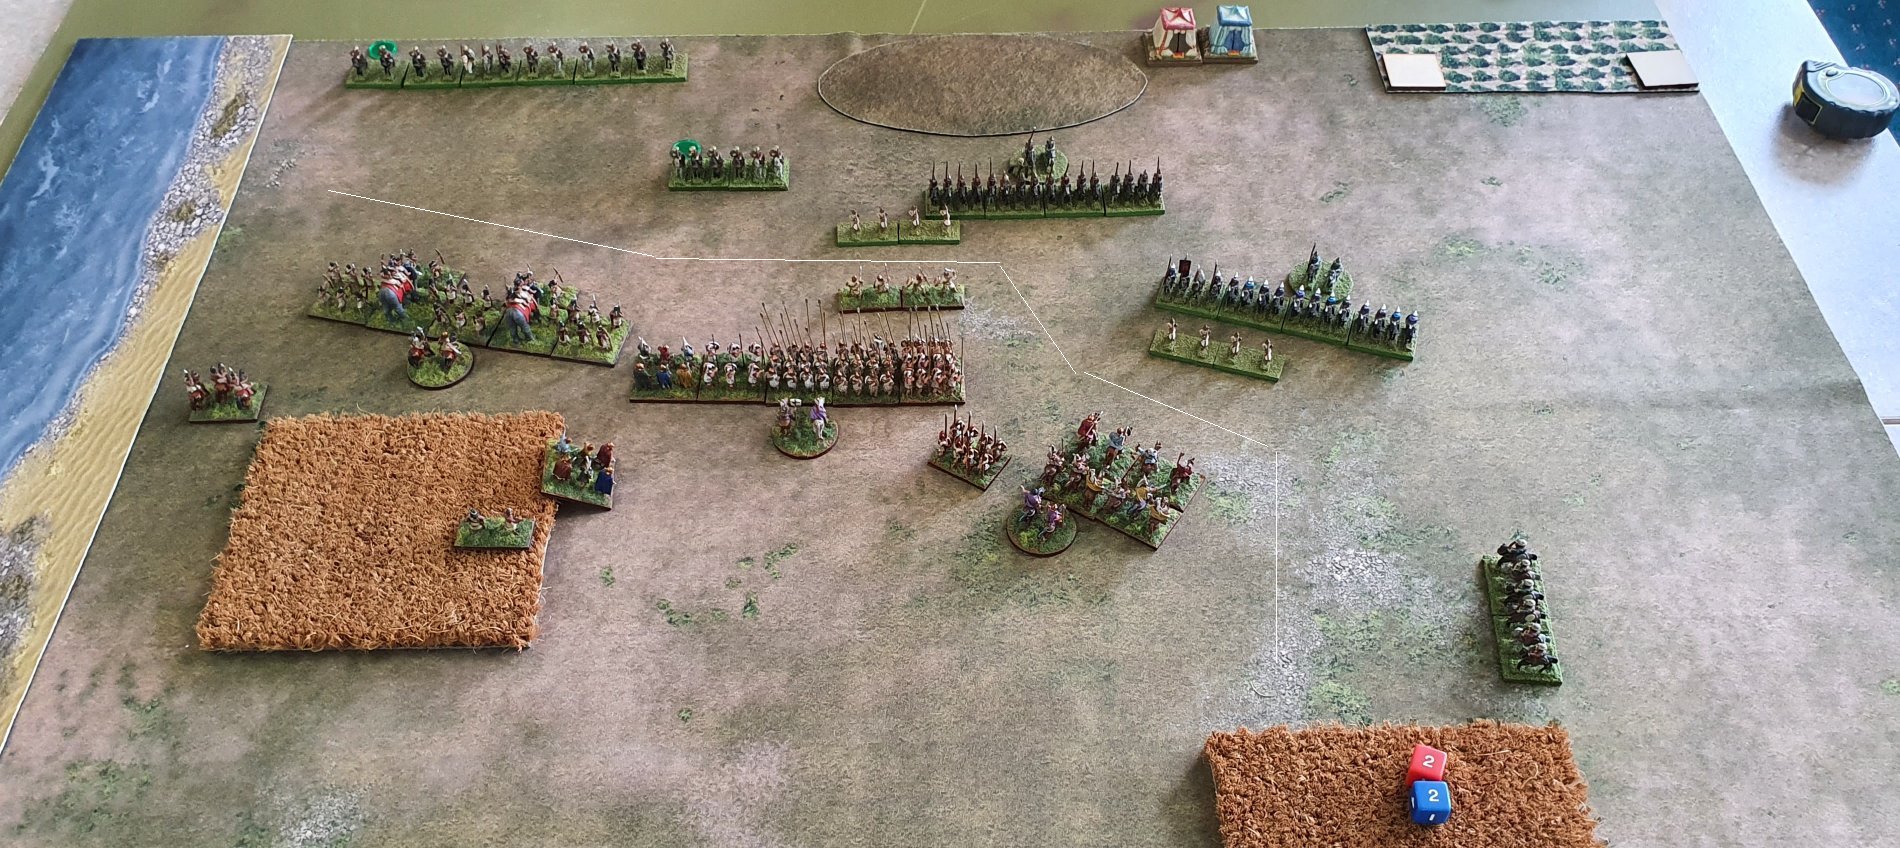
Initial Deployment
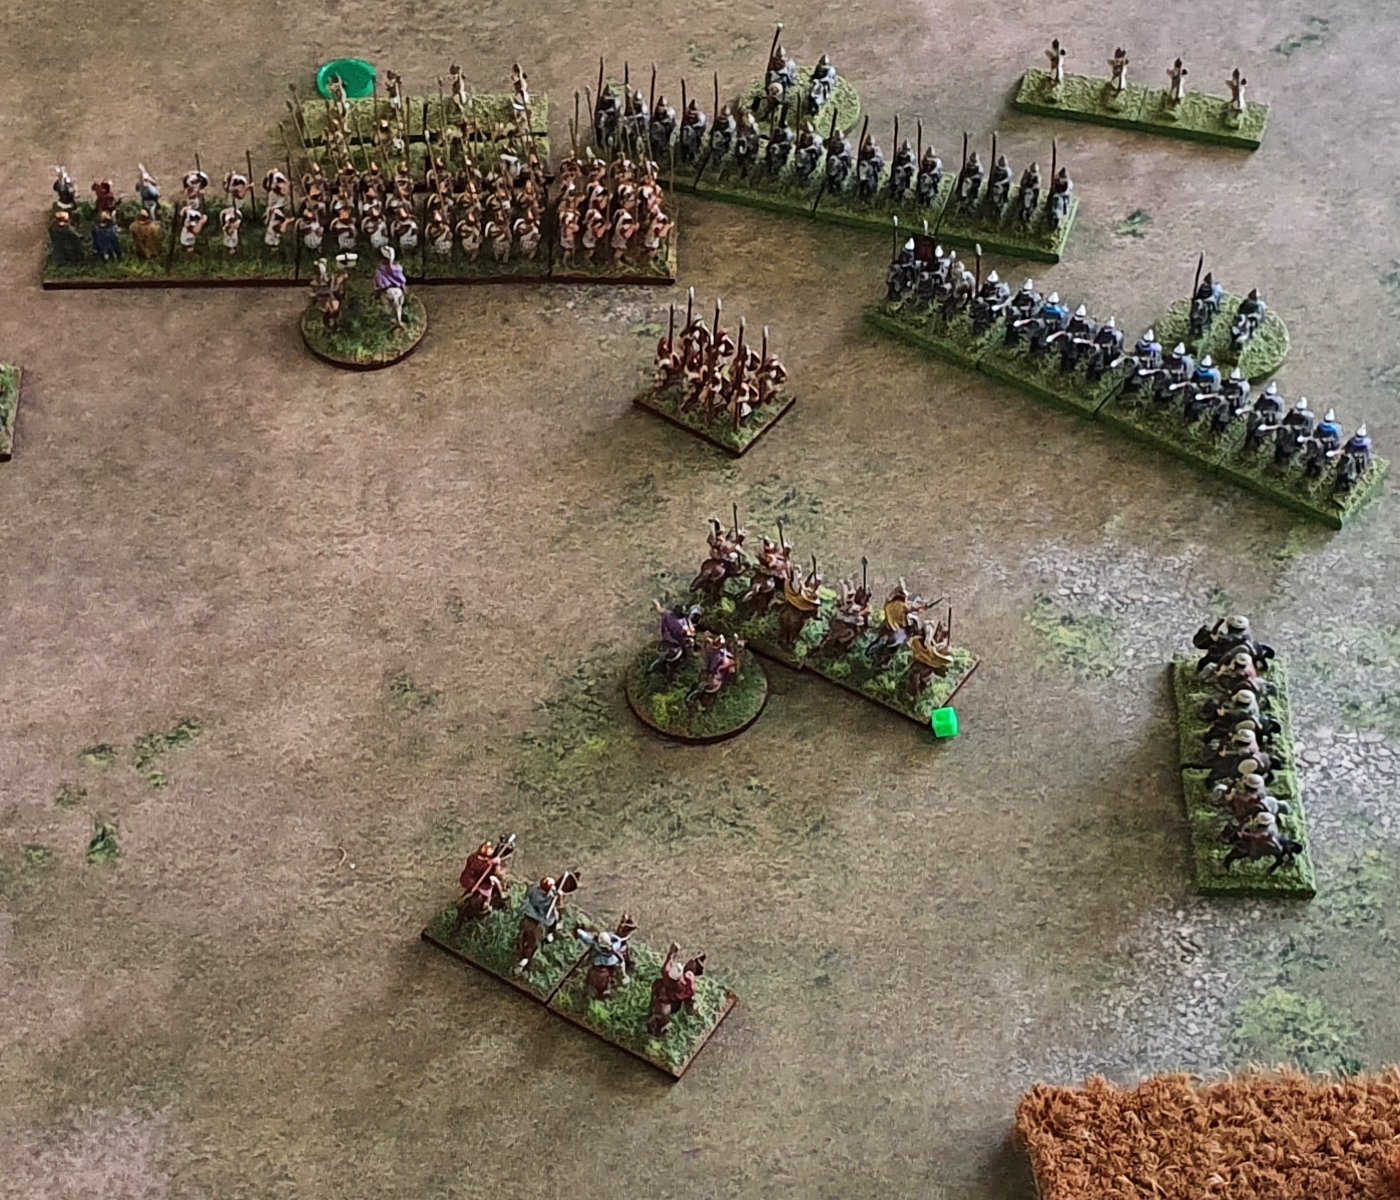
Kevan started with his cataphracts well back (out of the picture above). His light horse, cavalry bow and light infantry were further fowards.
I had my Indian corps on the left flank. The coastal zone protected the blank. I had one light infantry as far forward as possible in case my command started as unreliable it would extend the 4UD bubble that would activate my corps. My infantry corps had the Greek hoplites unit behind the pikes in order to protect my flank. The compulsory cavalry then took position between the infantry corps and the field, which also had a dummy ambush.

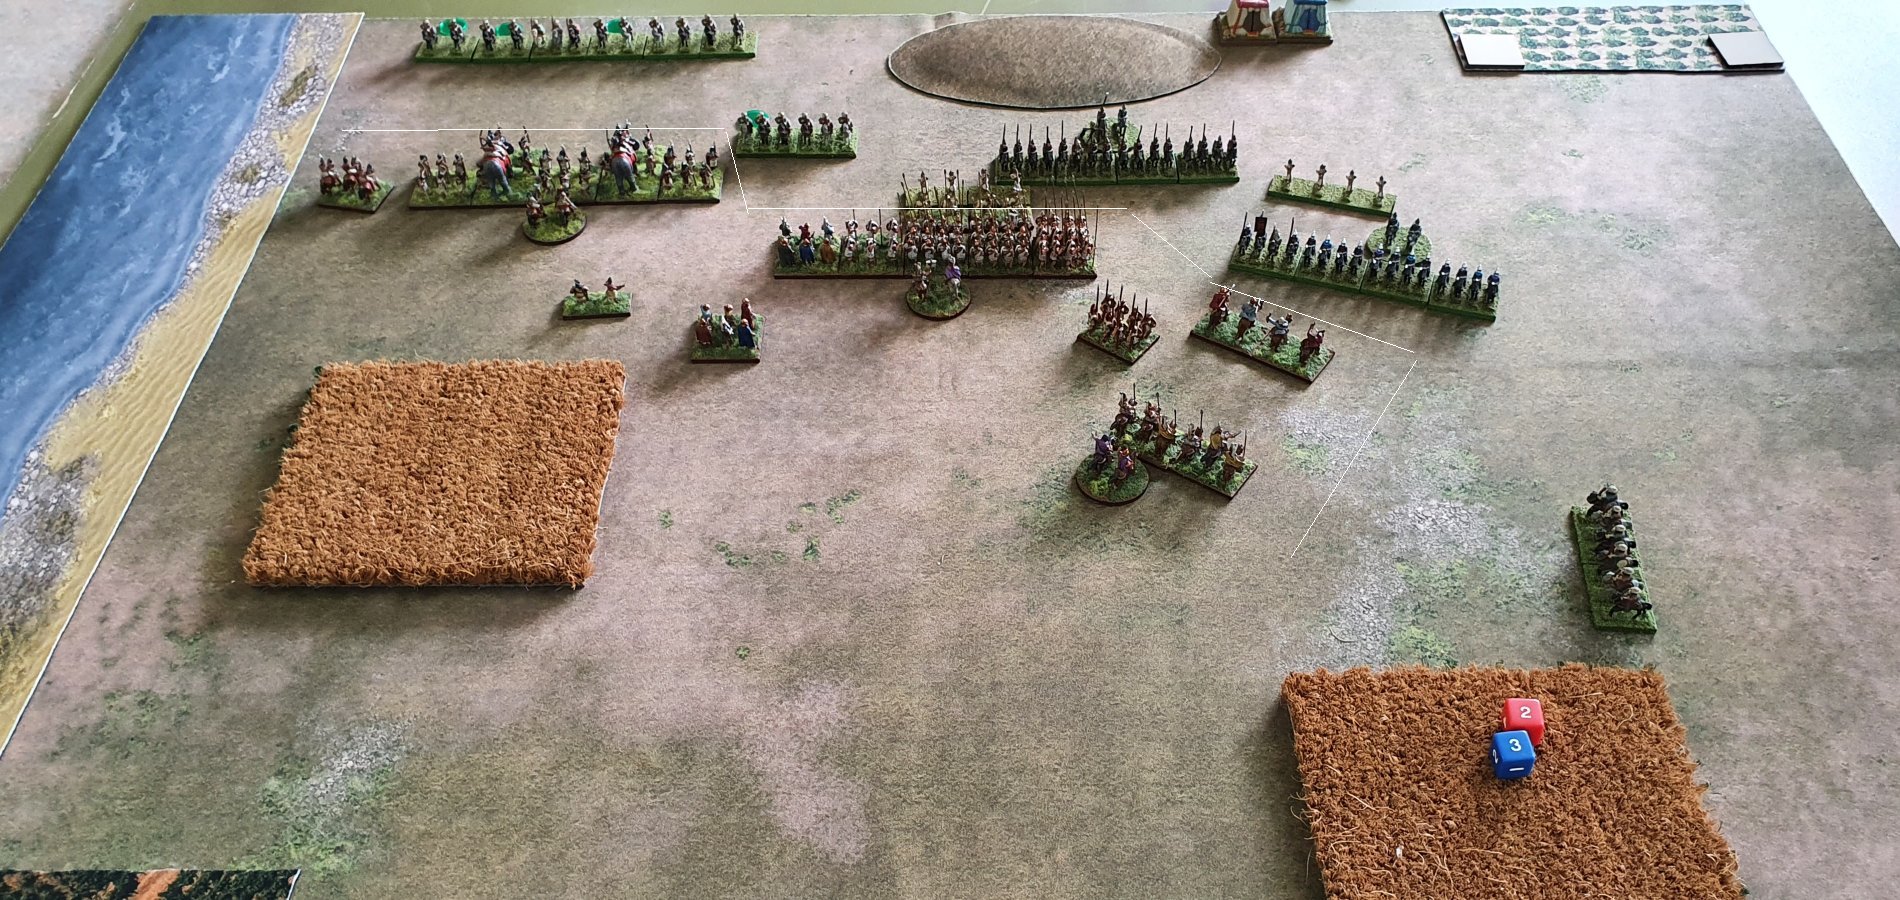
End of Alexandrian Turn One
In my first turn I was able to move my Indians and Alexandrian infantry twice, to end up just outside of 4UD from the Armenians. This only left enough command pips to move the Indian medium cavalry and Greek hoplites once. The cavalry corps only moved once as I did not want to leave too big a gap between it and the field, and joined up with the trailing hoplites from the central corps.

End of Armenian Turn One
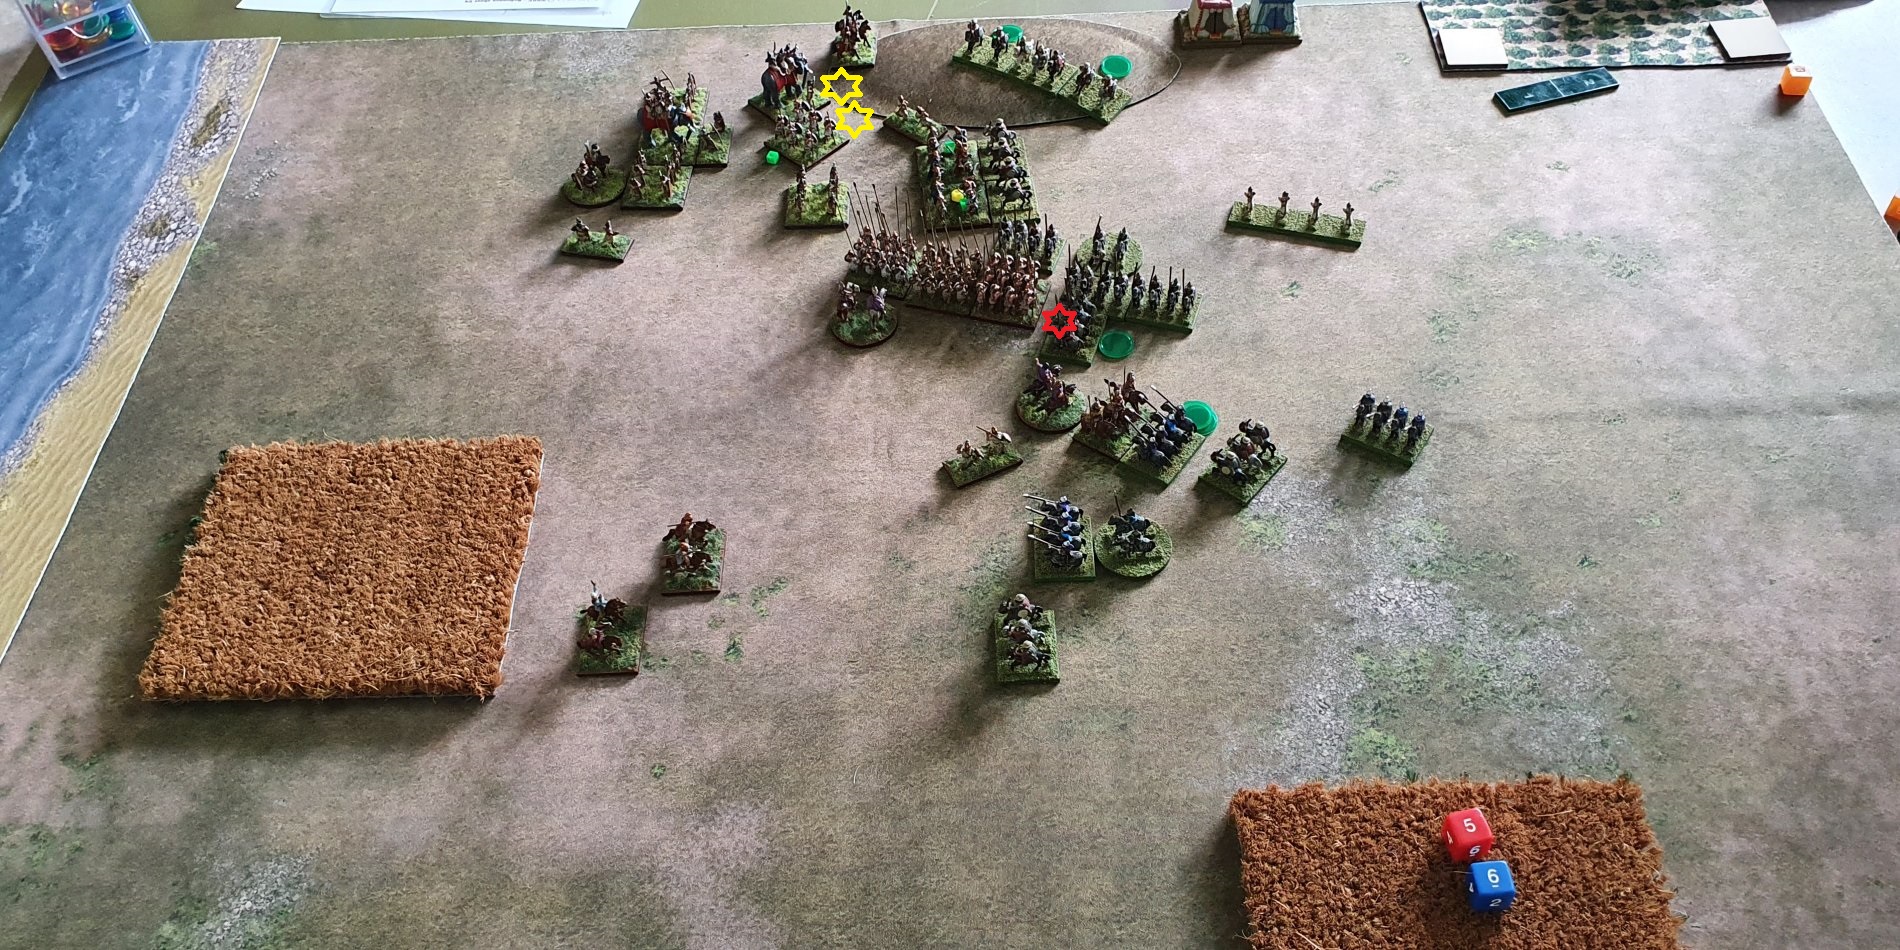
Kevan didn't get the command pips that he needed. His light cavalry moved up and came off second best in shooting against the Indians. His medium cavalry and light foot moved up to shoot at my infantry corps, without effect. His left flank was only able to move the cataphracts and medium cavalry one move each. He had wanted to move them further up to threaten my flanks.

End of Alexandrian Turn Two
In my turn two I decided to Charge! The Indian corps wheeled and charged the light horse, which evaded "long" and ended up near the edge of the board. My medium infantry from the central corps charged the Armenian medium cavalry bow (which evaded), and my Agrian light foot charged the light infantry bow (which evaded). My pikes were then able to move up to join with the medium infantry, and the hoplites moved up to protect the flank of the pikes. My cavalry moved up to continue to guard the flanks.
End of Armenian Turn Two
In their second turn, the Armenian light horse decided to stand still and attempt to rally off shooting hits rather than advance back. The central corps and left flank advanced. The left flank horse archers was now behind the flank of my cavalry corps.
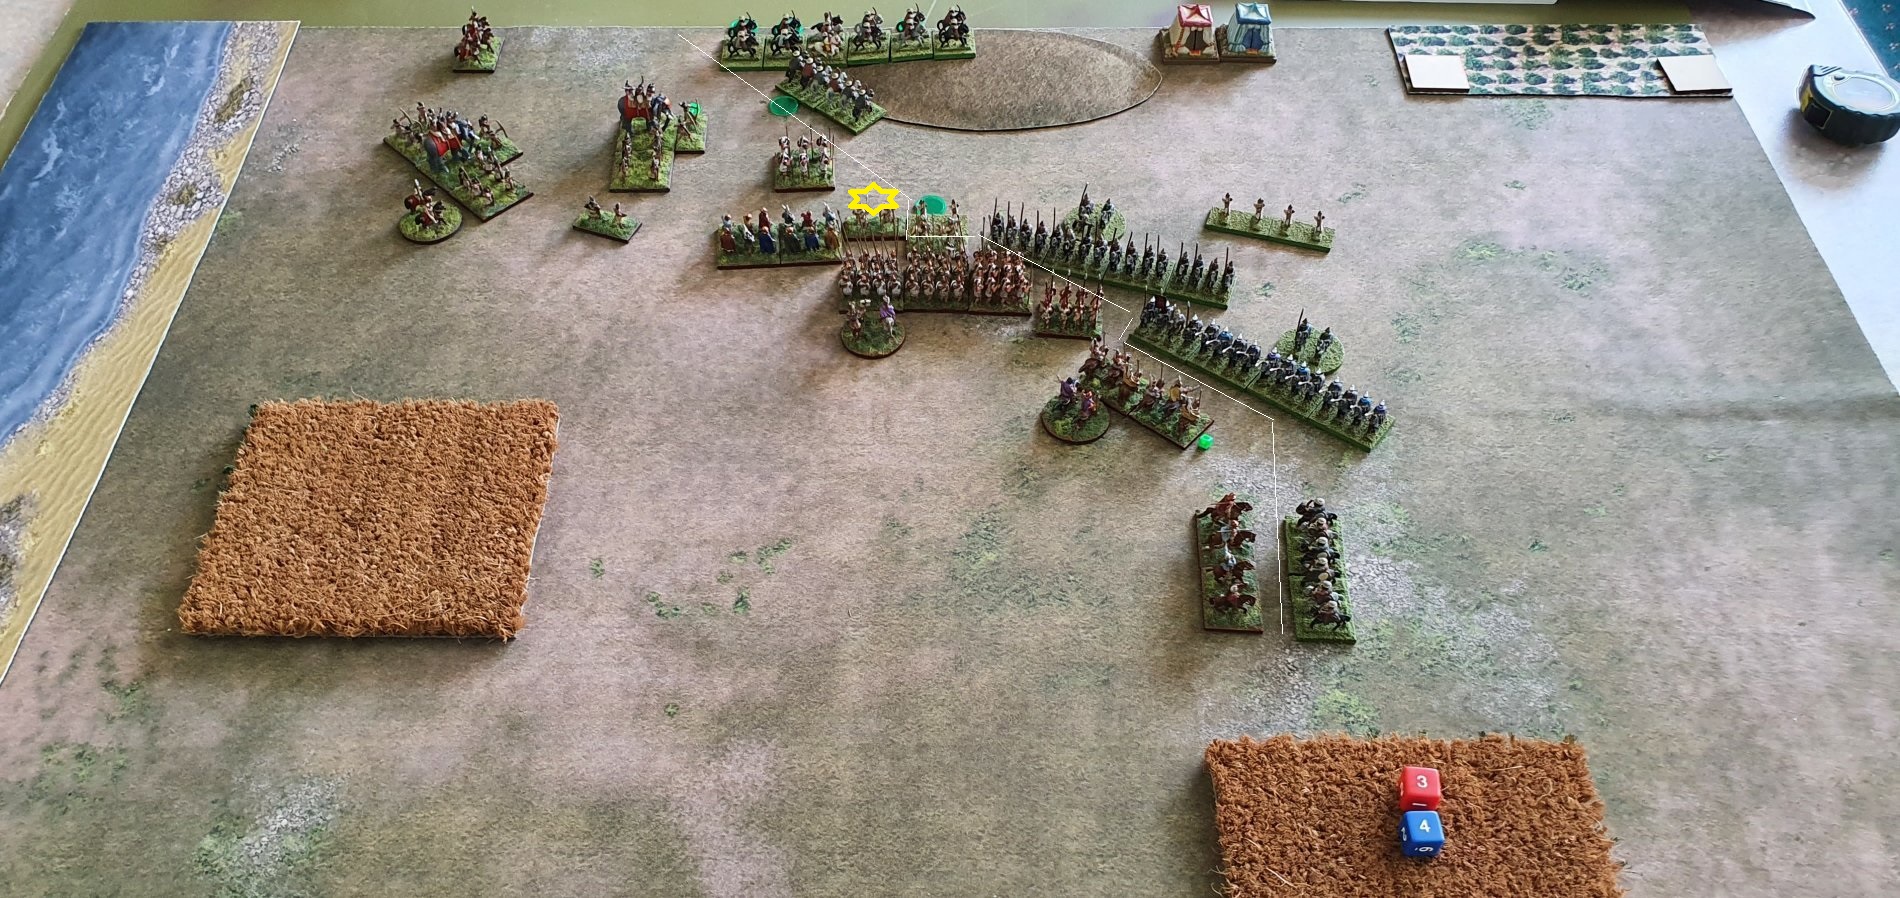
End of Alexandrian Turn Three
The Indian elephant corps continued forward to threaten the light horse, and inflicted more shooting hits. The Indians had ended just short of contacting the Armenian medium horse archers, but were not exerting a ZOC over them. The infantry corps continued forward to guard the flank of the Indian corps and to help compress the room to manoeuvre for the Armenians. The Alexandrian light horse charged the Armenian light infantry (which evaded to behind the cataphracts) and pursued to just out of the ZOC of the Armenian cataphracts.

End of Armenian Turn Three
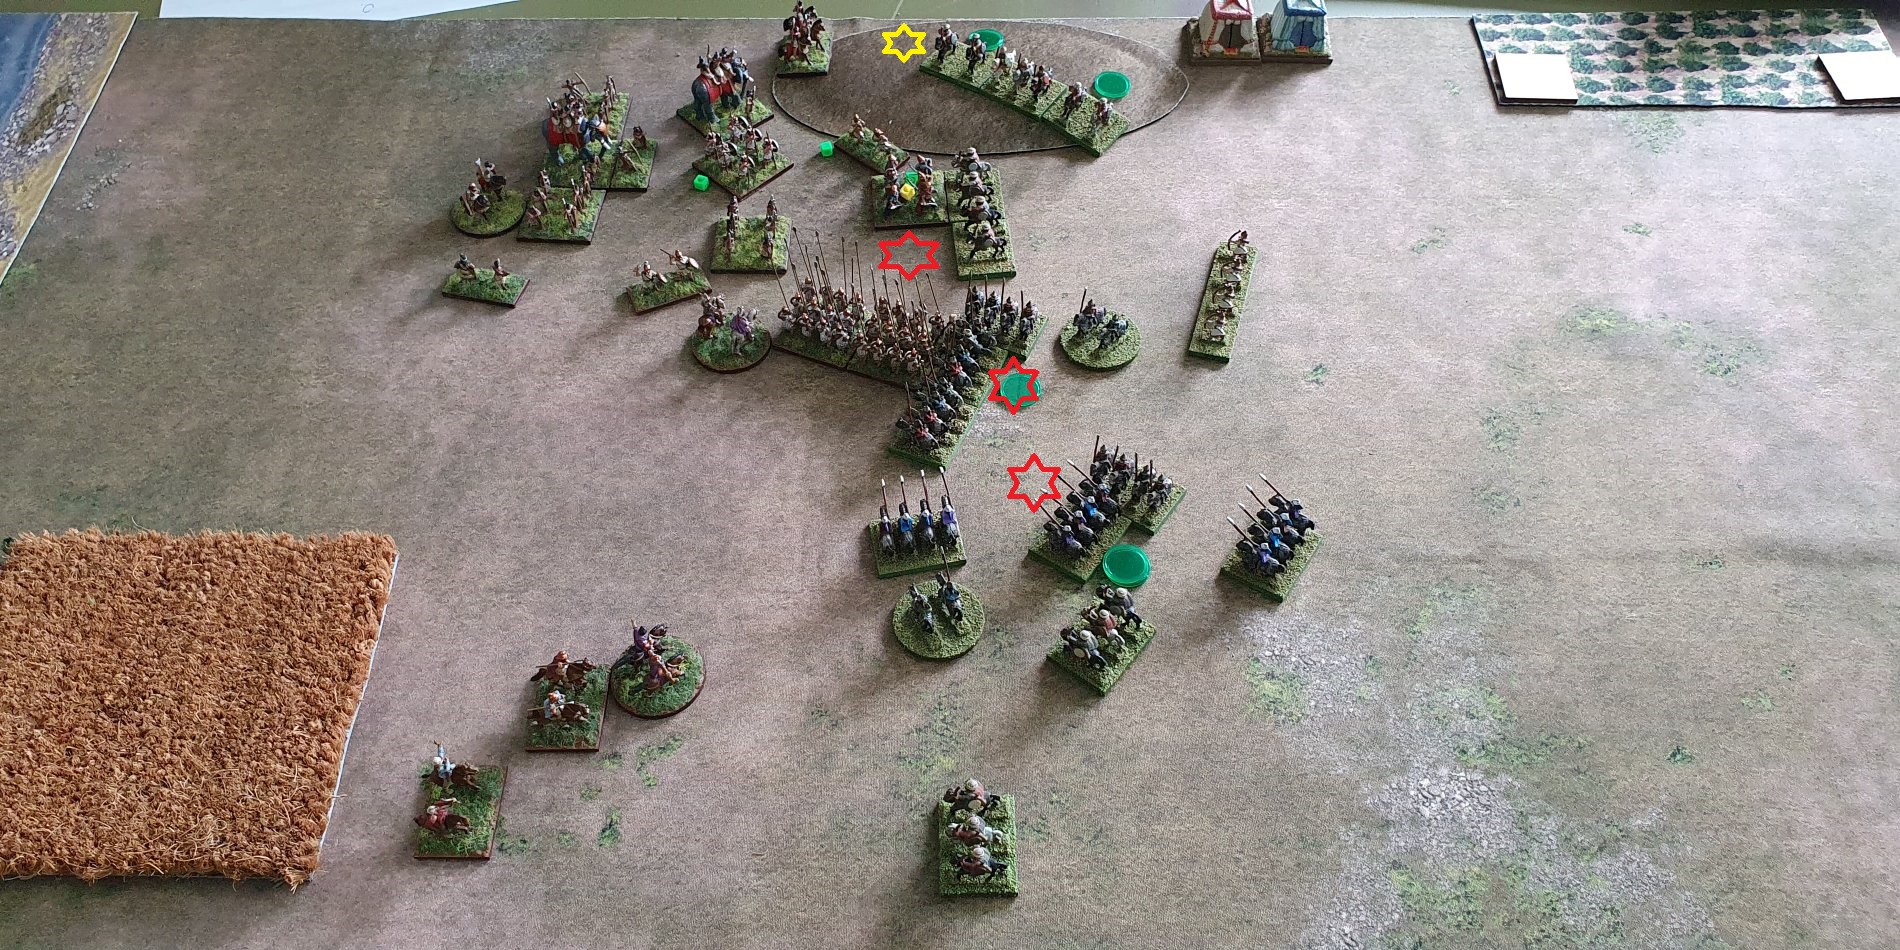
The Armenian turn three saw a dramatic repositioning by Kevan. The light horse have moved from their right flank to the centre, leaving the Indian corps with nothing in front of them. The centre cataphracts have advanced and wheeled, putting my end pike unit in their ZOC and some of the cataphracts potentially threatening the flank of the pike. The left flank cataphracts charged my light horse (which evaded), and his medium horse archers moved up on the flank of the Companion cavalry to inflict a shooting hit this turn and threaten a flank charge the next turn.
We broke for lunch thinking that the Alexandrian army was in trouble.
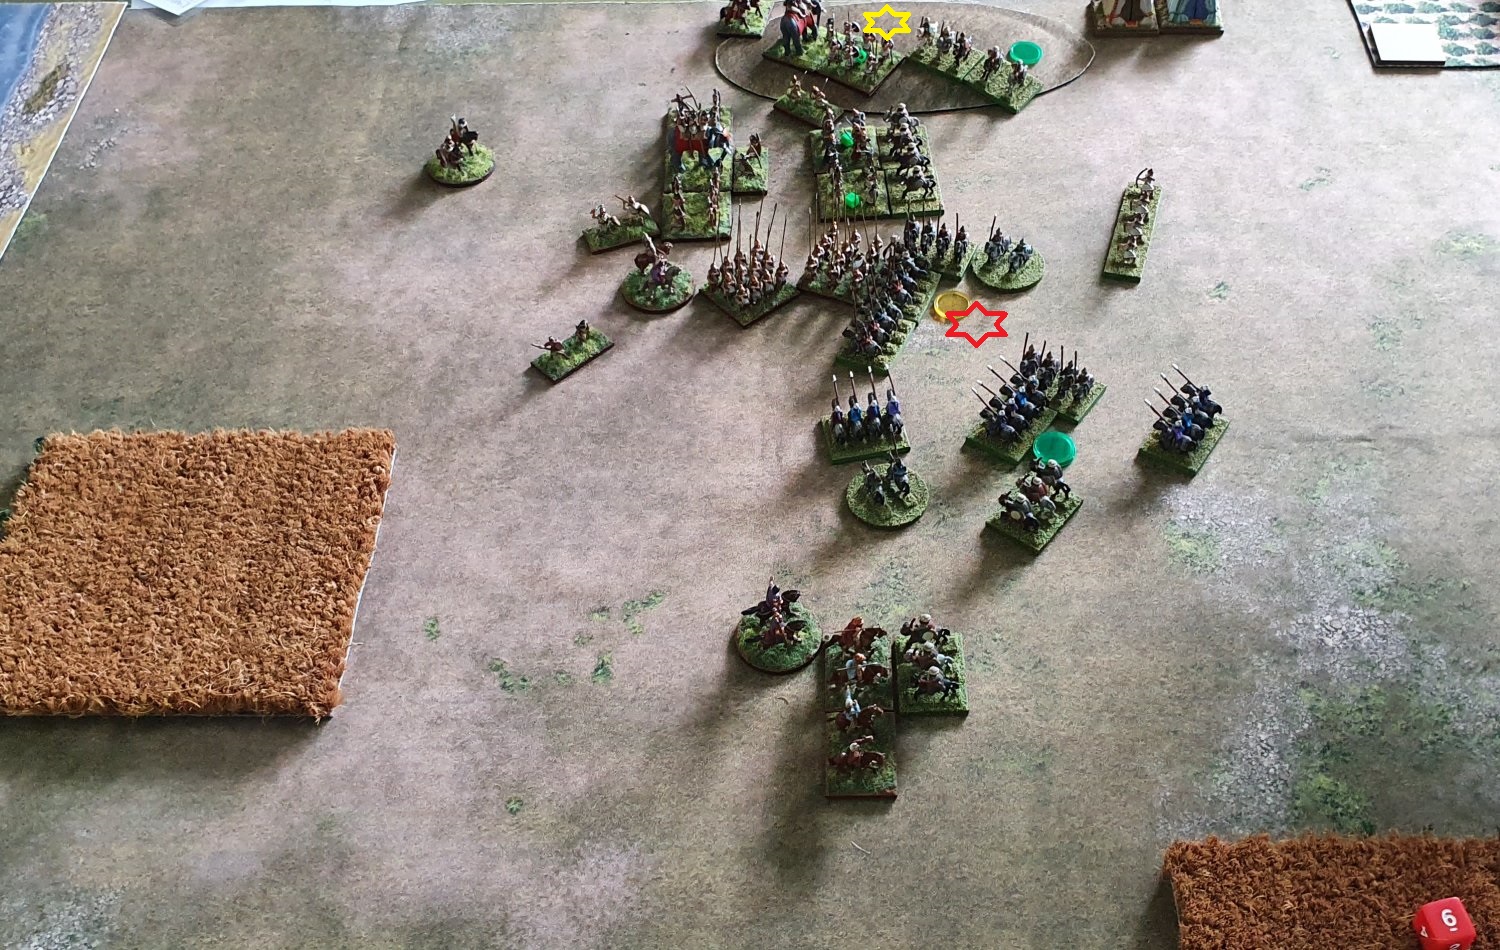
End of Alexandrian Turn Four
The Alexandrians responded to the risk to their flanks by moving up the Companion cavalry to ZOC the Armenian cataphracts and their light horse to ZOC the Armenian medium horse archers. Both groups were at a disadvantage against their opposing groups, but they were trying to buy time for the central corps.
In the centre the Agrian light infantry charged the opposing light foot, which decided to stand and receive the charge. The Agrians won both combats. The pike stayed in place but the hoplites moved up to better protect the flank. The medium foot moved up, and the medium spears were able to pin the enemy medium horse bow.
The Indian corps had to split into two groups which wheeled separately to try and get back into the battle.
End of Alexandrian Turn Five
In the Armenian turn four, the Armenian light horse moved forward and turned to face the battle.
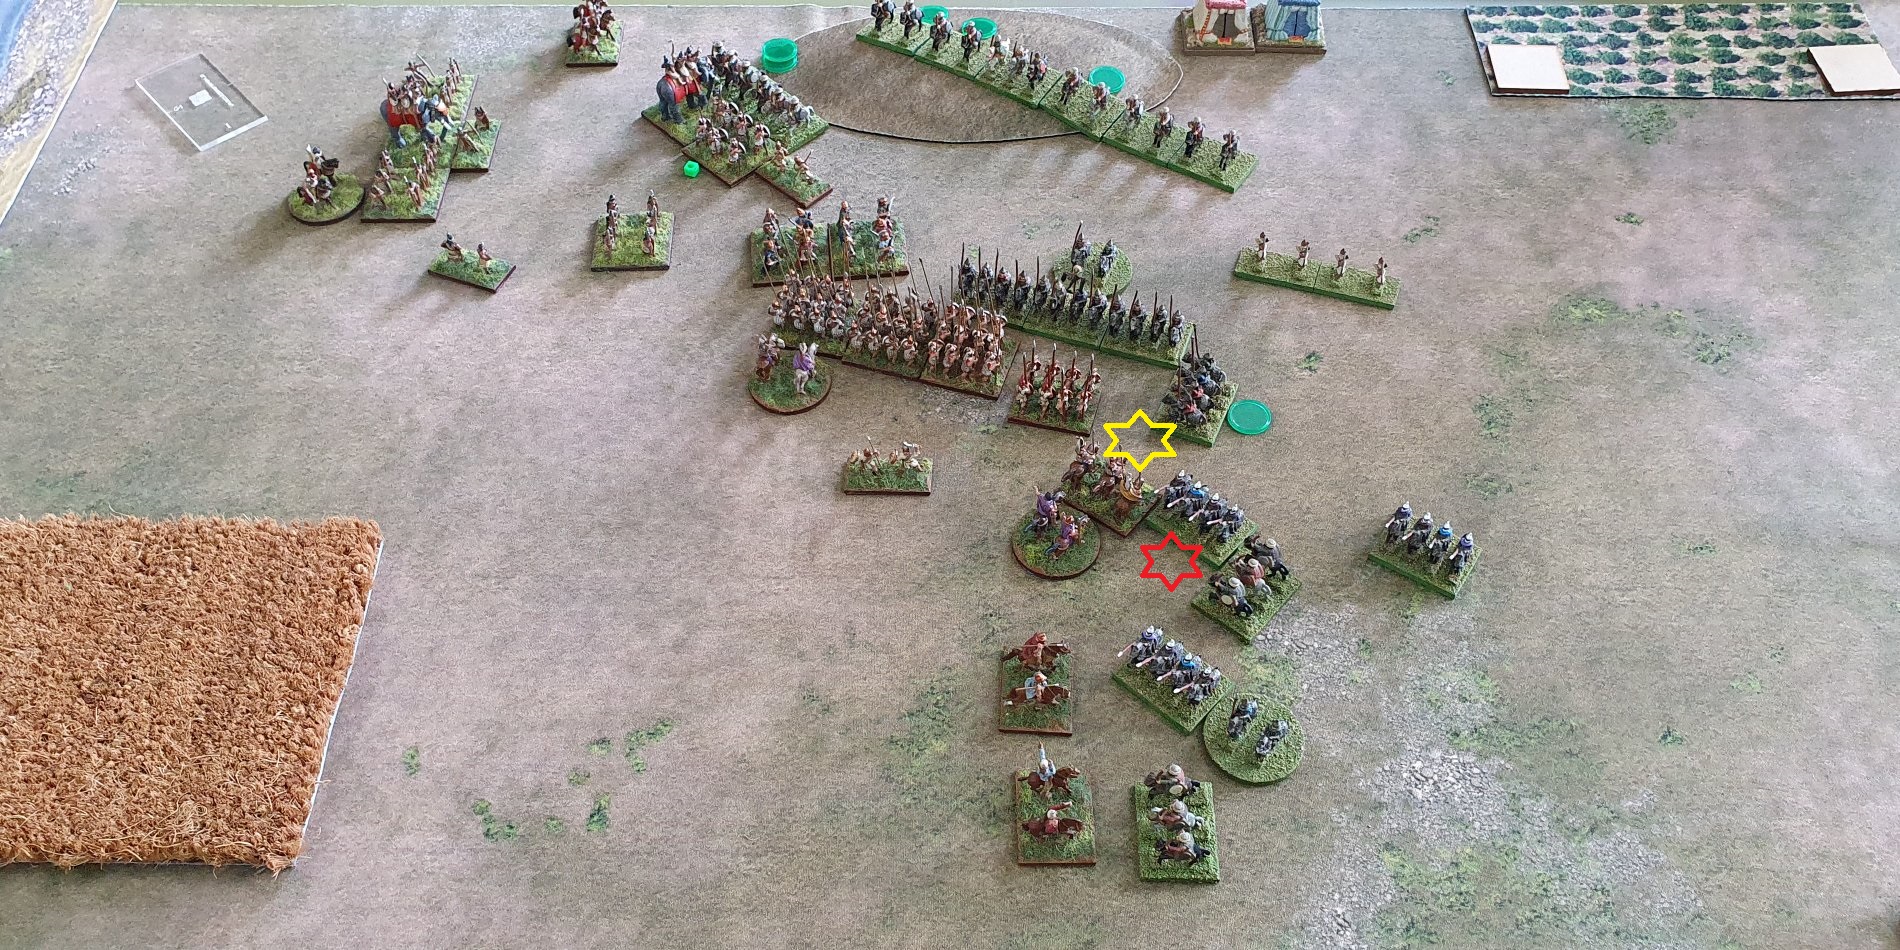
The Armenian left flank corps finally rolled high for command pips and was able to do some clever manoeuvring. One unit of medium horse charged my light horse bow, which evaded. A cataphract unit then charged my remaining light horse unit, which also evaded. (Looking at the turn four photo it missed out on being a flank charge by about 5mm, certainly my unit evaded to the rear which implies a frontal charge. If it was a flank charge my evade would have been blocked by the medium horse archer which had previously charged. If my light horse had not evaded, then when the cataphracts conformed they would have pushed back the medium horse archers as per diagram on p53). This left the remaining medium horse bow able to charge the flank of my Companion cavalry which were also charged in the front (being Impact cavalry they did not have the option of evading) by the cataphracts. The injured Companion unit which received the flank charge was routed, but the other unit won its combat.
The central corps of cataphracts wheeled the end unit to threaten a charge into the flank of my hoplites. The medium horse archers turned around to face my units.
In the Alexandrian turn five, the light horse units moved back to ZOC the enemy cataphracts and horse archers. My remaining Companion cavalry unit routed its Cataphract opponent which fled through the unit behind it, disordering it.
My medium spear from the central corps and an elephant from the Indian corps charged the two medium horse bow. My Thracians moved up in front of the pike line in order to threaten the flank of the cataphracts.
End of Alexandrian Turn Six
In the Armenian turn five the medium horse archers and cataphracts both charged the light horse units in front of them. Another unit of cataphracts conformed or charged the Companion cavalry.
In the cataphracts vs the infantry, the hoplites were charged in the front and the flank and were routed. The light horse came down off the hill to threaten the Thracian medium infantry.
In the Alexandrian turn six the Thracians charged the light horse, and the two units of medium horse bow were routed. I think that I rallied the Companions to remove a hit.
End of Armenian Turn Six
In the Armenian turn six a unit of cataphracts charged into the flank of my Companions cavalry already engaged another unit of cataphracts. The Companions routed. My end unit of pike was also charged both frontally and in the flank by cataphracts and also routed. I also lost a unit of Thracian medium infantry in the battle against the light horse bow. A great turn for the Armenians.
End of Alexandrian Turn Seven
In the Alexandrian turn seven I was able to charge some units into the light horse but my infantry in the centre was in trouble. Amazingly my Pikes were able to defeat the unit on cataphracts that they were engaged with. My light horse came back and charged the medium horse archers.
By this time I was worriedly trying to work out which army was going to break first. In the tension of the following three player turns I forgot to take any pictures. In the end the Alexandrian army triumphed, but it was mainly by killing light horse, light foot and medium horse archers. I only killed one unit of cataphracts.