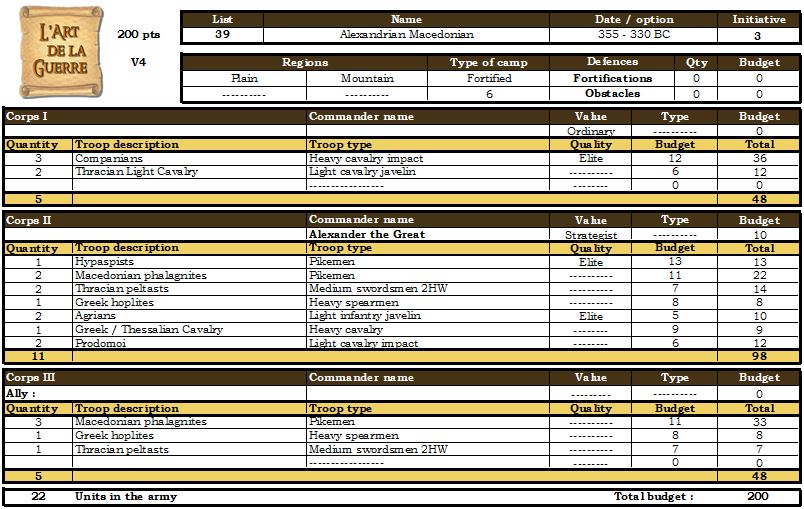
Jason and I had decided on a Classical period game (all my armies are Classical period). He was going for Classical Greece. Although the Romans, Carthaginians and Macedonians all fought the Greeks at some point, I decided on Alexandrian Macedonian as being closest in period (and Alexandrian is also my newest army).
The previous time I had used Alexandrian Macedonian I had a small dedicated rough terrain command. That didn't work so well so I decided to have a small pike command; a large command with pikes, rough terrain troops and some cavalry; and the Companions command. Since the previous game I have ended up painting some more pikes and Thracians so I was able to take more fighting troops and less light infantry. In the end I only had the minimum required light foot.
I ended up taking only 3 Companions rather than 4. By doing this and reducing the general to ordinary, I was able to add a stand of hoplites and a stand of Thracians.
The plan was to deploy the small pike command first. It has a unit of Thracians so can anchor one flank on rough terrain and put the hoplites on the other. Probably deploy the Companions second, wide on a flank to threaten the enemy flank. This should give me the flexibility to deploy the last command with maximum information on the enemy.
My Alexandrian Macedonian list

I won initiative and decided to attack in the plains. Jason rolled for a coastal zone but was unsuccessful. He placed two plantations, a hill and a field. I placed two hills. We adjusted the hill and one plantation.
We both placed two ambushes, although mine were dummy.

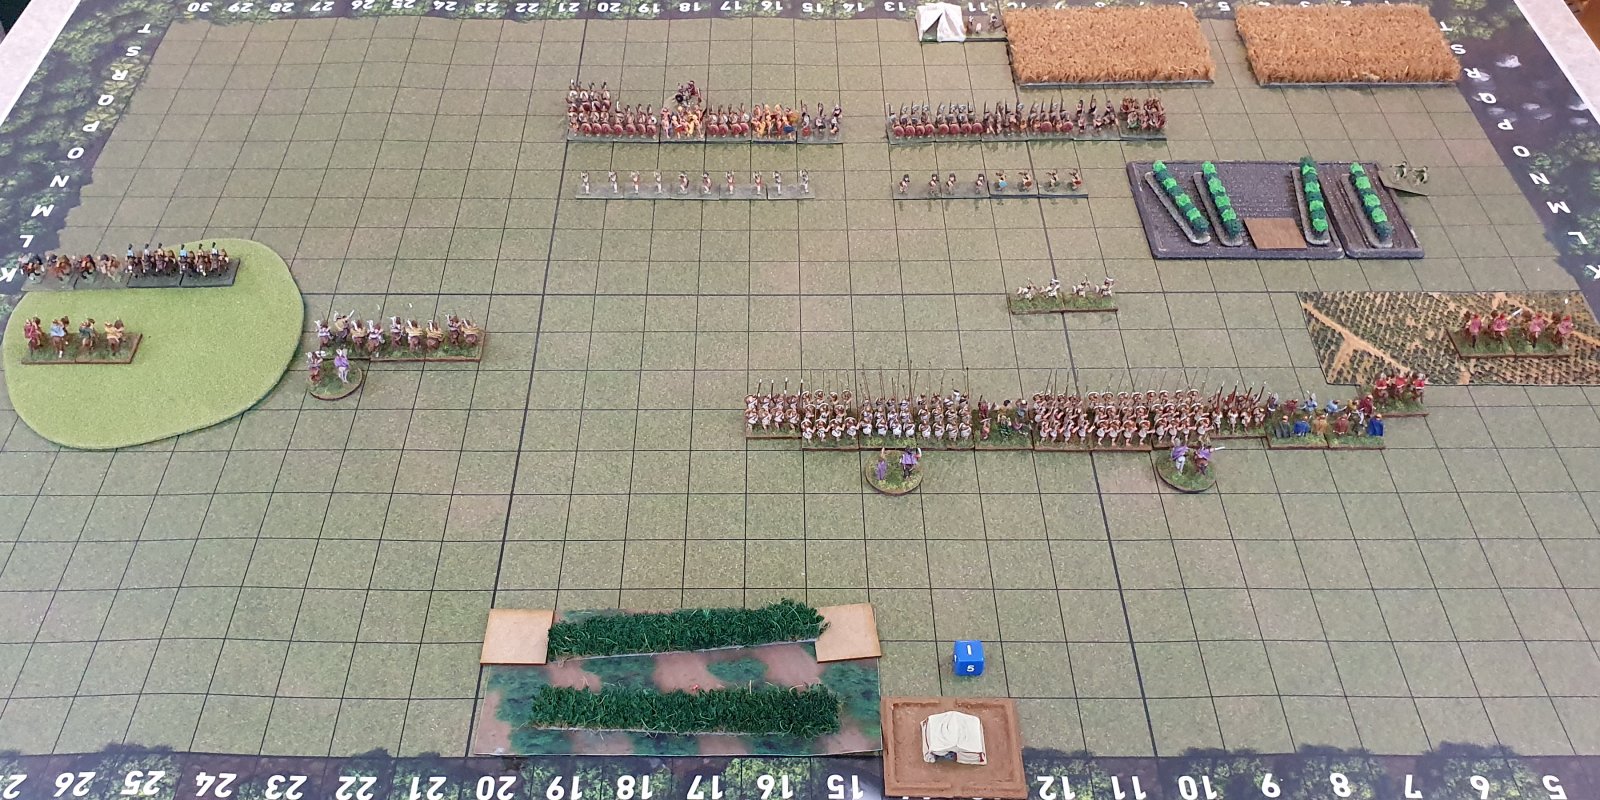
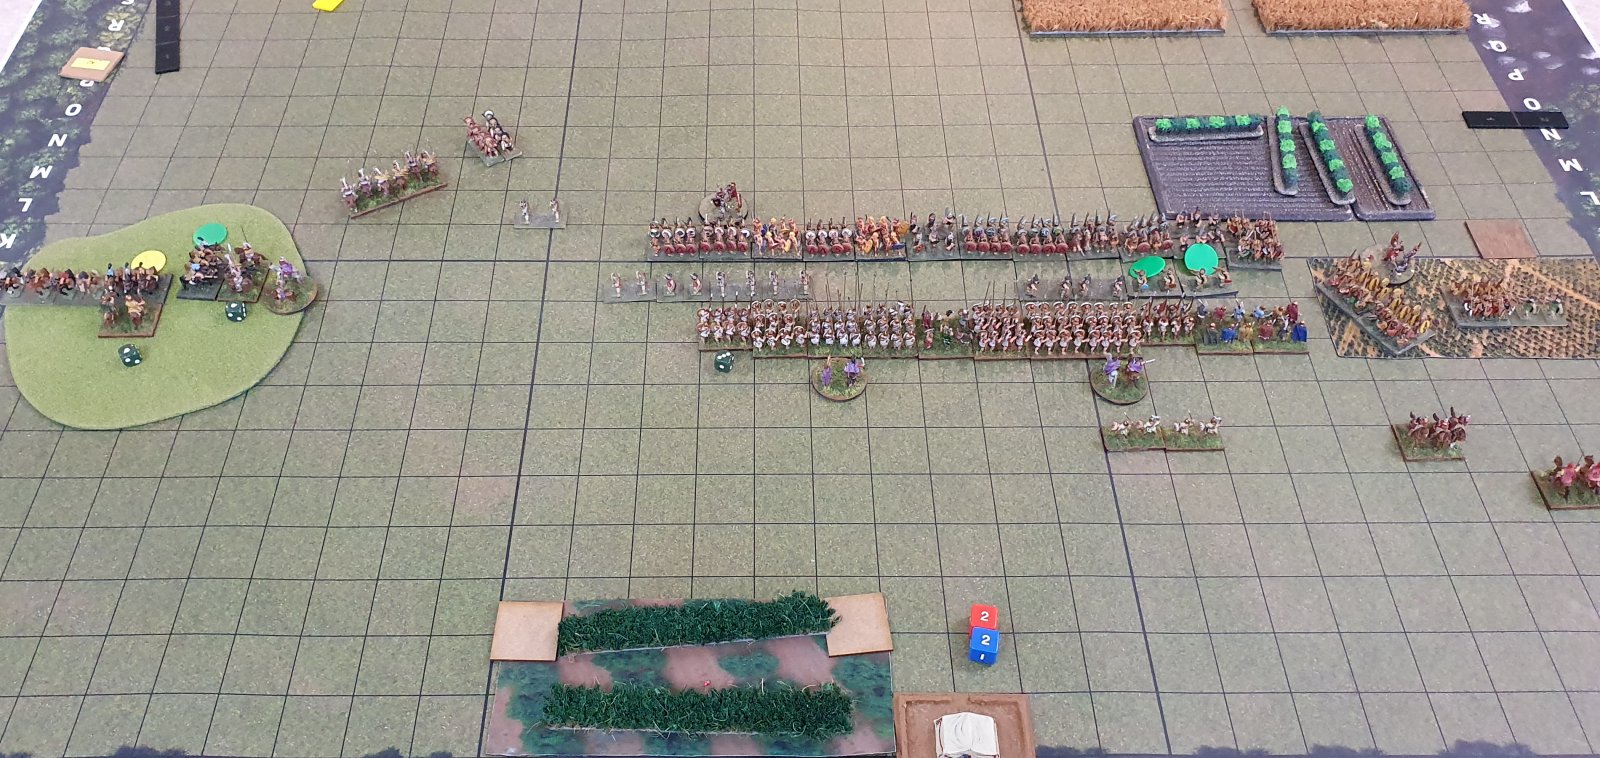
Initial Deployment
Jason's initial deployment was the LI from his allied corps near the ambush marker on his left flank. The rest of the command was obviously in ambush. So much for my plan of trying to have as much information about his forces before I deployed!
I put the pike corps in the centre. He put his Corps II opposite. I put my Companions on the left flank, with the LH javelin very wide. He did his final corps on his right flank. I placed my final corps on my right flank. The Prodomoi (LH impact) were wide on the right flank. The Greek cavalry (HC, incorrectly labelled MC above) was behind my foot because I have run out of deployment room.
My assumption was that the ambush on my left was a dummy, given it was so far away from the commanding general.
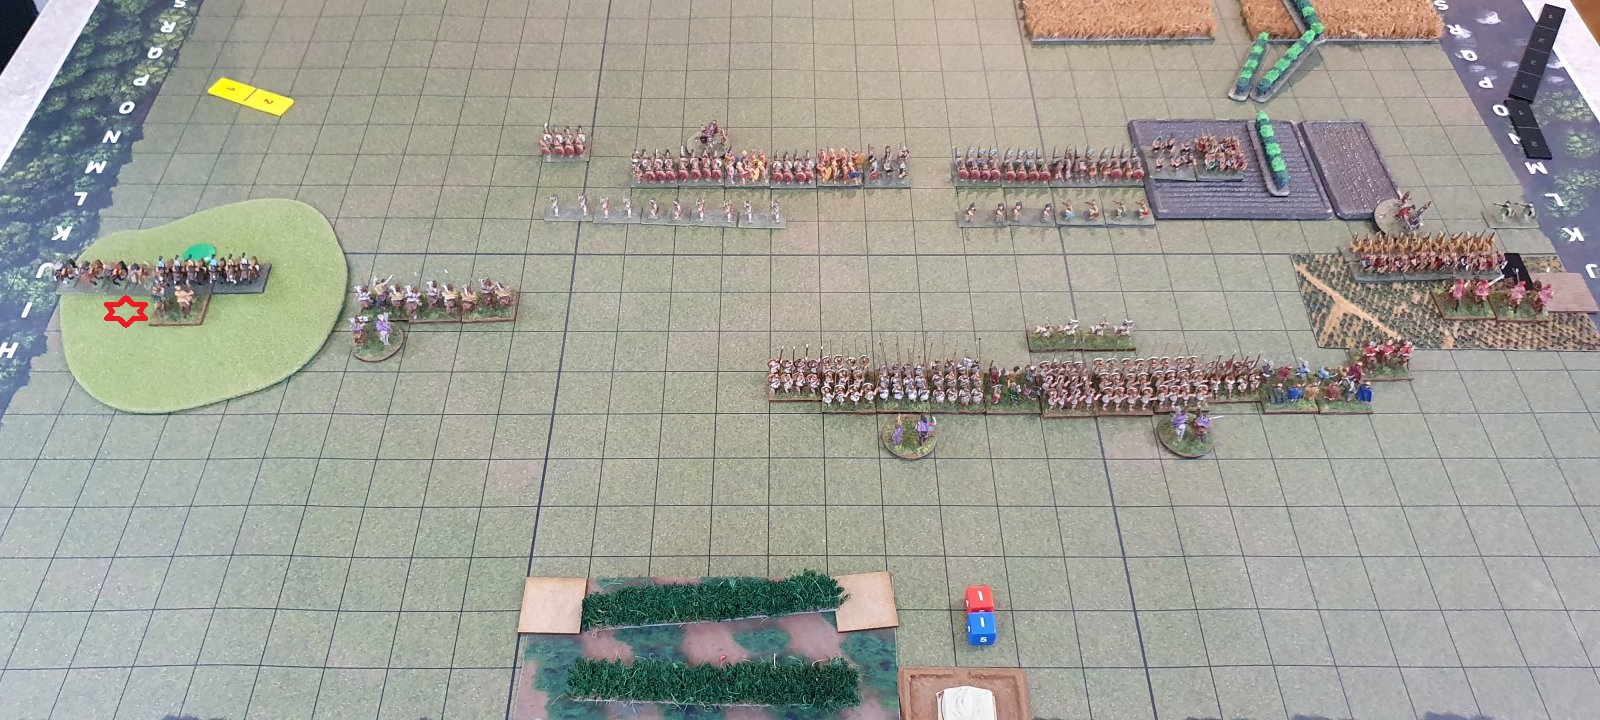
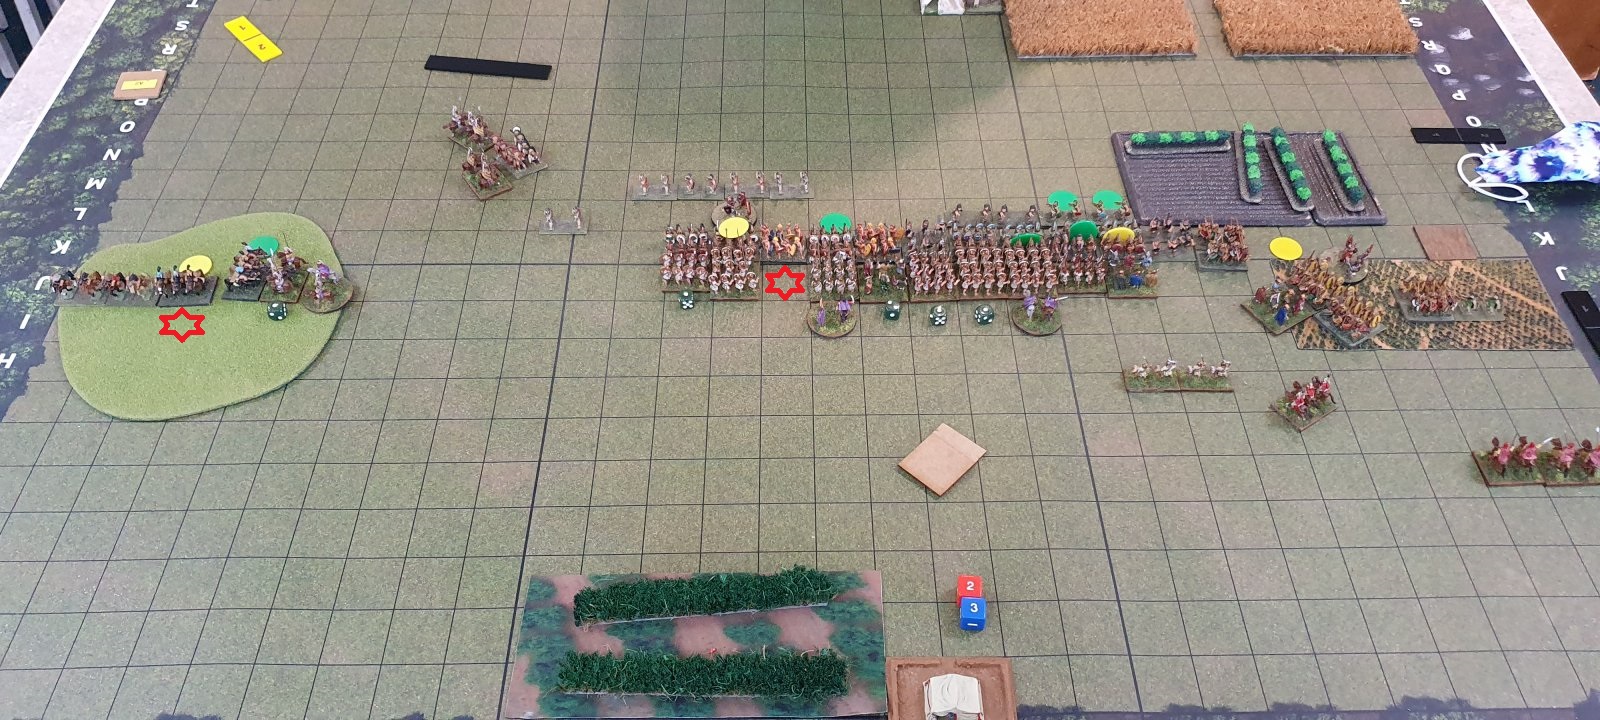
End of Alexandrian Turn One
In my first turn I moved up first the Companions and then the LH on the left flank. In retrospect I should have moved the LH to expose the ambush first, and I could then have moved my Companions taking this into account. The ambush contained two light horse and two mediocre medium cavalry.
My main battle line moved forward 2UD and slid left 1UD. My Greek HC on the right flank moved to just short of the fields and the Prodomoi moved into the fields.
End of Spartan Turn One
The Spartan ambush on his right flank charged my light horse. I was uphill so stood up to the charge. I lost one light horse but inflicted one wound on the medium cavalry. The other ambush on the Spartan left flank was 3 javelinmen who moved forward into the fields and threatened the Prodomoi light horse. The Spartan battle line moved forward three and slid to their left.
In my second turn the one unit of Companions charged the flank of the medium cavalry. Impact elite heavy cavalry against mediocre medium cavalry did just one hit. The light horse on the hill did as much with another hit on the medium cavalry. The rest of the Companions moved to try and get behind the Spartan flank.
On the right flank the Prodomoi light horse evaded out of the javelinmen zone of control, and I also pulled back my Greek heavy cavalry.
My main battle line moved forward 1.5 UD and slid left 1 UD. My light foot moved up to skirmish with his light foot, and inflicted two shooting hits.
End of Spartan Turn Two
In their second turn, the Spartan battle line moved forward 2UD. The Spartan skirmishers charged the Agrians, who evaded. Jason made sure that his skirmishers moved up sufficiently close to my troops that I couldn't bring my light infantry back to take them on as there would not be enough room in front of my troops for them to fit.
The allied javelinmen in the field moved to threaten the right flank of my battle line. The lone unit of Spartan hoplites moved up to ZOC my Companions unit.
In the shooting, the Spartans did 1 point of damage on my left hoplites (in photo dice incorrectly shows a 3). In the cavalry battle, the Spartans won both match ups.
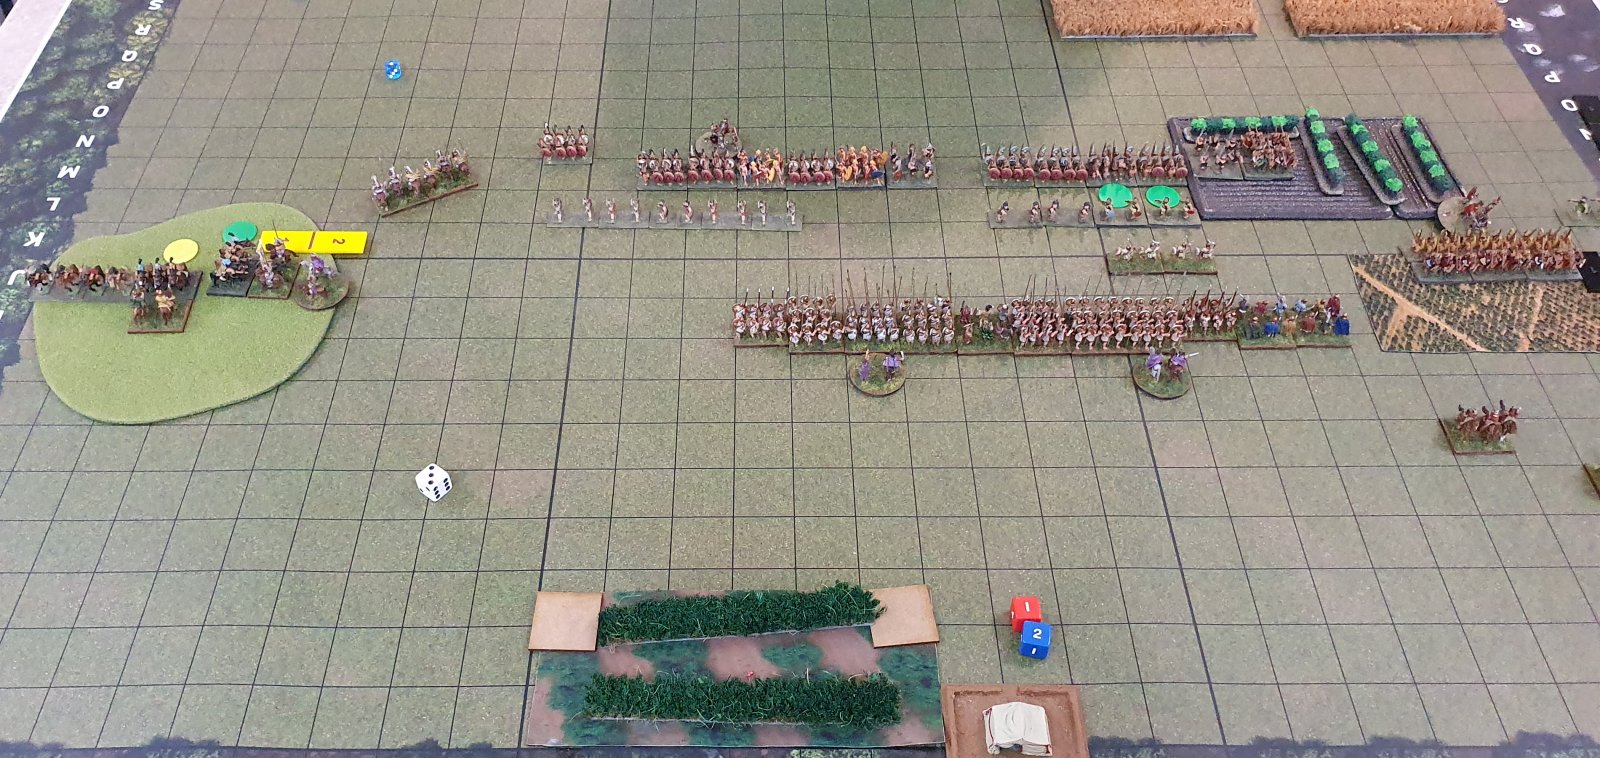
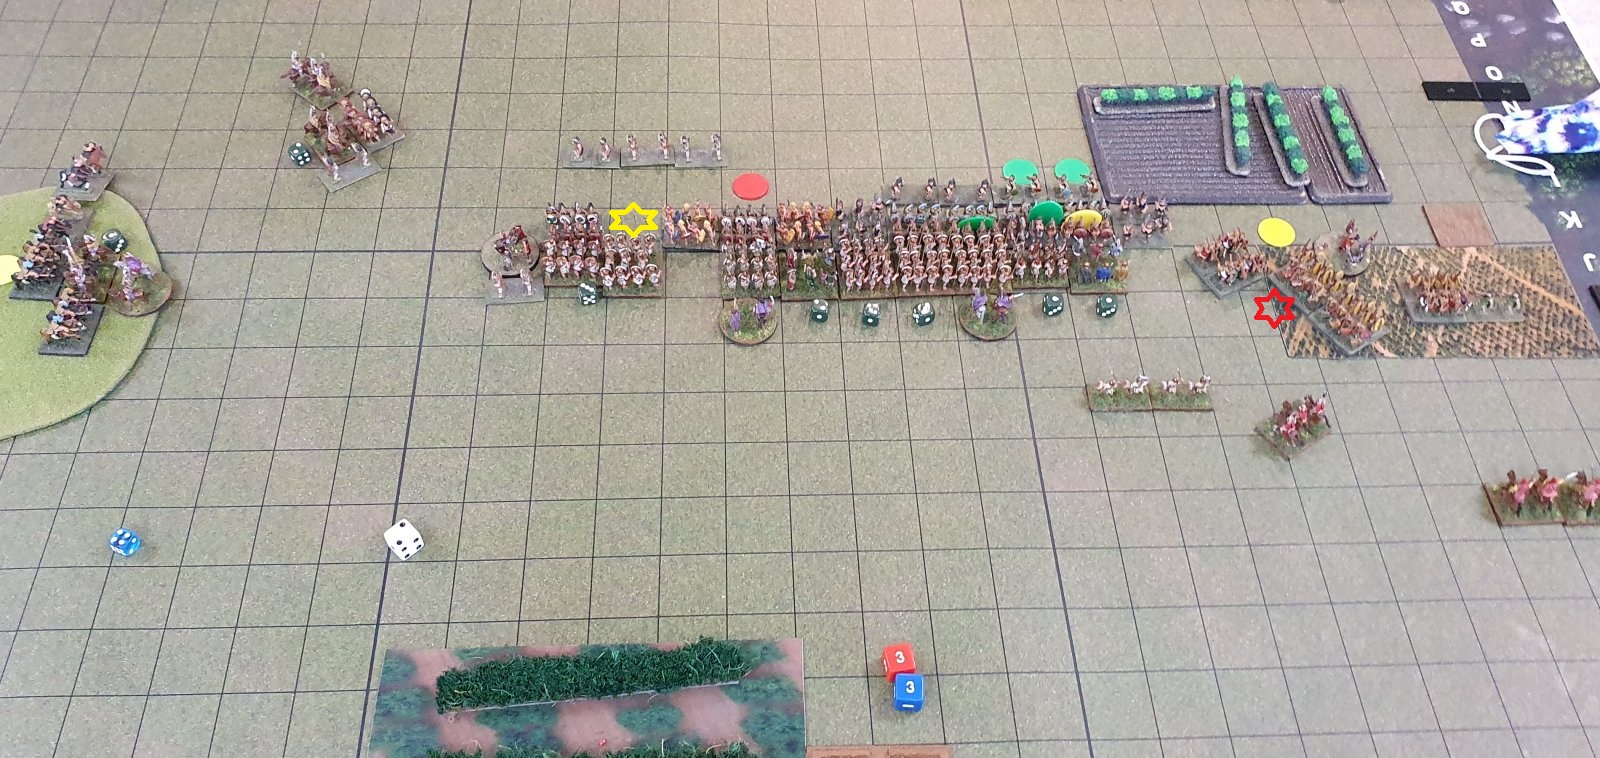
End of Alexandrian Turn Three
The two Companions moved to face the Spartan hoplite and move around their flank. The main battle line slid left 1 UD and charged. The end units of Thracians turned and charged the Javelinmen that was ZOCing it. My Greek heavy cavalry on the right flank moved up to when it might be useful in a future turn. Unfortunately cavalry doesn't exert a ZOC in rough terrain, so I couldn't use it to guard a flank.
In the cavalry combat my light horse died and the Companions lost but took no wounds because of their armour.
In the main battle, I inflicted 7 hits but took 8 in return. The furious charge of the impetuous HI really worked for Jason as I lost one unit of pikes completely and the unit of Thracians took two hits.
In the battle in fields, my Thracians won the combat and inflicted two hits.
There was some discussion from bystanders after the game about whether I should have charged in when I did. One alternative would be to sit where I was and take shooting from 7 light infantry. I think the odds work out to be about 1/6 chance of LI shooting inflicting a hit on HI, which would have been okay. However I would risk having my right flank turned.
I still feel that the charge wasn't a terrible decision. In most of the matchups I was slightly ahead (ordinary Pike +2 vs elite Spartans +1). If the pikes hadn't lost 1-6 vs the impetuous mercenaries, I wouldn't have had the hole in my battle line and the results would have looked much better.
On the other hand charging in would just have meant a battle on nearly even terms and the luck of the dice. A better player would probably have worked out how to get more advantageous match ups.
Not a lot of movement. In the cavalry battle the Spartan cavalry has moved up to support the unit in combat. My single unit of Companions is now fighting against a unit with support on both sides. The Spartan hoplites charged into the facing Companions unit with a light infantry unit supporting. The Companions took two hits.
On the right flank the javelinmen charged the flank of my engaged Thracians, which was destroyed in the resulting combat.
In the main battle line I inflicted 4 hits but took 6 hits.

The only movement in my turn was to charge with the Greek heavy cavalry into the end unit of MI 2HW, and for my Companions to charge the lone unit of Spartan hoplites in the flank. However in the main battle line I lost four units this turn, and my army was on the verge of breaking (21 losses out of 22).
Note the photo has a unit of javelinmen into the flank of the Greek cavalry as Jason had just started his turn four when I took the picture.
No photo for the Spartan turn four but the result was as expected. I had already lost the game after the first combat, so I ended up throwing Alexander into the battle and lost my general to concede 4 more army cohesion points. Final result was a loss of 28 (22) to 12 (30)
Well done to Jason. I would have thought that the Macedonians would have a easy battle against the Greeks with pike going up against heavy spear. What did I learn from the game?
During the terrain adjustment phase, I could have moved the plantation on my right flank first and then moved the fields second. I did it the other way round which wasted a roll because I couldn't move it where I wanted. Perhaps I should have moved it further into my deployment zone and pushed my troops past it.
In deployment, given that I had cavalry on my right flank maybe I should have deployed everything somewhat to the left and just ignored the terrain. The group of 3 horsemen would have been a deterrent to the javelinmen coming out of the terrain.
On the left flank I should have taken the ambush more seriously. If I had moved up the Companions and light horse as a group it should have been enough to take out the enemy horse (although in that case they would probably have the advantage of being uphill in the fight). When I did move my Companions in, I should have committed overwhelming force rather than just the one unit.
Julian's Guide for ADLG beginners recommends that you get into combat quickly (before you can be out manoeuvred) even if not an advantageous match up. I guess I am still following this advice, even though I now have a dozen games under my belt.
The situation can be seen below, where I slid left 1 UD and charged in the 1.5 UD.

This avoided an overlap on the left, but conceded an overlap on the right. Another option would have been for the two groups to charge the light infantry to drive them off, but stop short of the Spartan battle line.
The battle in the centre could have gone either way, however even if I had killed all 12 units in the Spartan battle line I still wouldn't have broken his army.
The final consideration is always the composition of my army. Does the three cavalry in the large command do anything useful, or should I put all my cavalry in a single command? Are the Hoplites worth including? The army list allows a total of four units of Thracians (I fielded three as that's what I had painted). Jason suggested that I have at least a couple of light infantry per command, but what do I drop for the points?
In the three games that I have used the army (both #39 and #40 variants) the Companions have never lived up to my high expectations of elite, armoured, impact cavalry. Perhaps I need to be more conservative with them, rather than assuming they can win combats on their own.